This article helps you import new products, whether you're starting from scratch or switching to Lightspeed eCom from another platform.
Article navigation
This article is divided into two parts:
- Instructions - Contains step-by-step instructions.
- Reference - Contains reference material.
Instructions
A successful import depends on the quality of your data. That's why most of the steps you need to follow when importing to eCom revolve around your worksheet. For more information on why a worksheet is important, click here.
Use the following instructions to begin:
1. Creating your worksheet
In order to import new products, these steps instruct you to create a blank table that will become your worksheet.
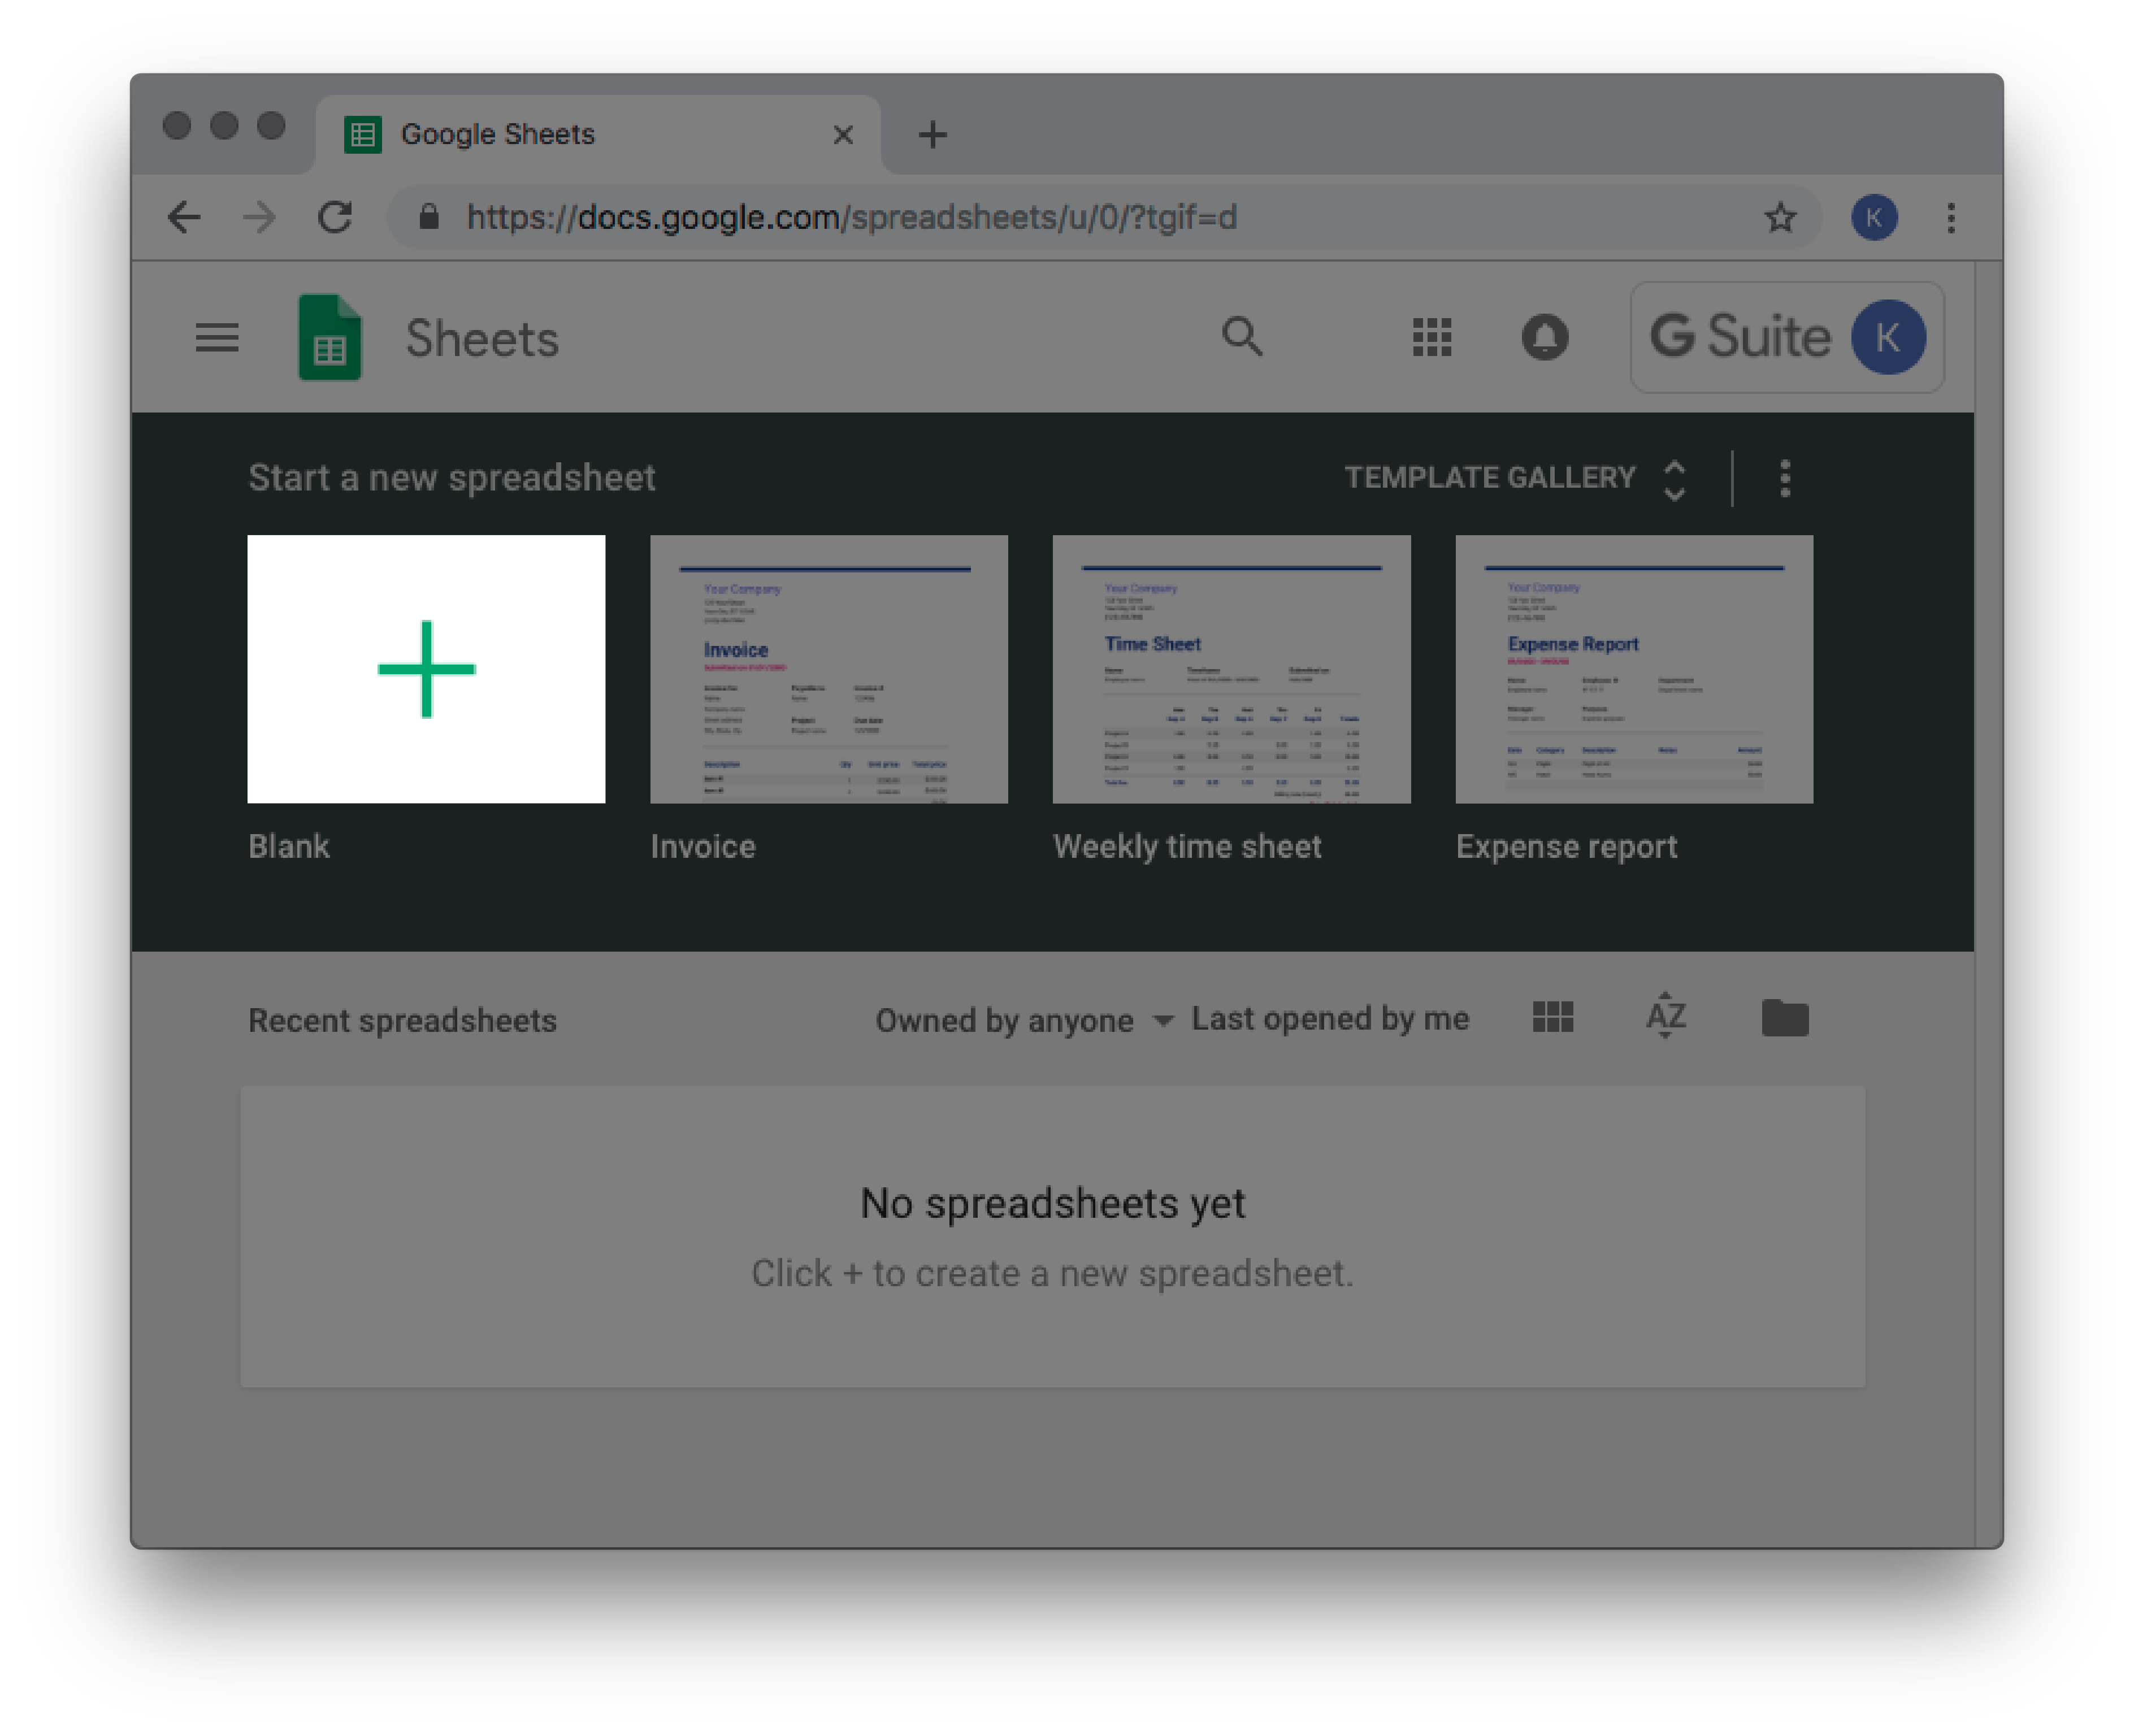
- Click here to log in to your Google account and open Google Sheets. Google Sheets is the recommended spreadsheet software. For more information about this software and format, click here.
- Create a new blank sheet by clicking +. This will be used as your worksheet.
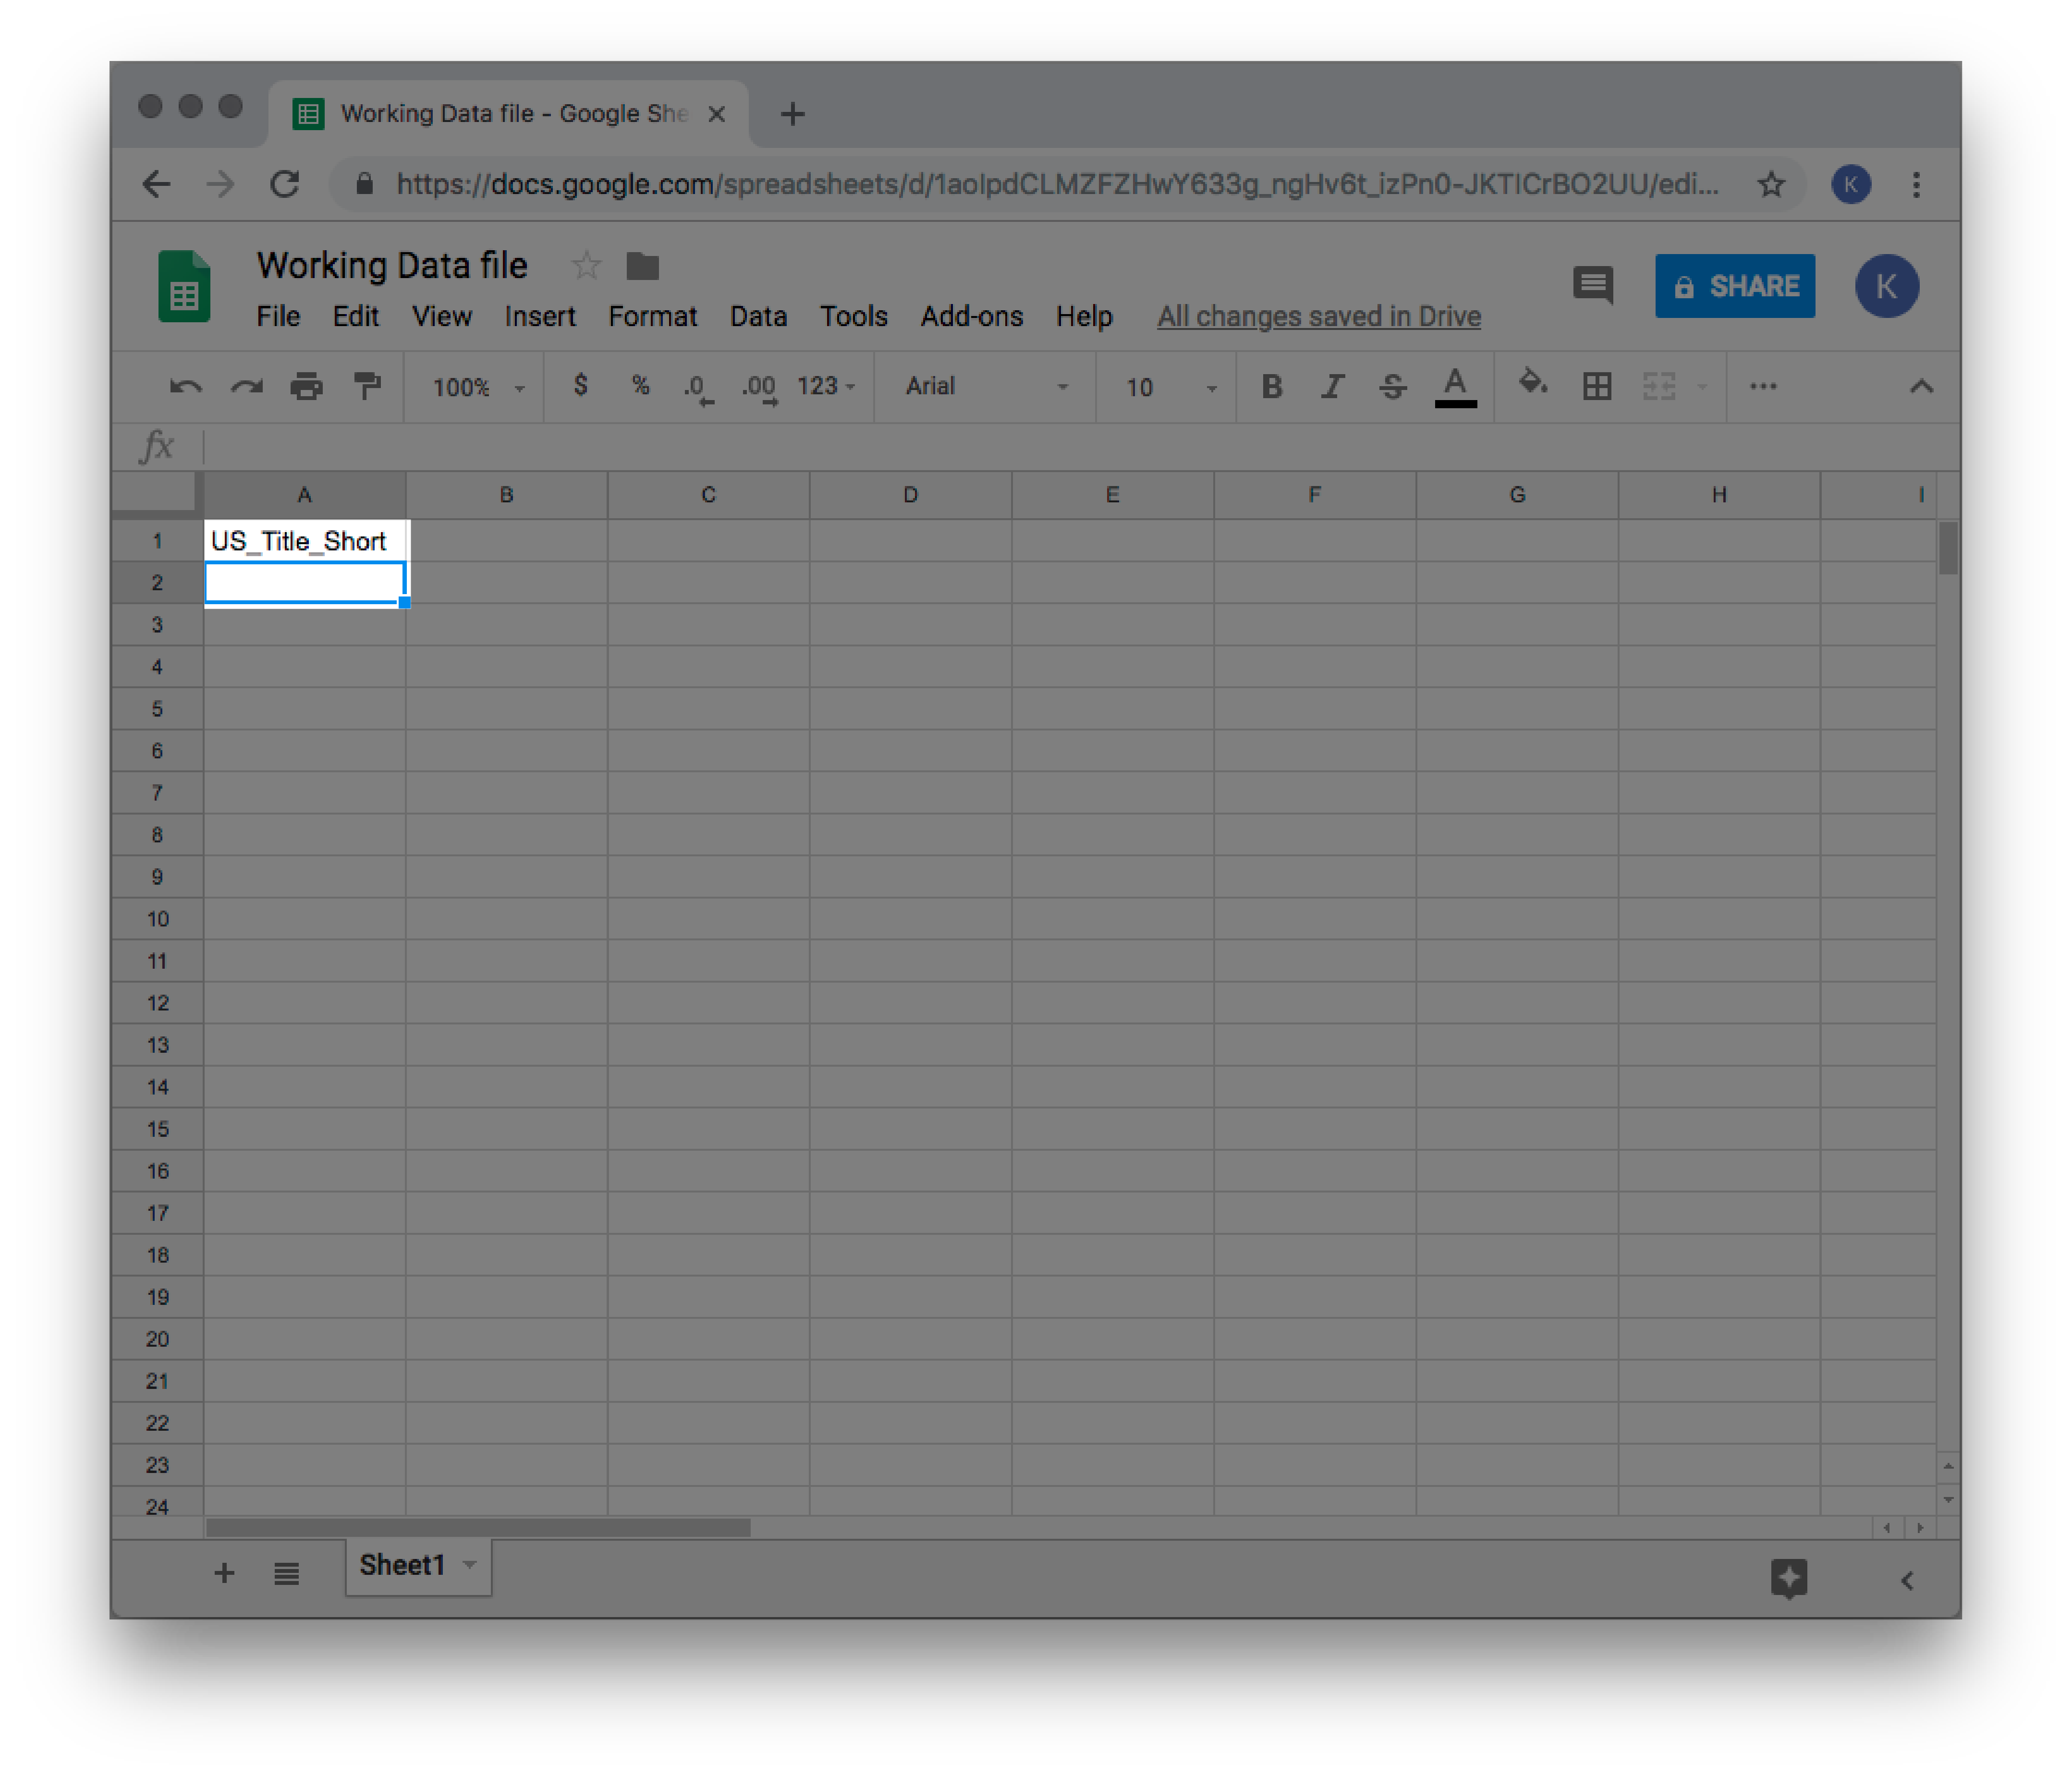
- In Column A, add a column for the product title. Read Formatting columns in your worksheet, to learn about this column's requirements and how you can name it.
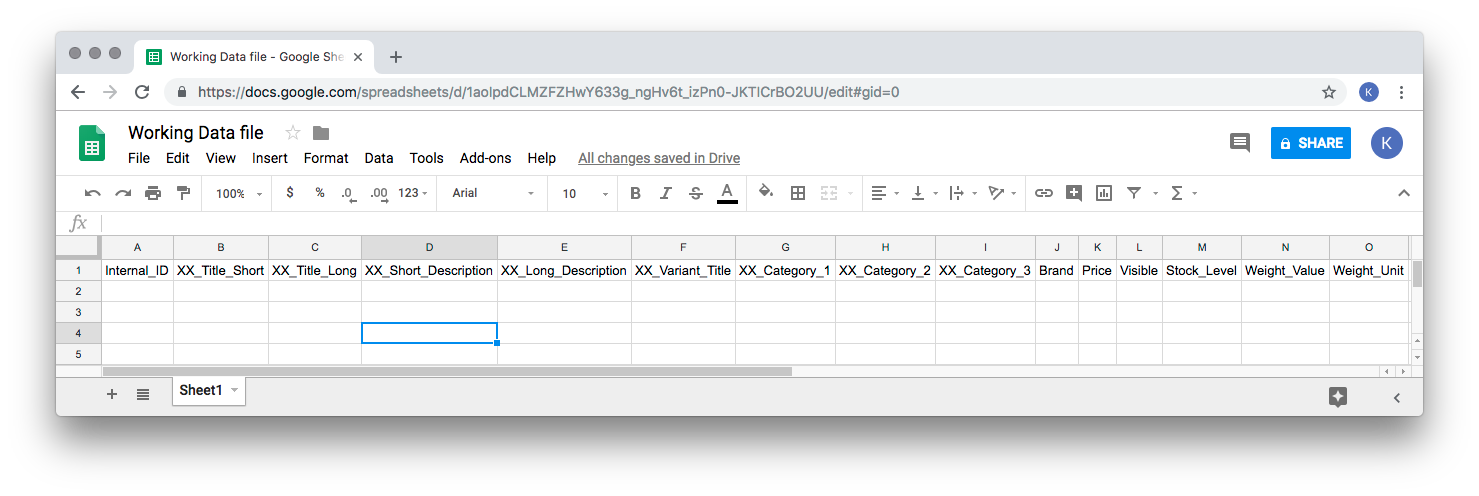
- In the next columns, add the column titles for the data you need to import.
- See Commonly required columns for worksheet for the most important columns required when starting from scratch and why.
- Use the Products column titles article to know the available columns to be added and their specific requirements.
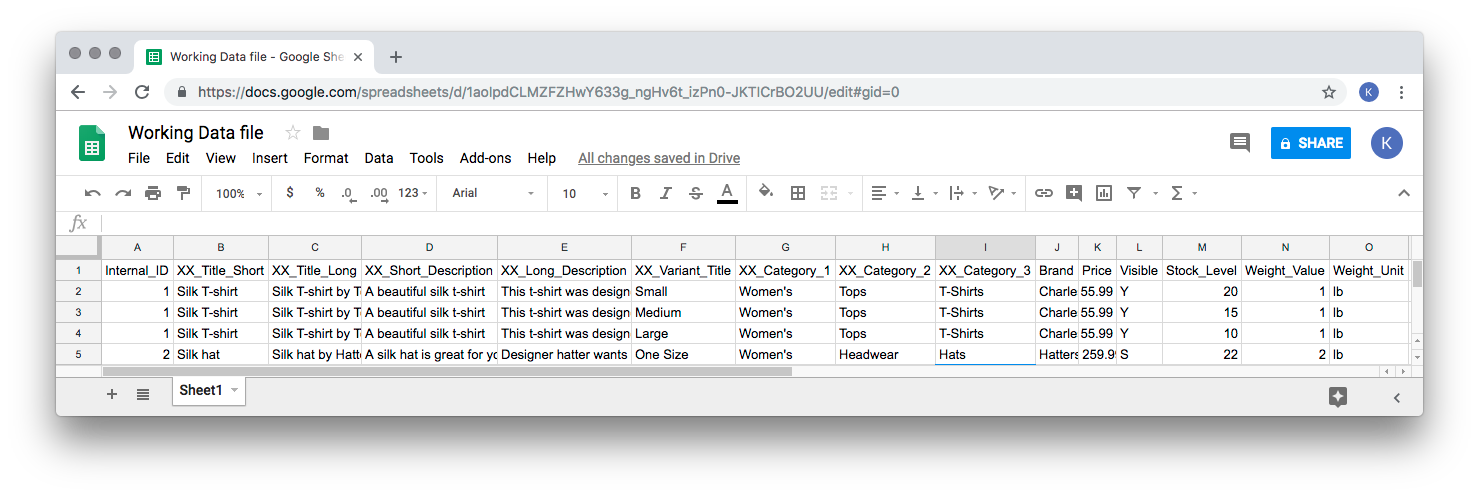
- Enter your product data for each column.
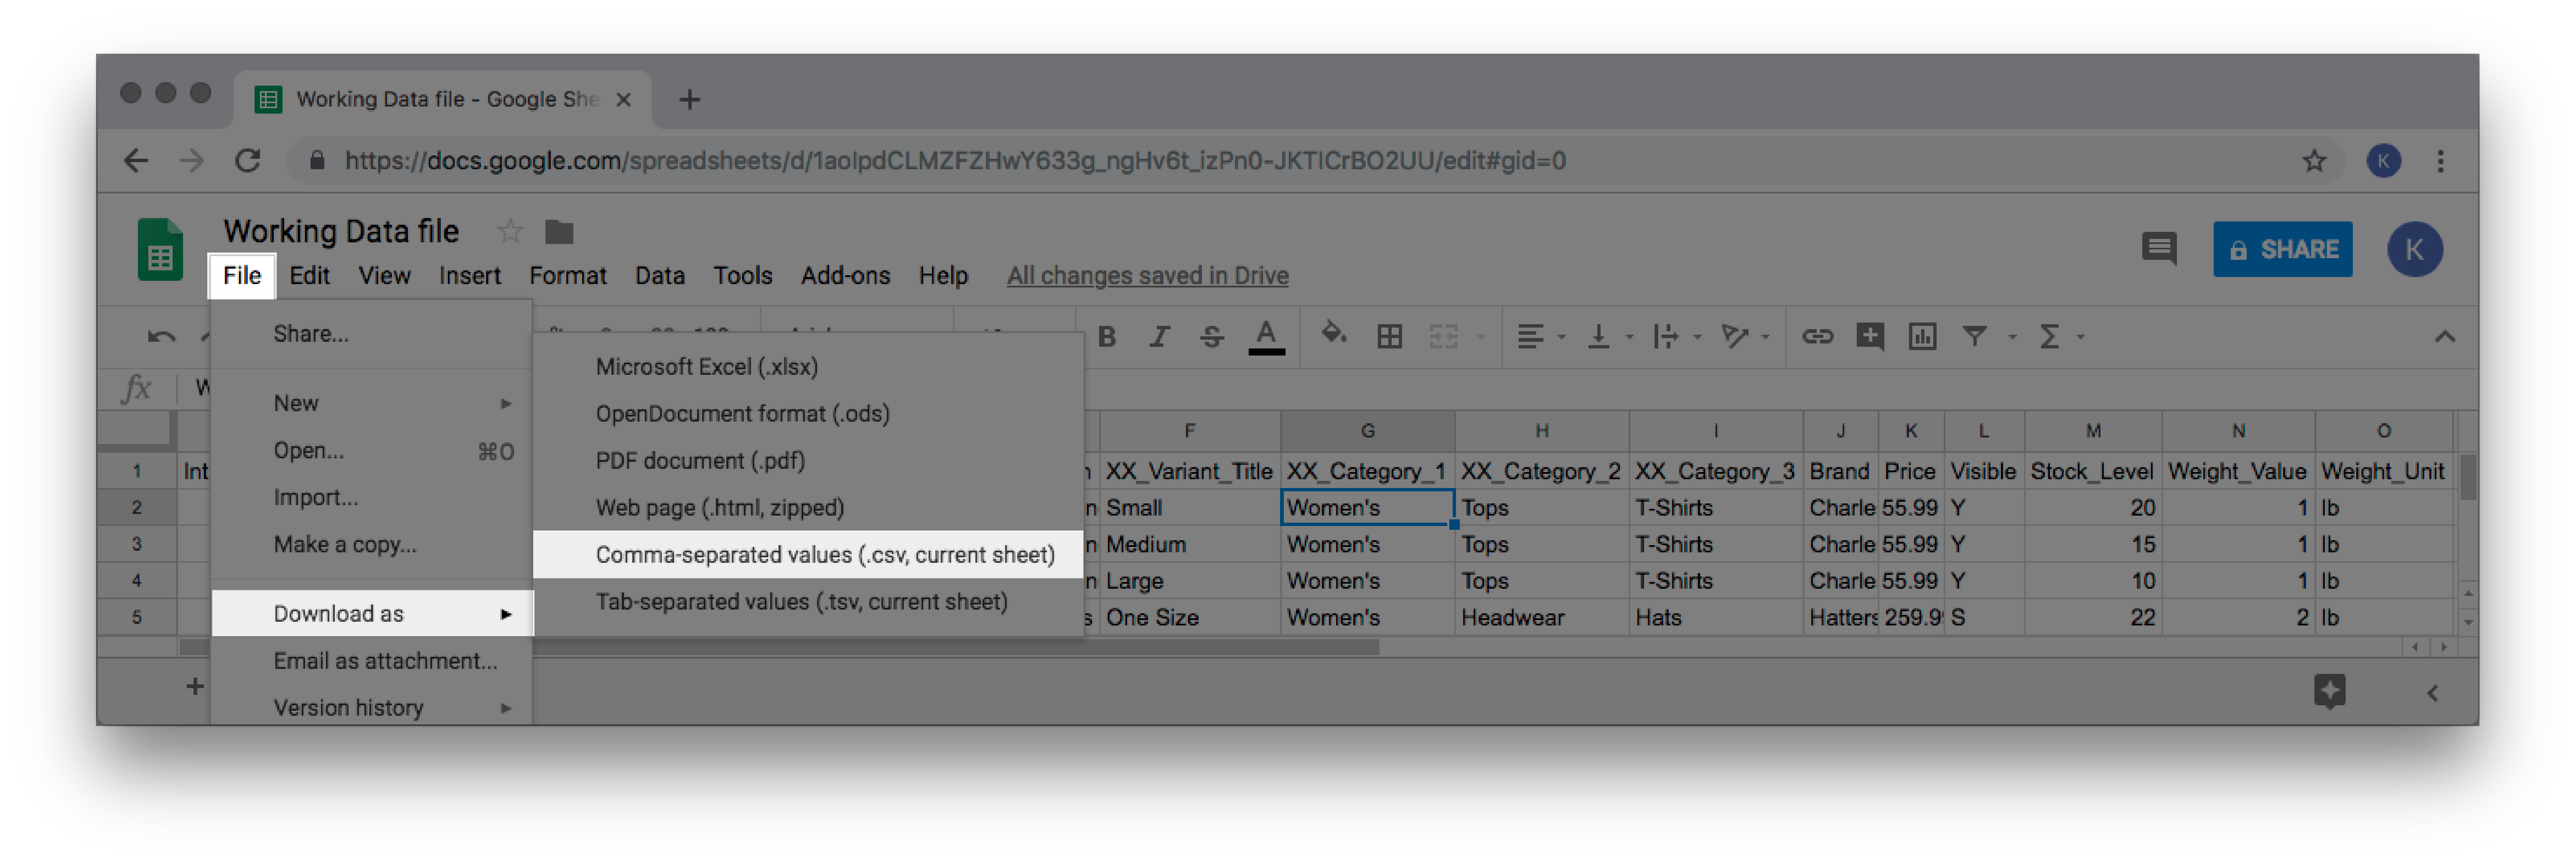
- When done, save your worksheet to your computer. This can be done by clicking File > Download As > Comma separated values (.CSV).
2. Importing your worksheet
Once you've created your worksheet for importing new products, you can import it into eCom.
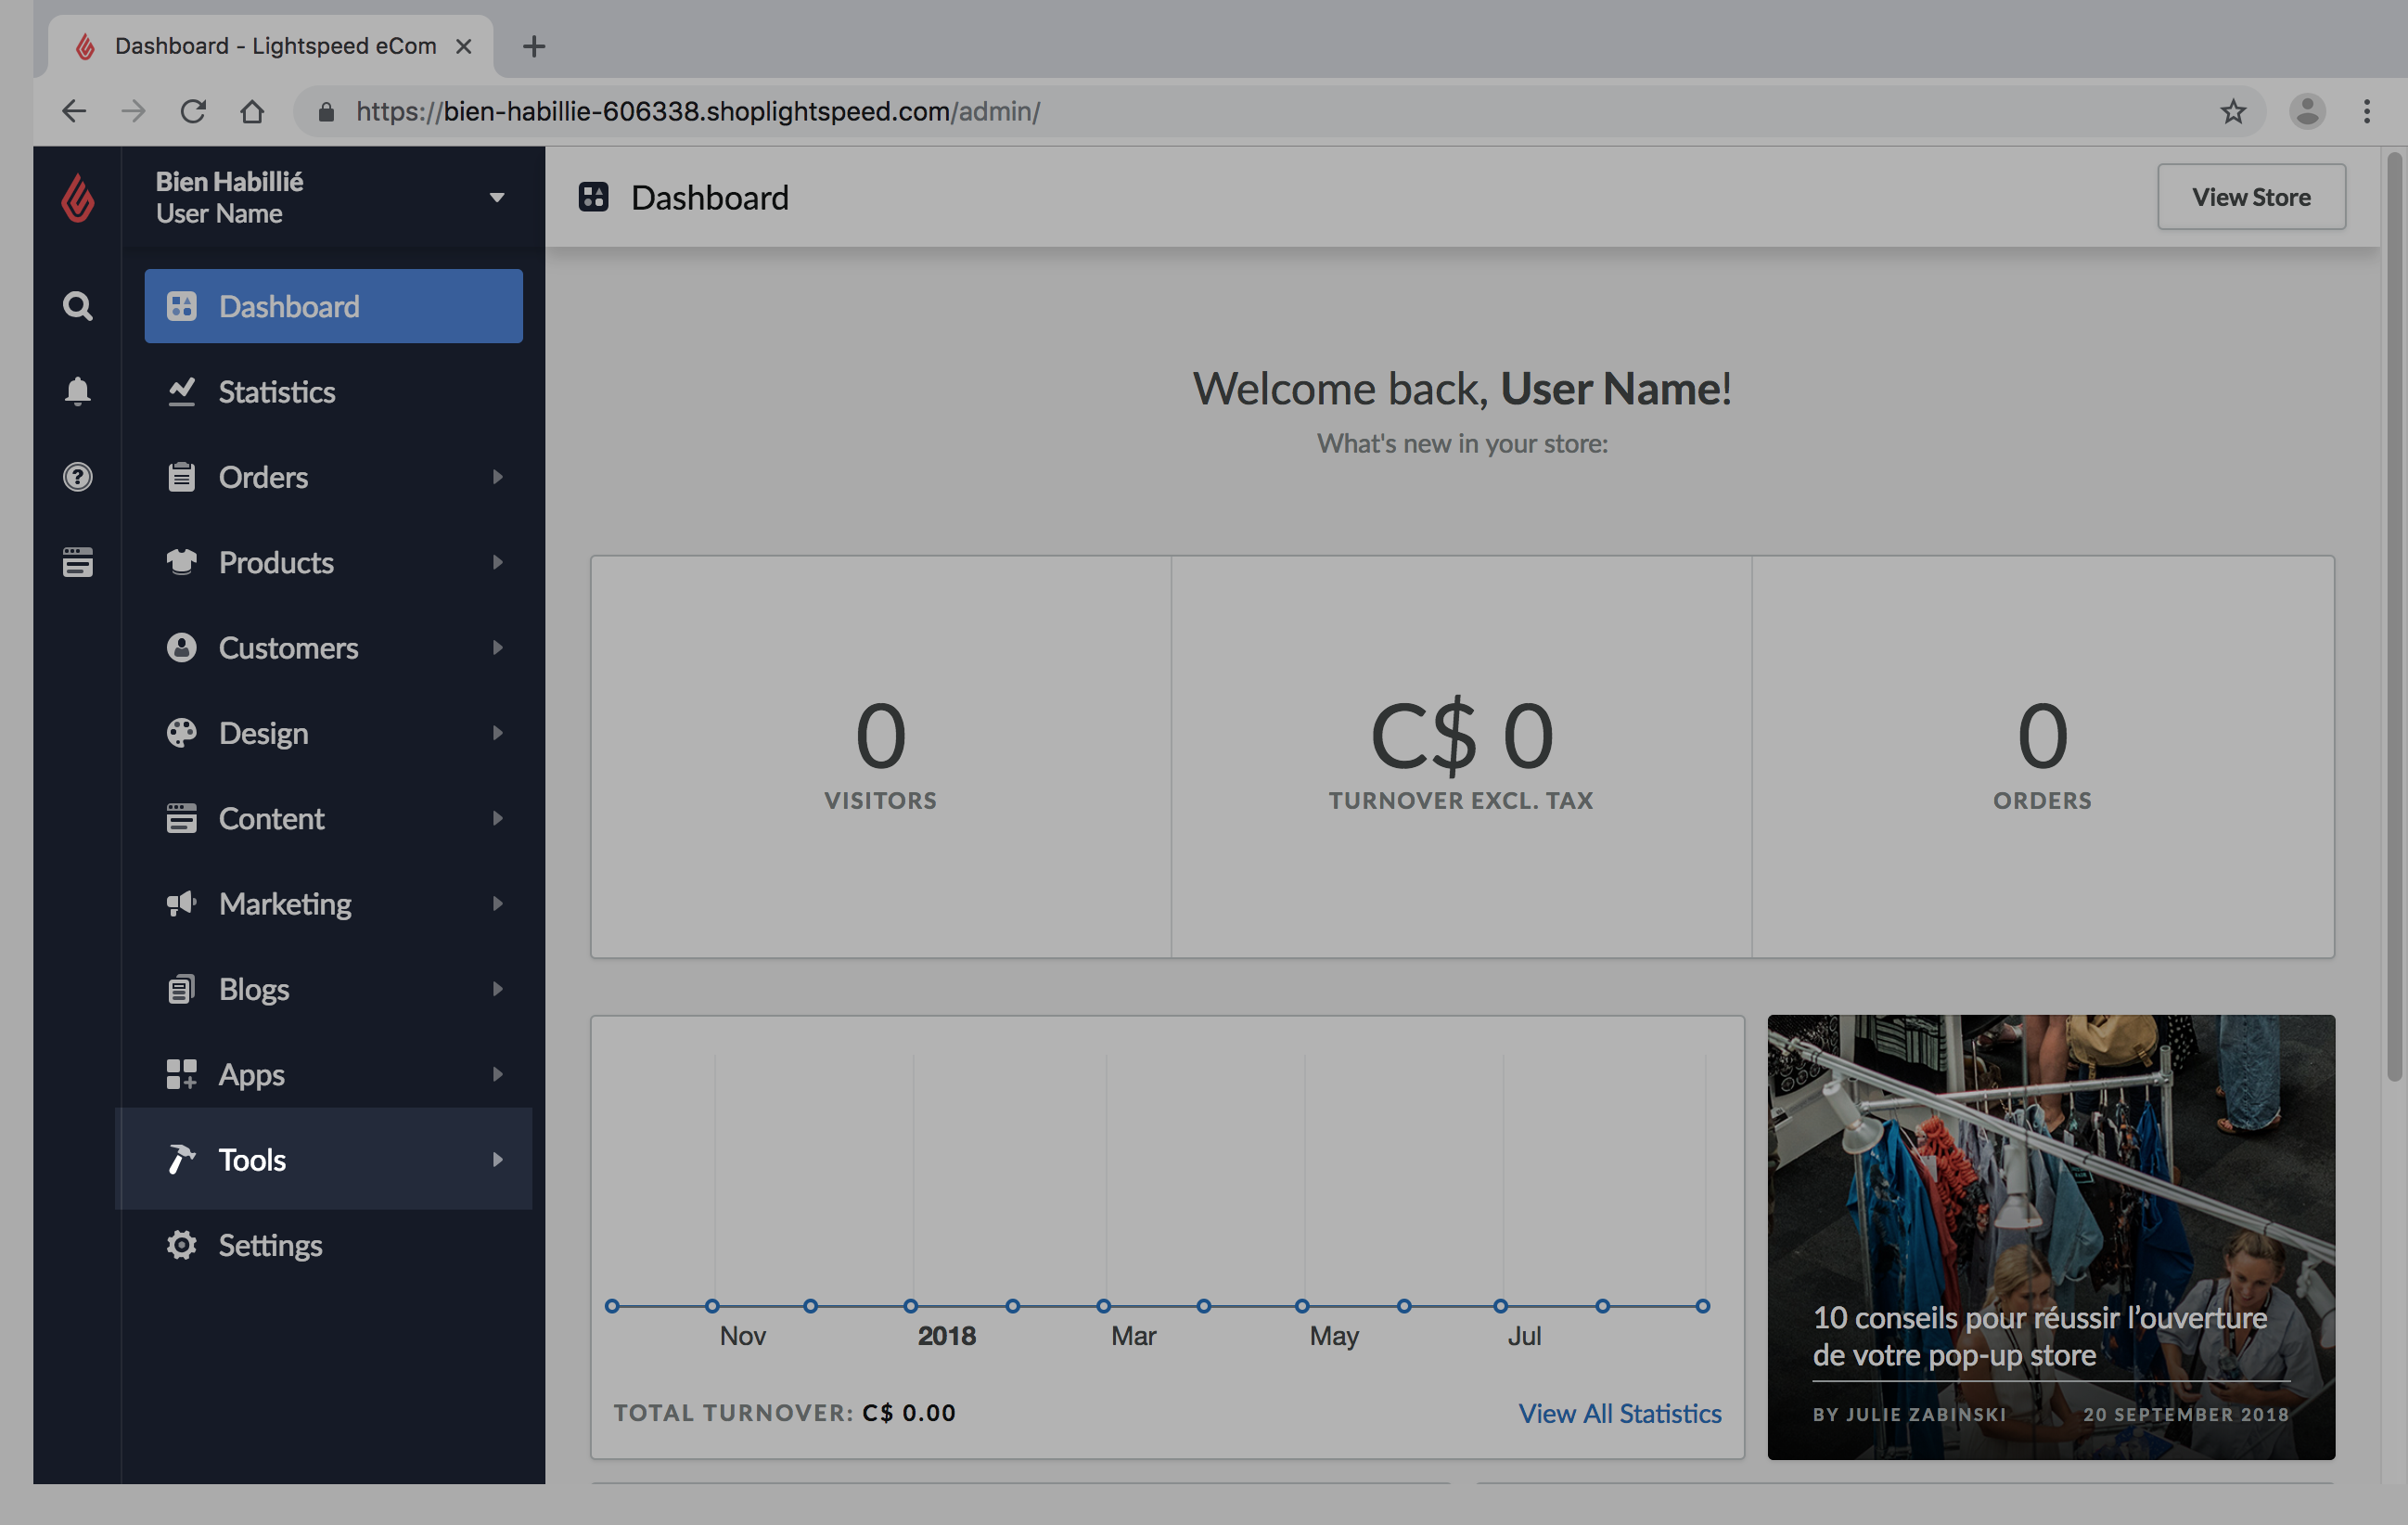
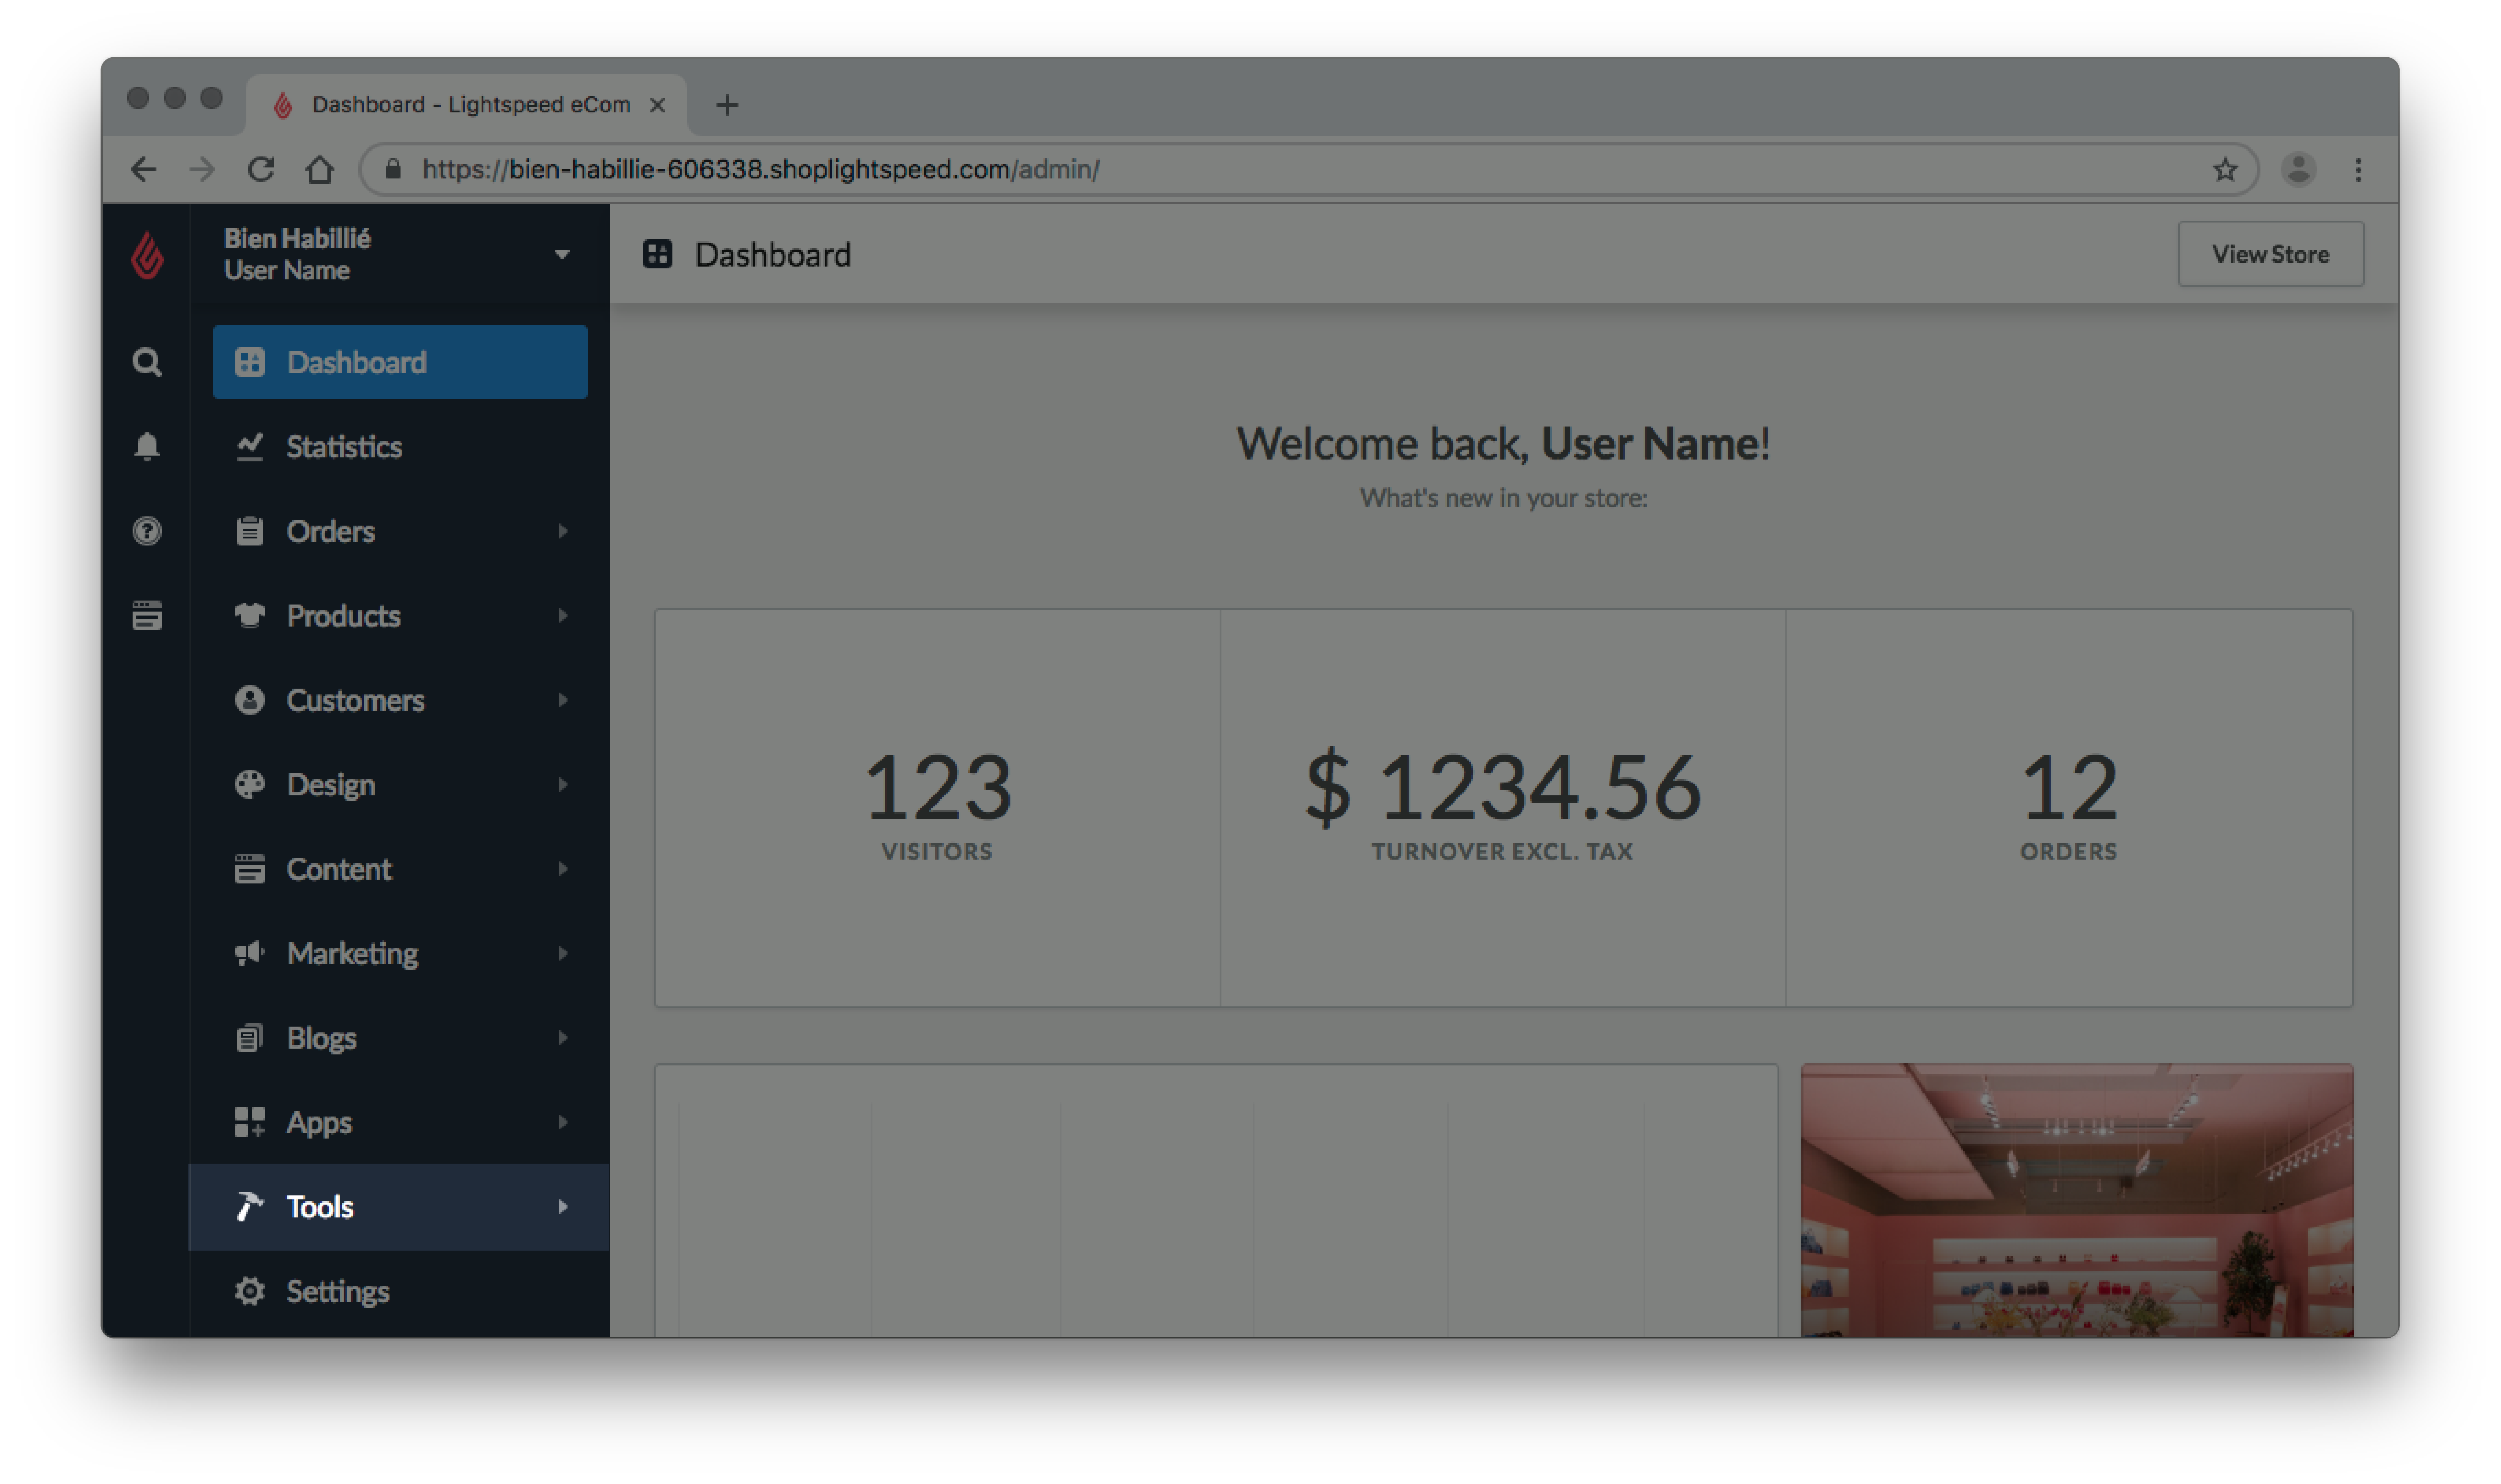
- In eCom store's Back Office, click Tools.
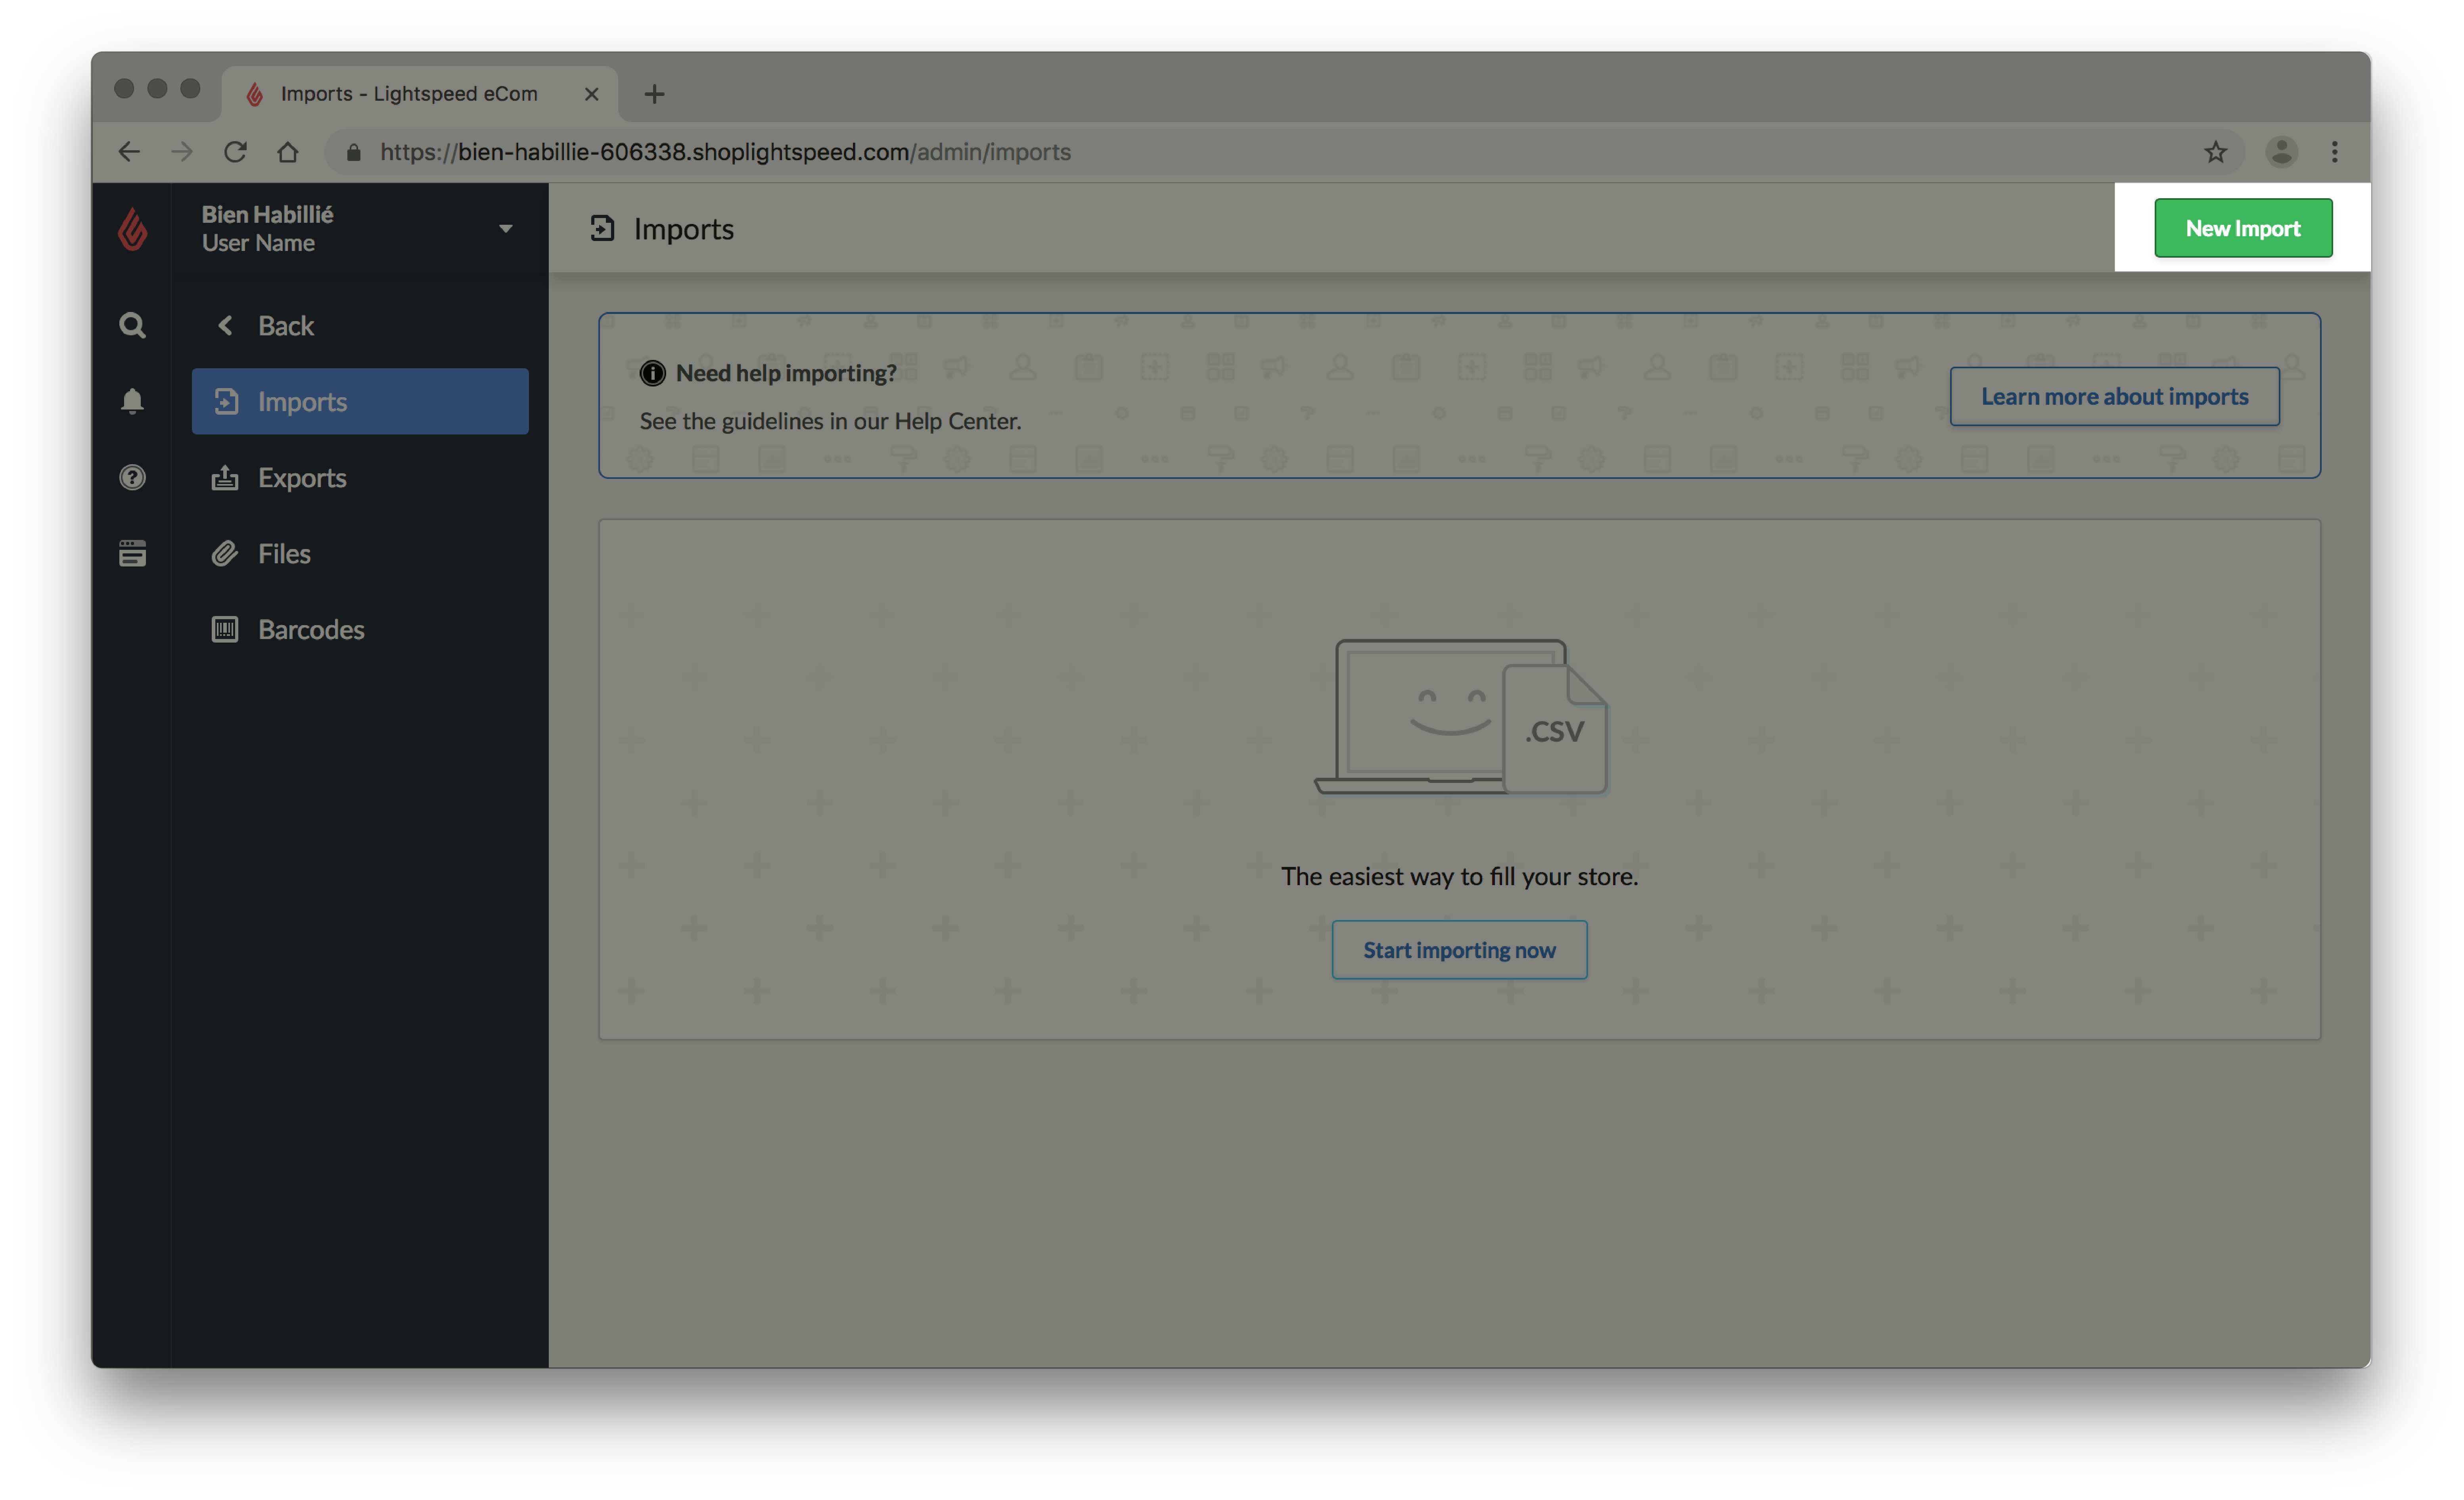
- Click New Import.
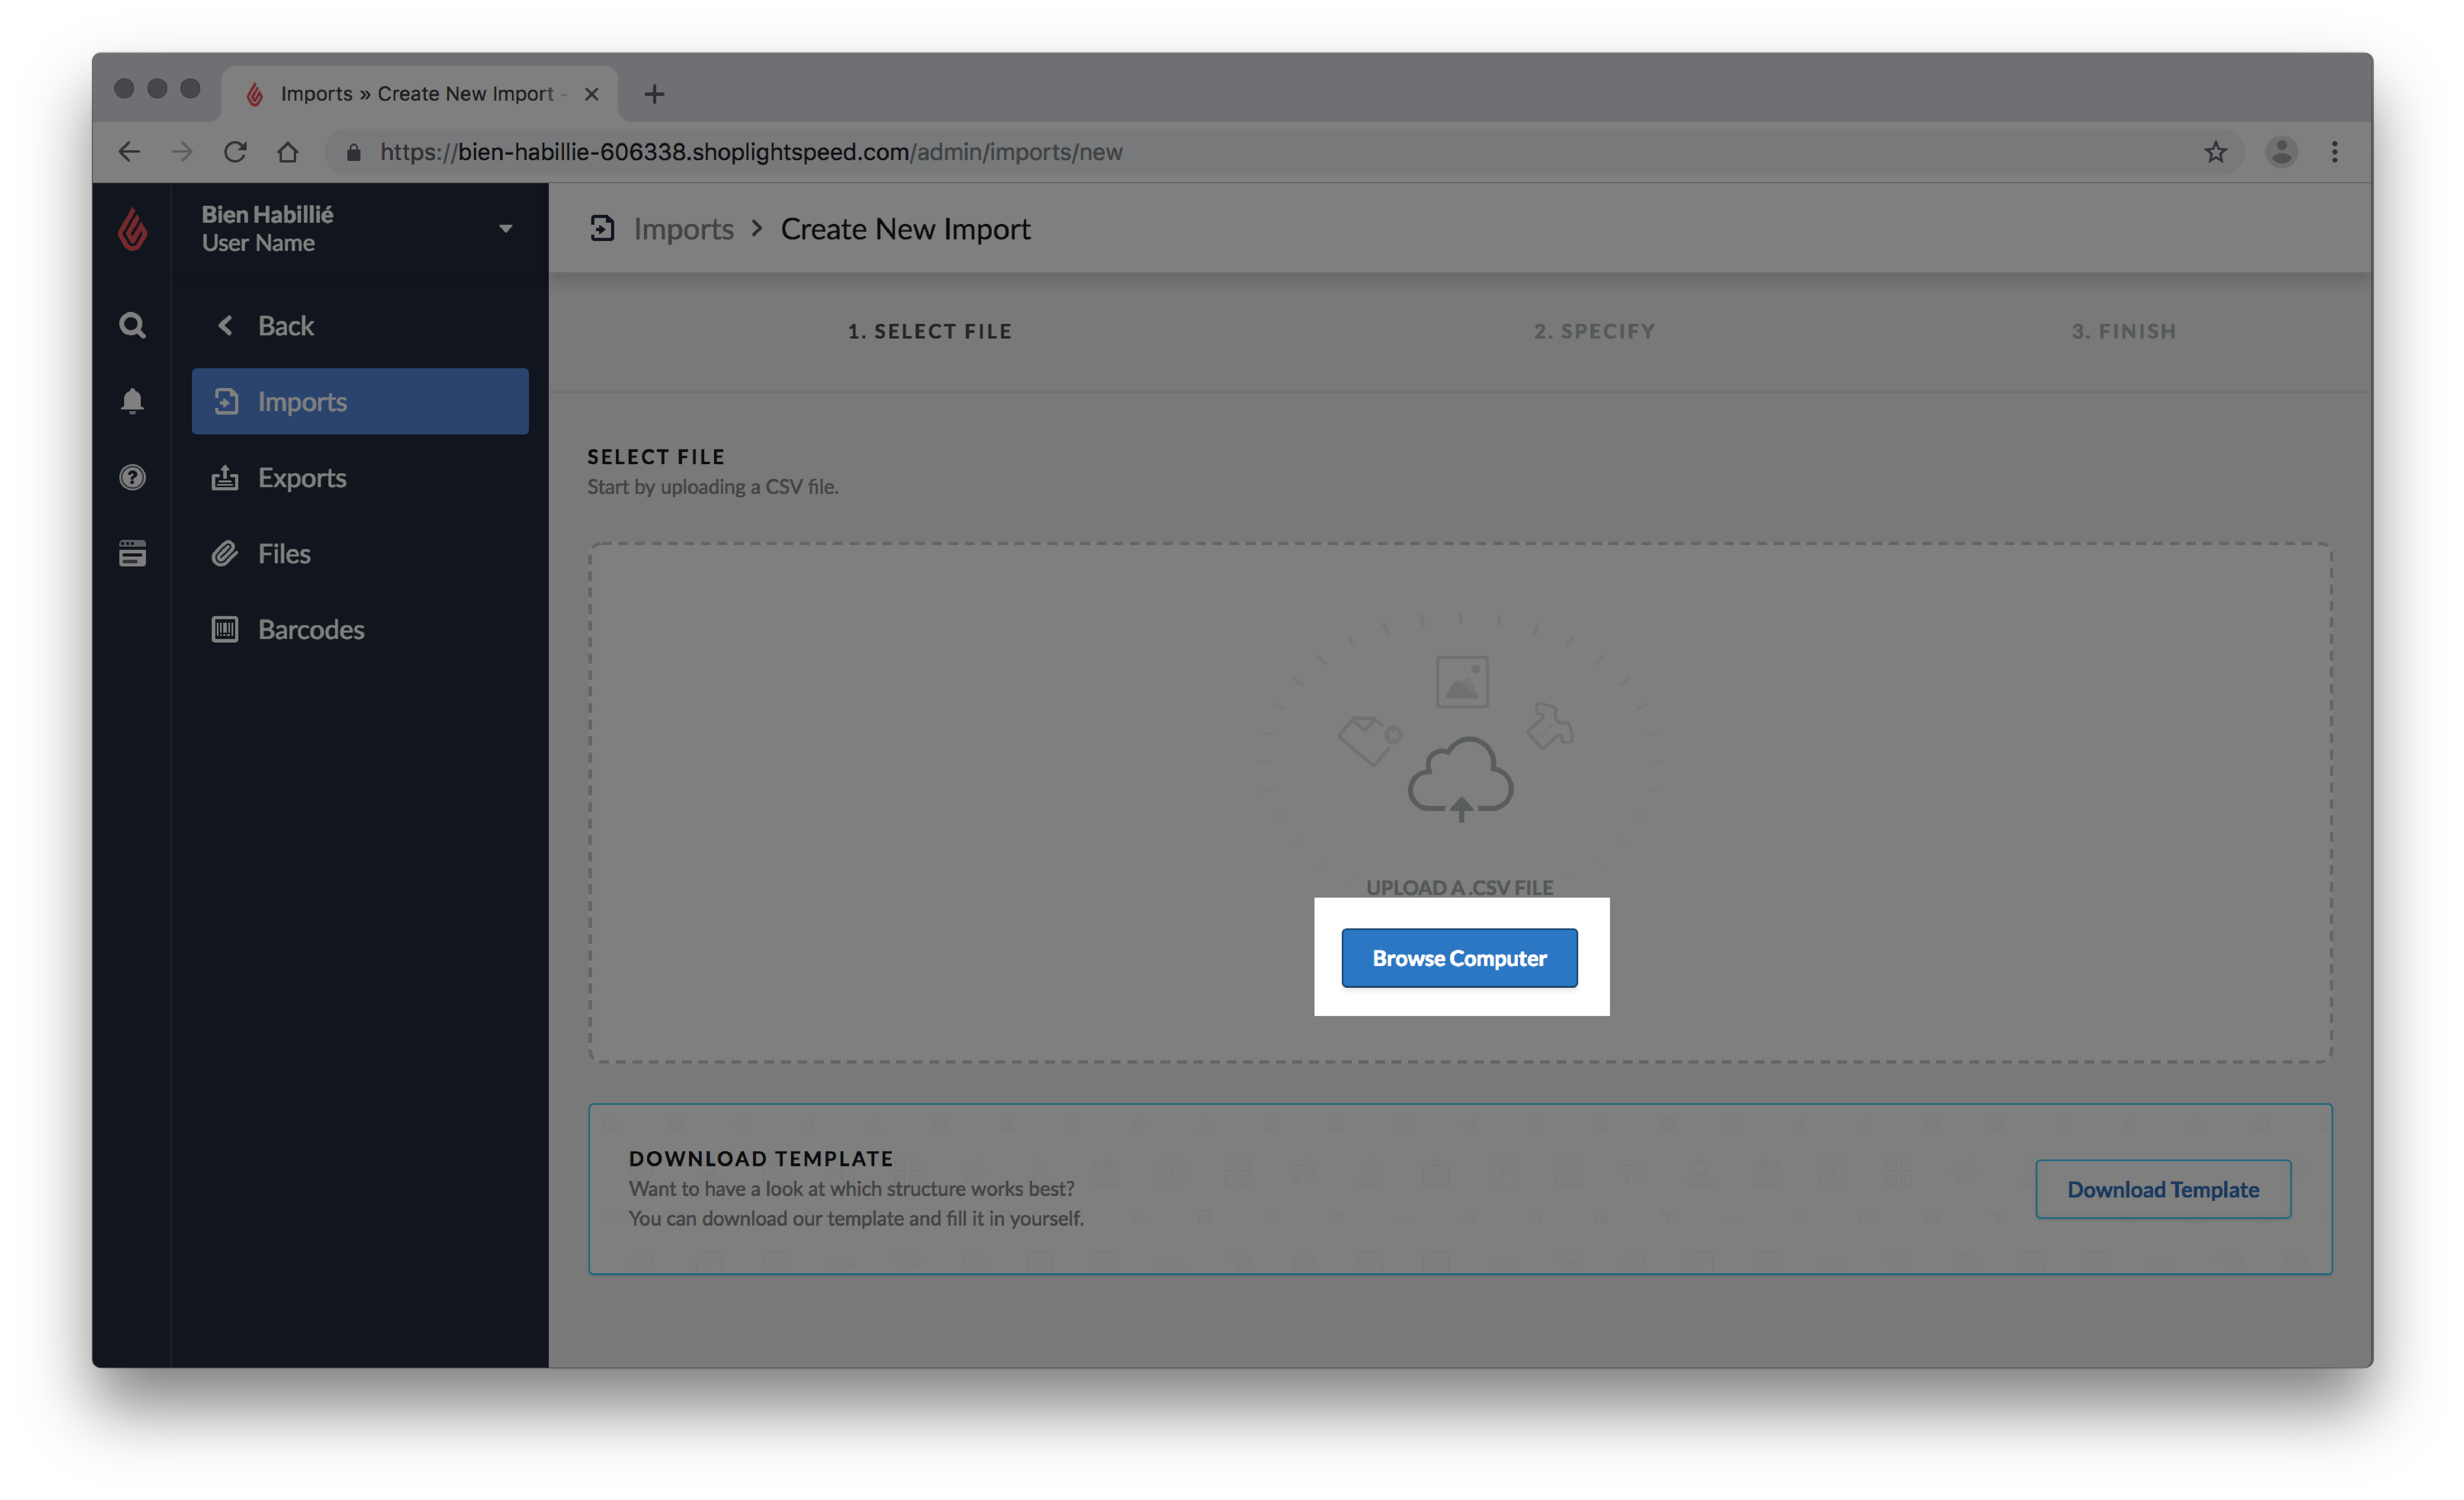
- Click Browse computer.
- Locate your worksheet and click Open.
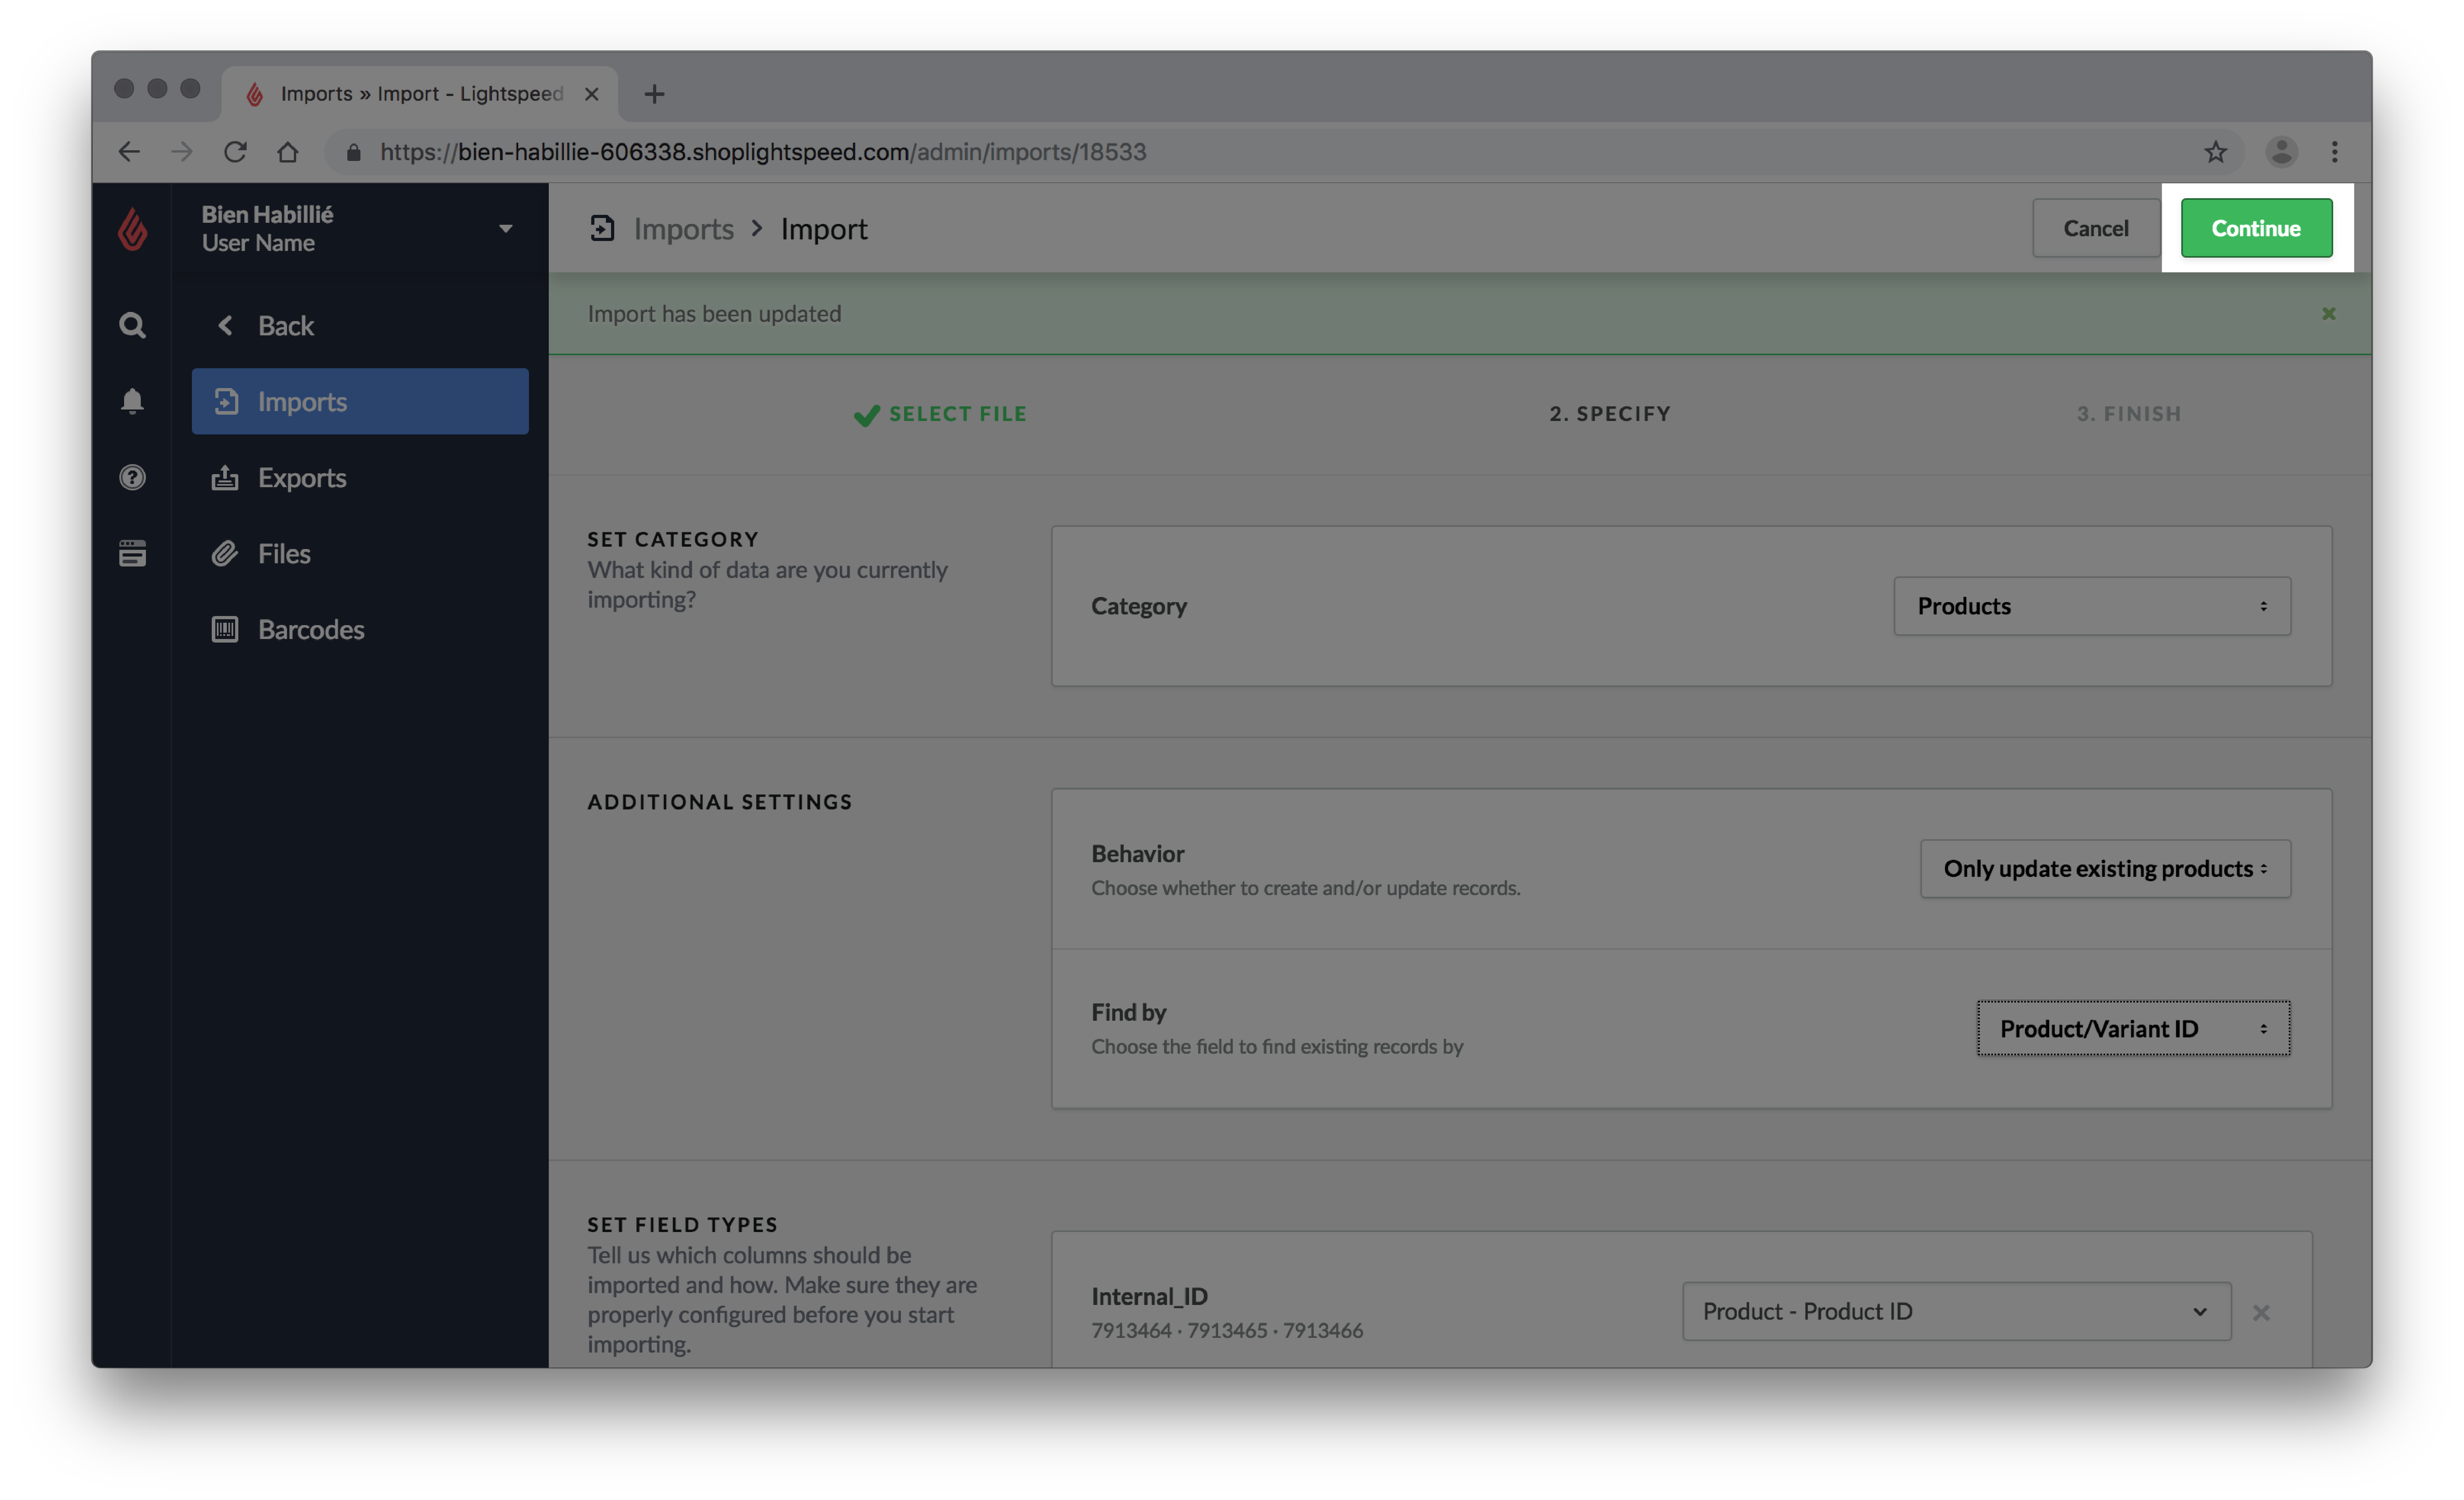
- Click Choose what you want to import and select Products.
- The page will continue automatically. In the section ADDITIONAL SETTINGS:
- For Behaviour, click Choose an option: and select Only creates new products.
- For Group by, click Product ID and select the column your worksheet is using to group variants. For example, you may be using the Product ID to group variants. For more information, see Internal ID.
- For Behaviour, click Choose an option: and select Only creates new products.
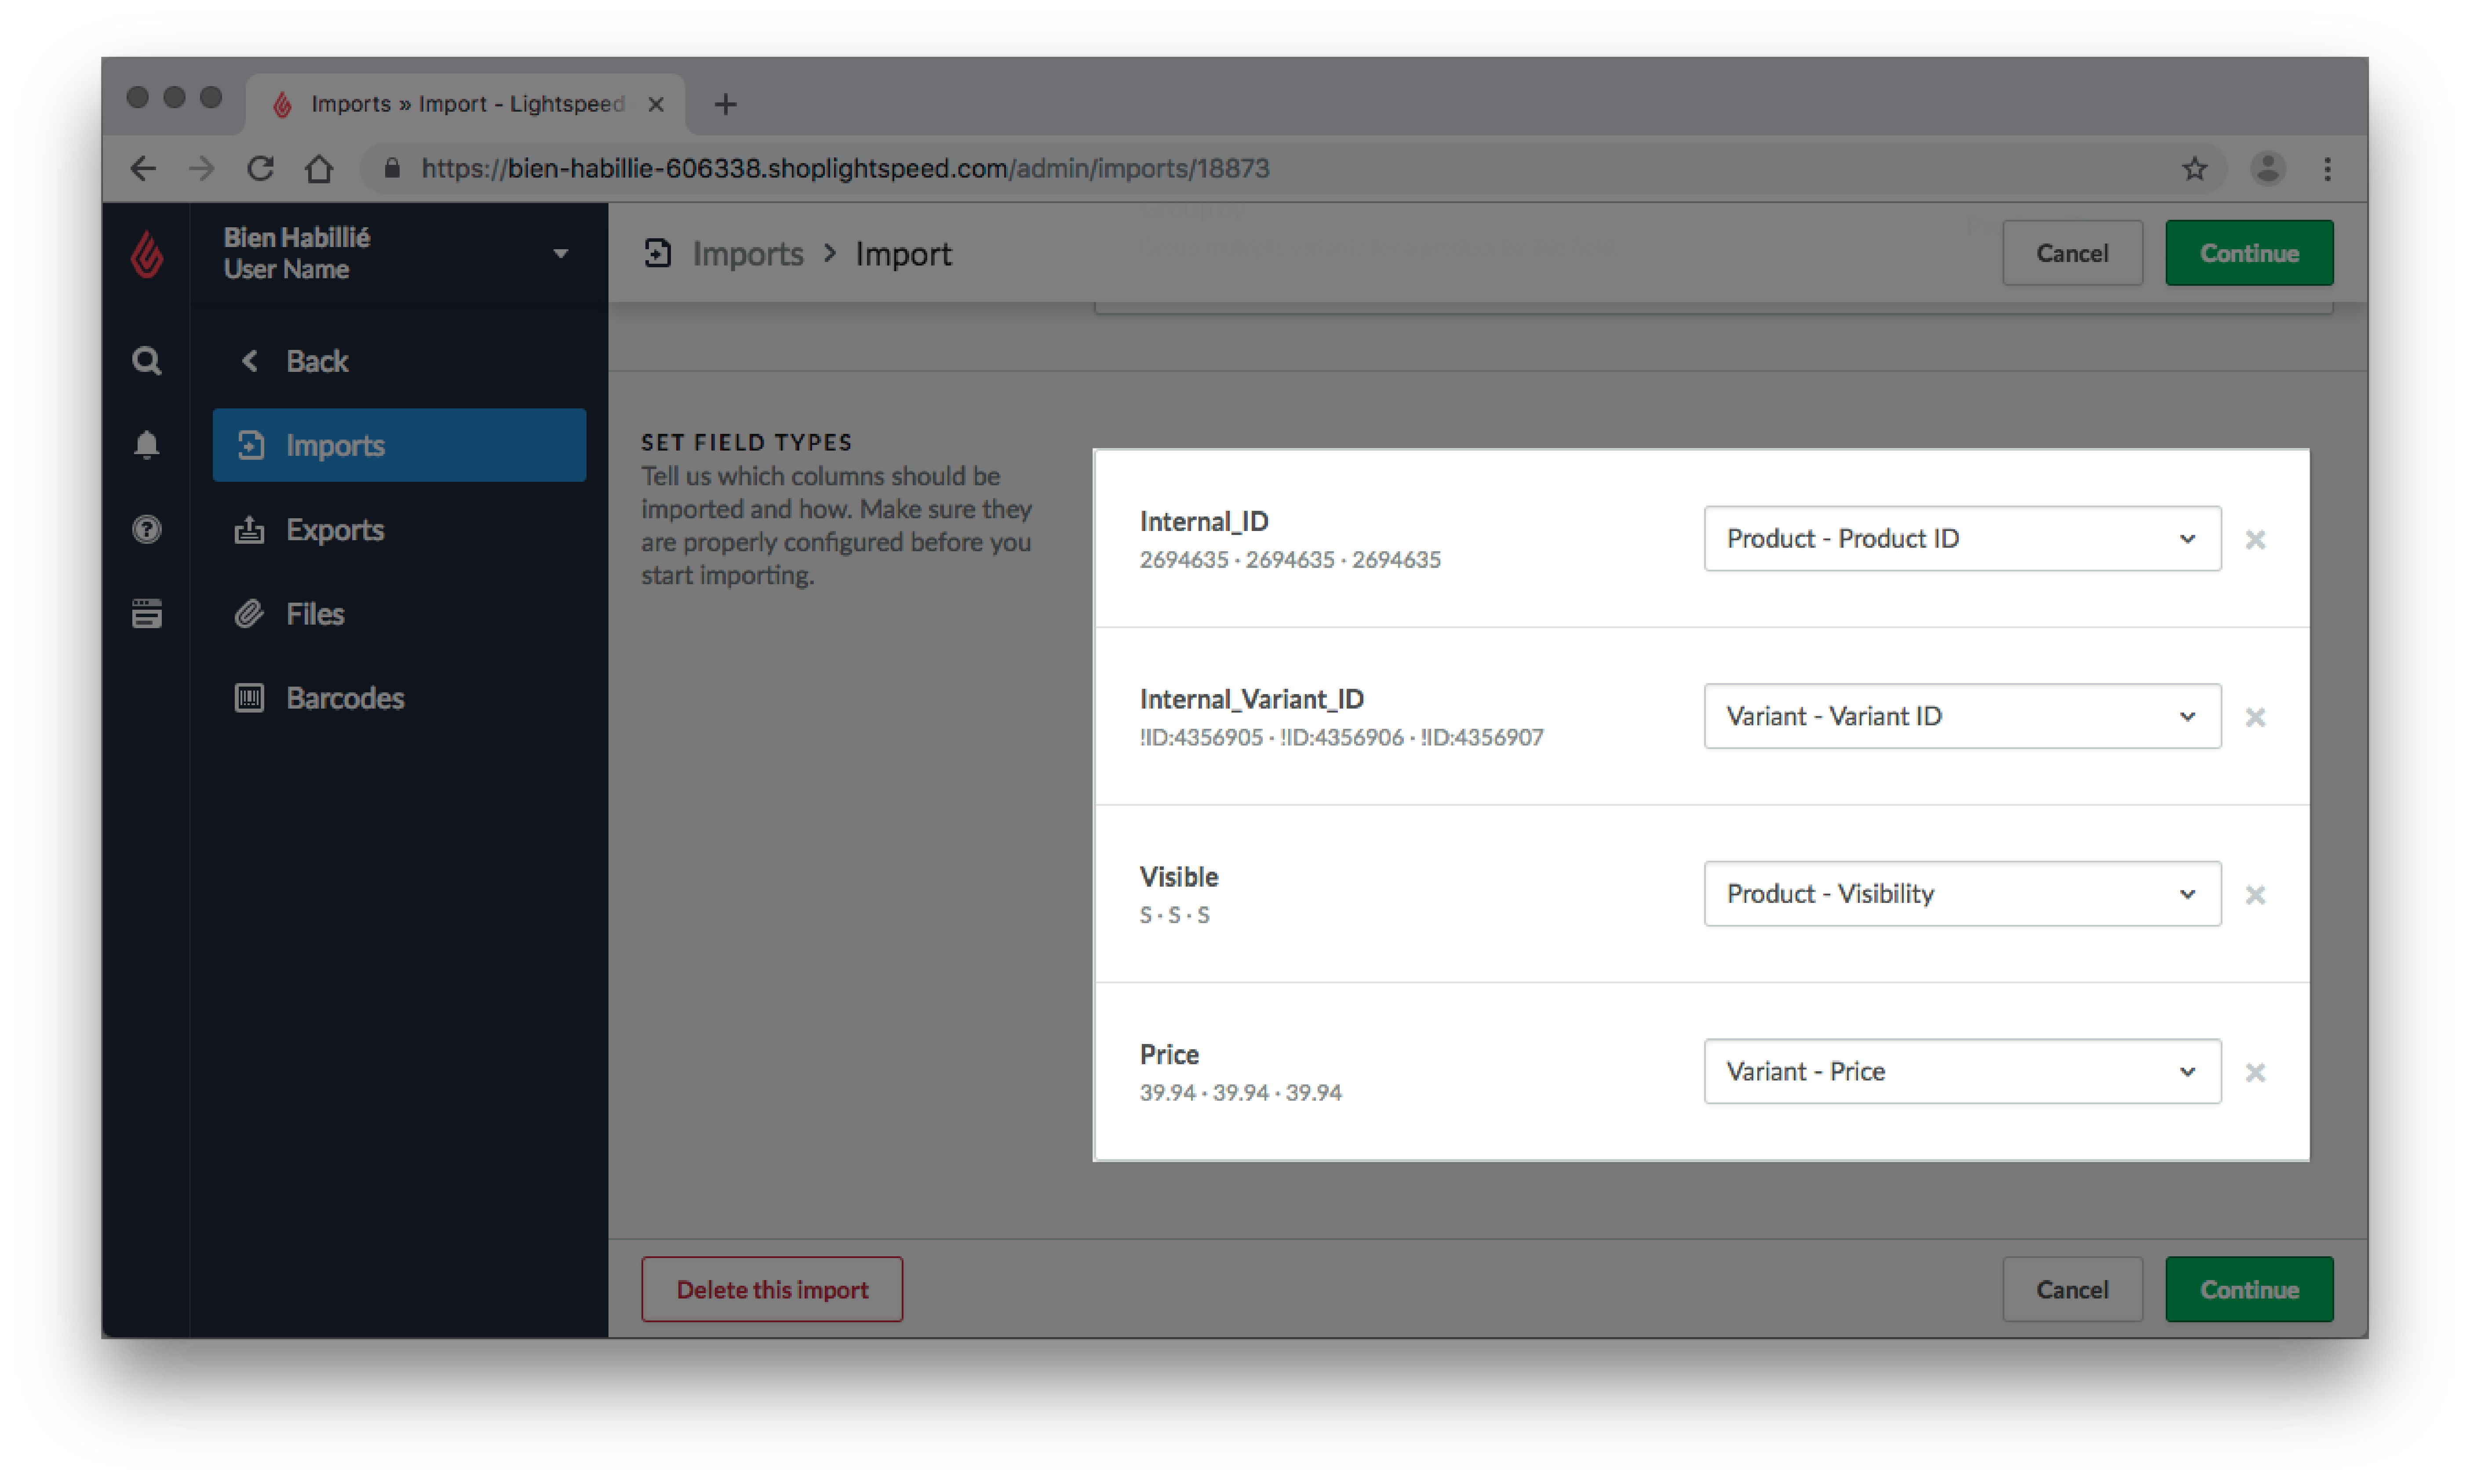
- The columns in the section SET FIELD TYPES will be automatically mapped to the correct fields as long as the column headers were not modified in your worksheet. Find out which columns should be mapped to the correct fields by using the table in the Product column titles article.
- On the top right-hand side of the screen, click Continue.
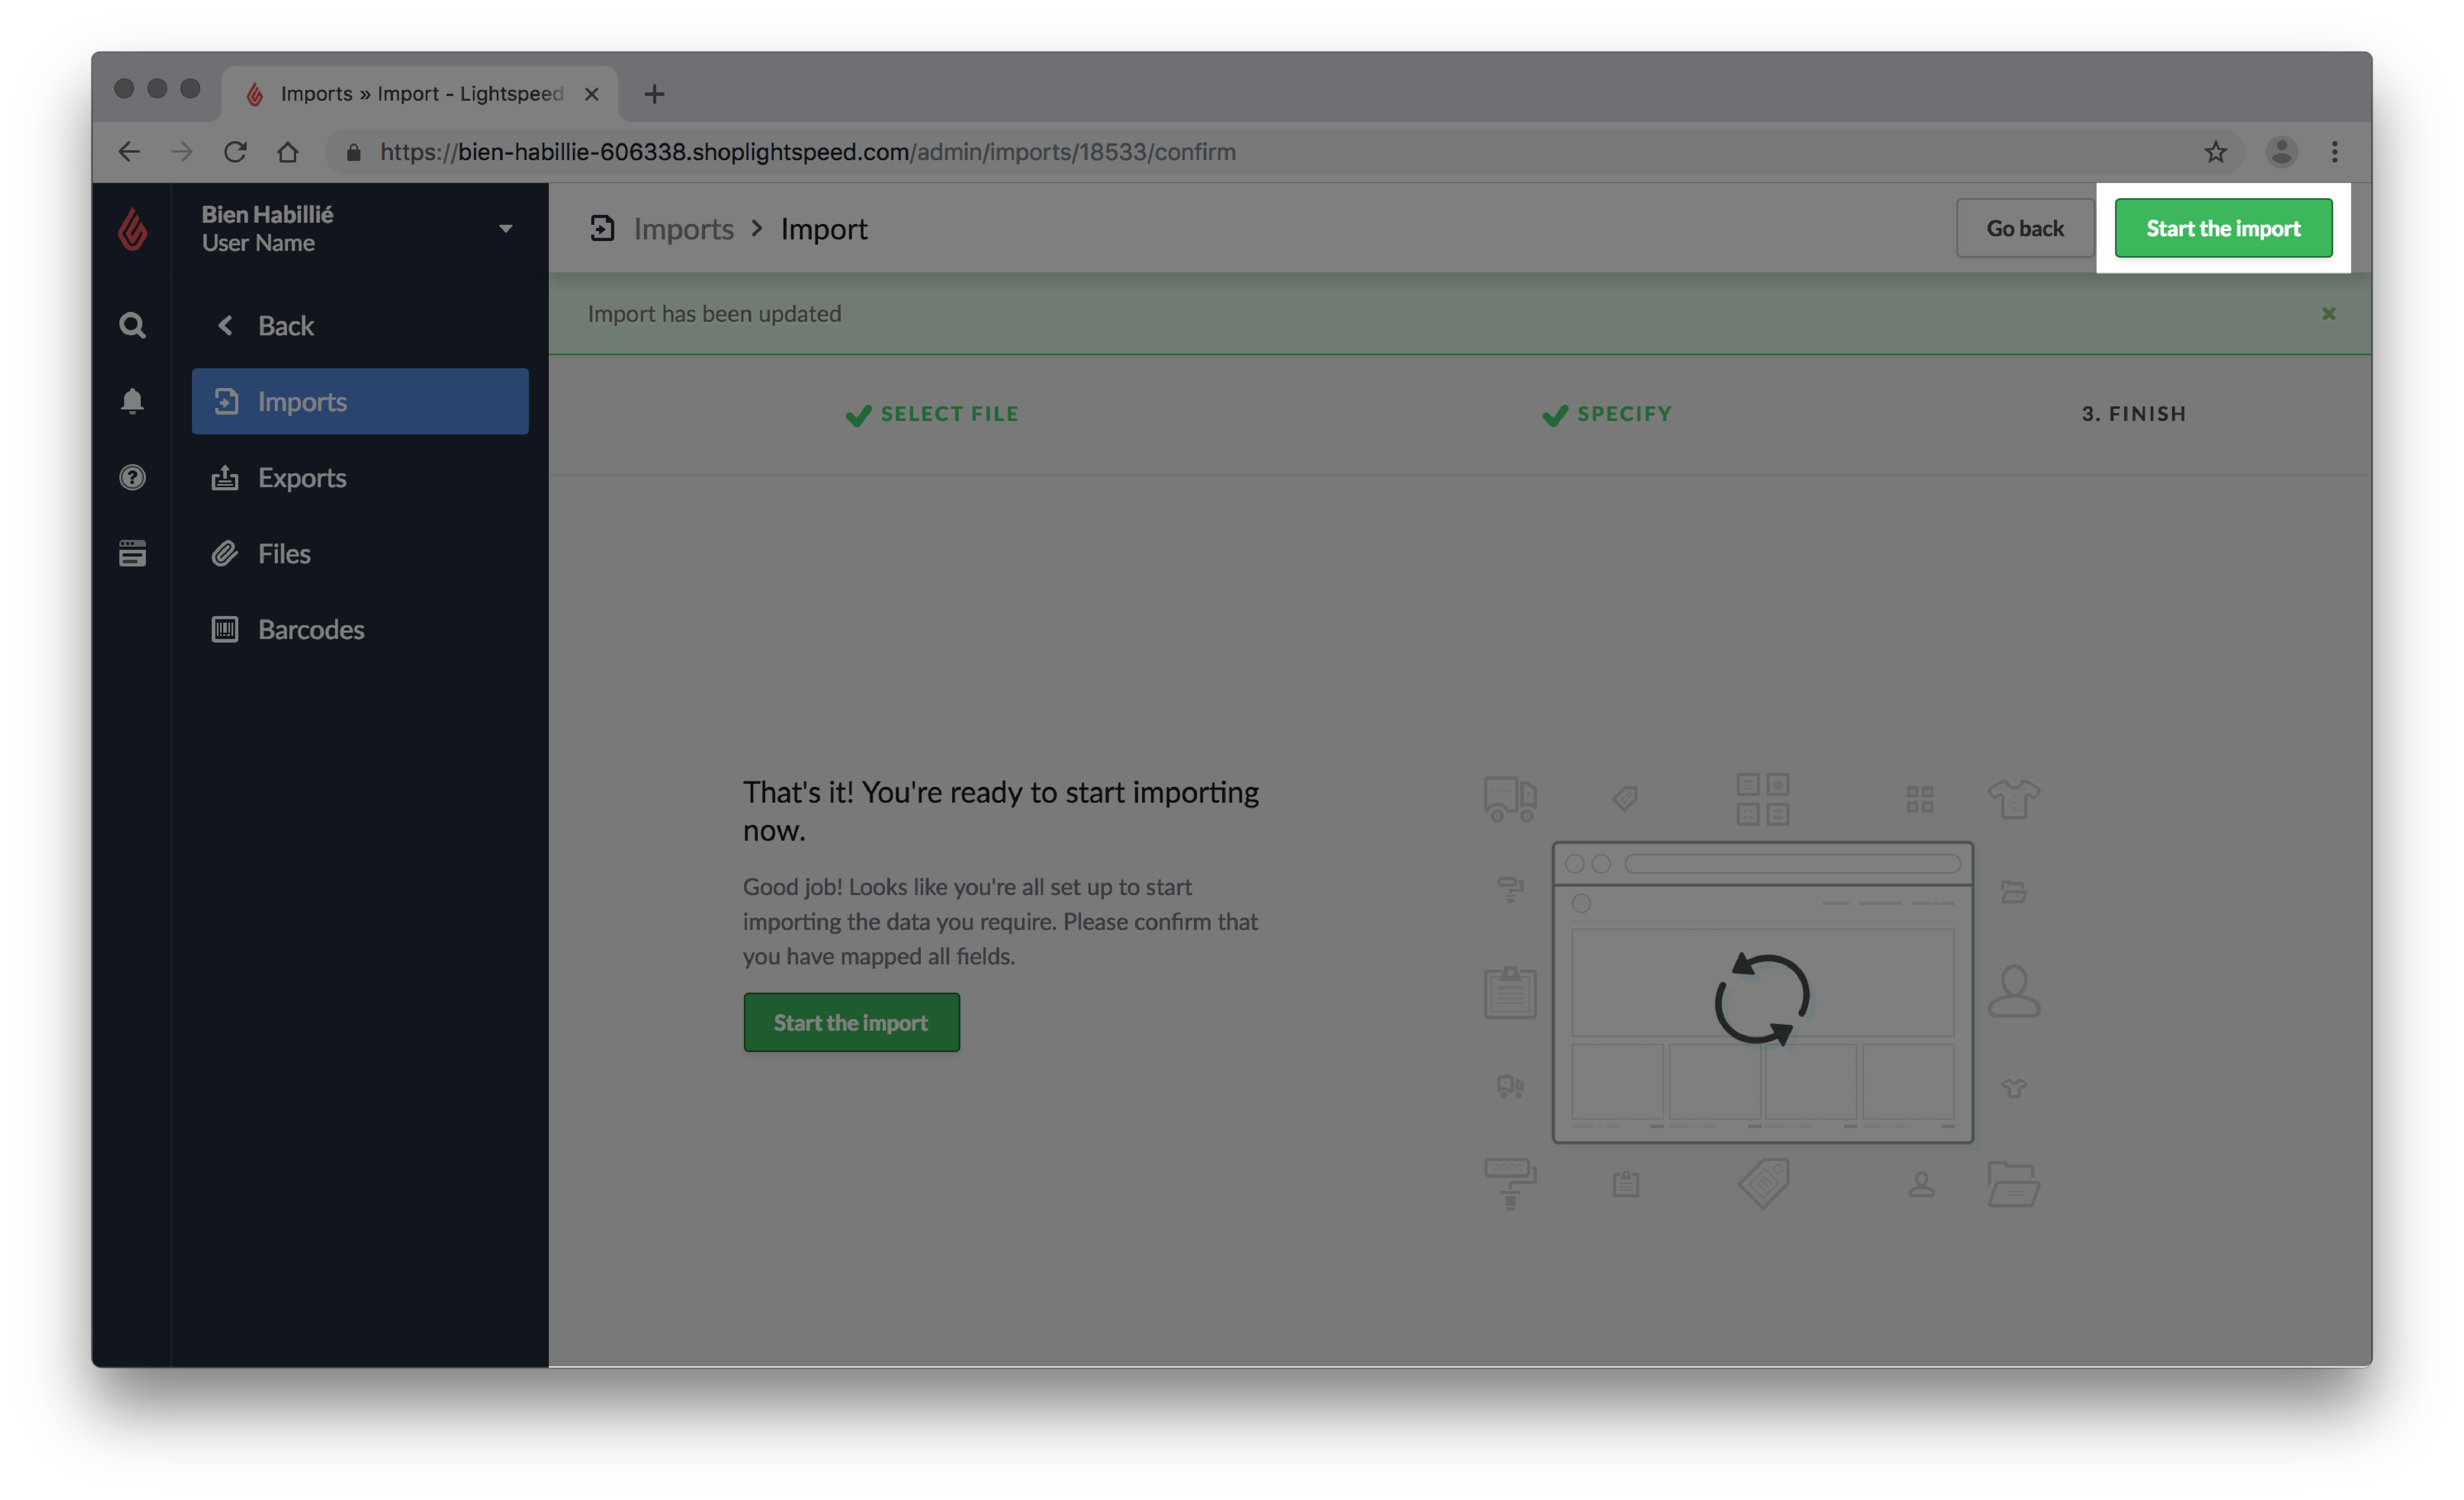
- Click Start the import. The import tool will begin processing your import. You do not have to remain on the page and may come back to it later.
3. Verifying your changes
It is necessary to verify your new products were successfully imported after starting an import. After checking the import tool for errors, it is important to test some products from your worksheet at random and confirm your edits took place.
3a. Confirm no errors occurred during the import:
- Log in to your eCom store's Back Office and click Tools.
- Locate your import by the date or the filename and click View report beside the status.
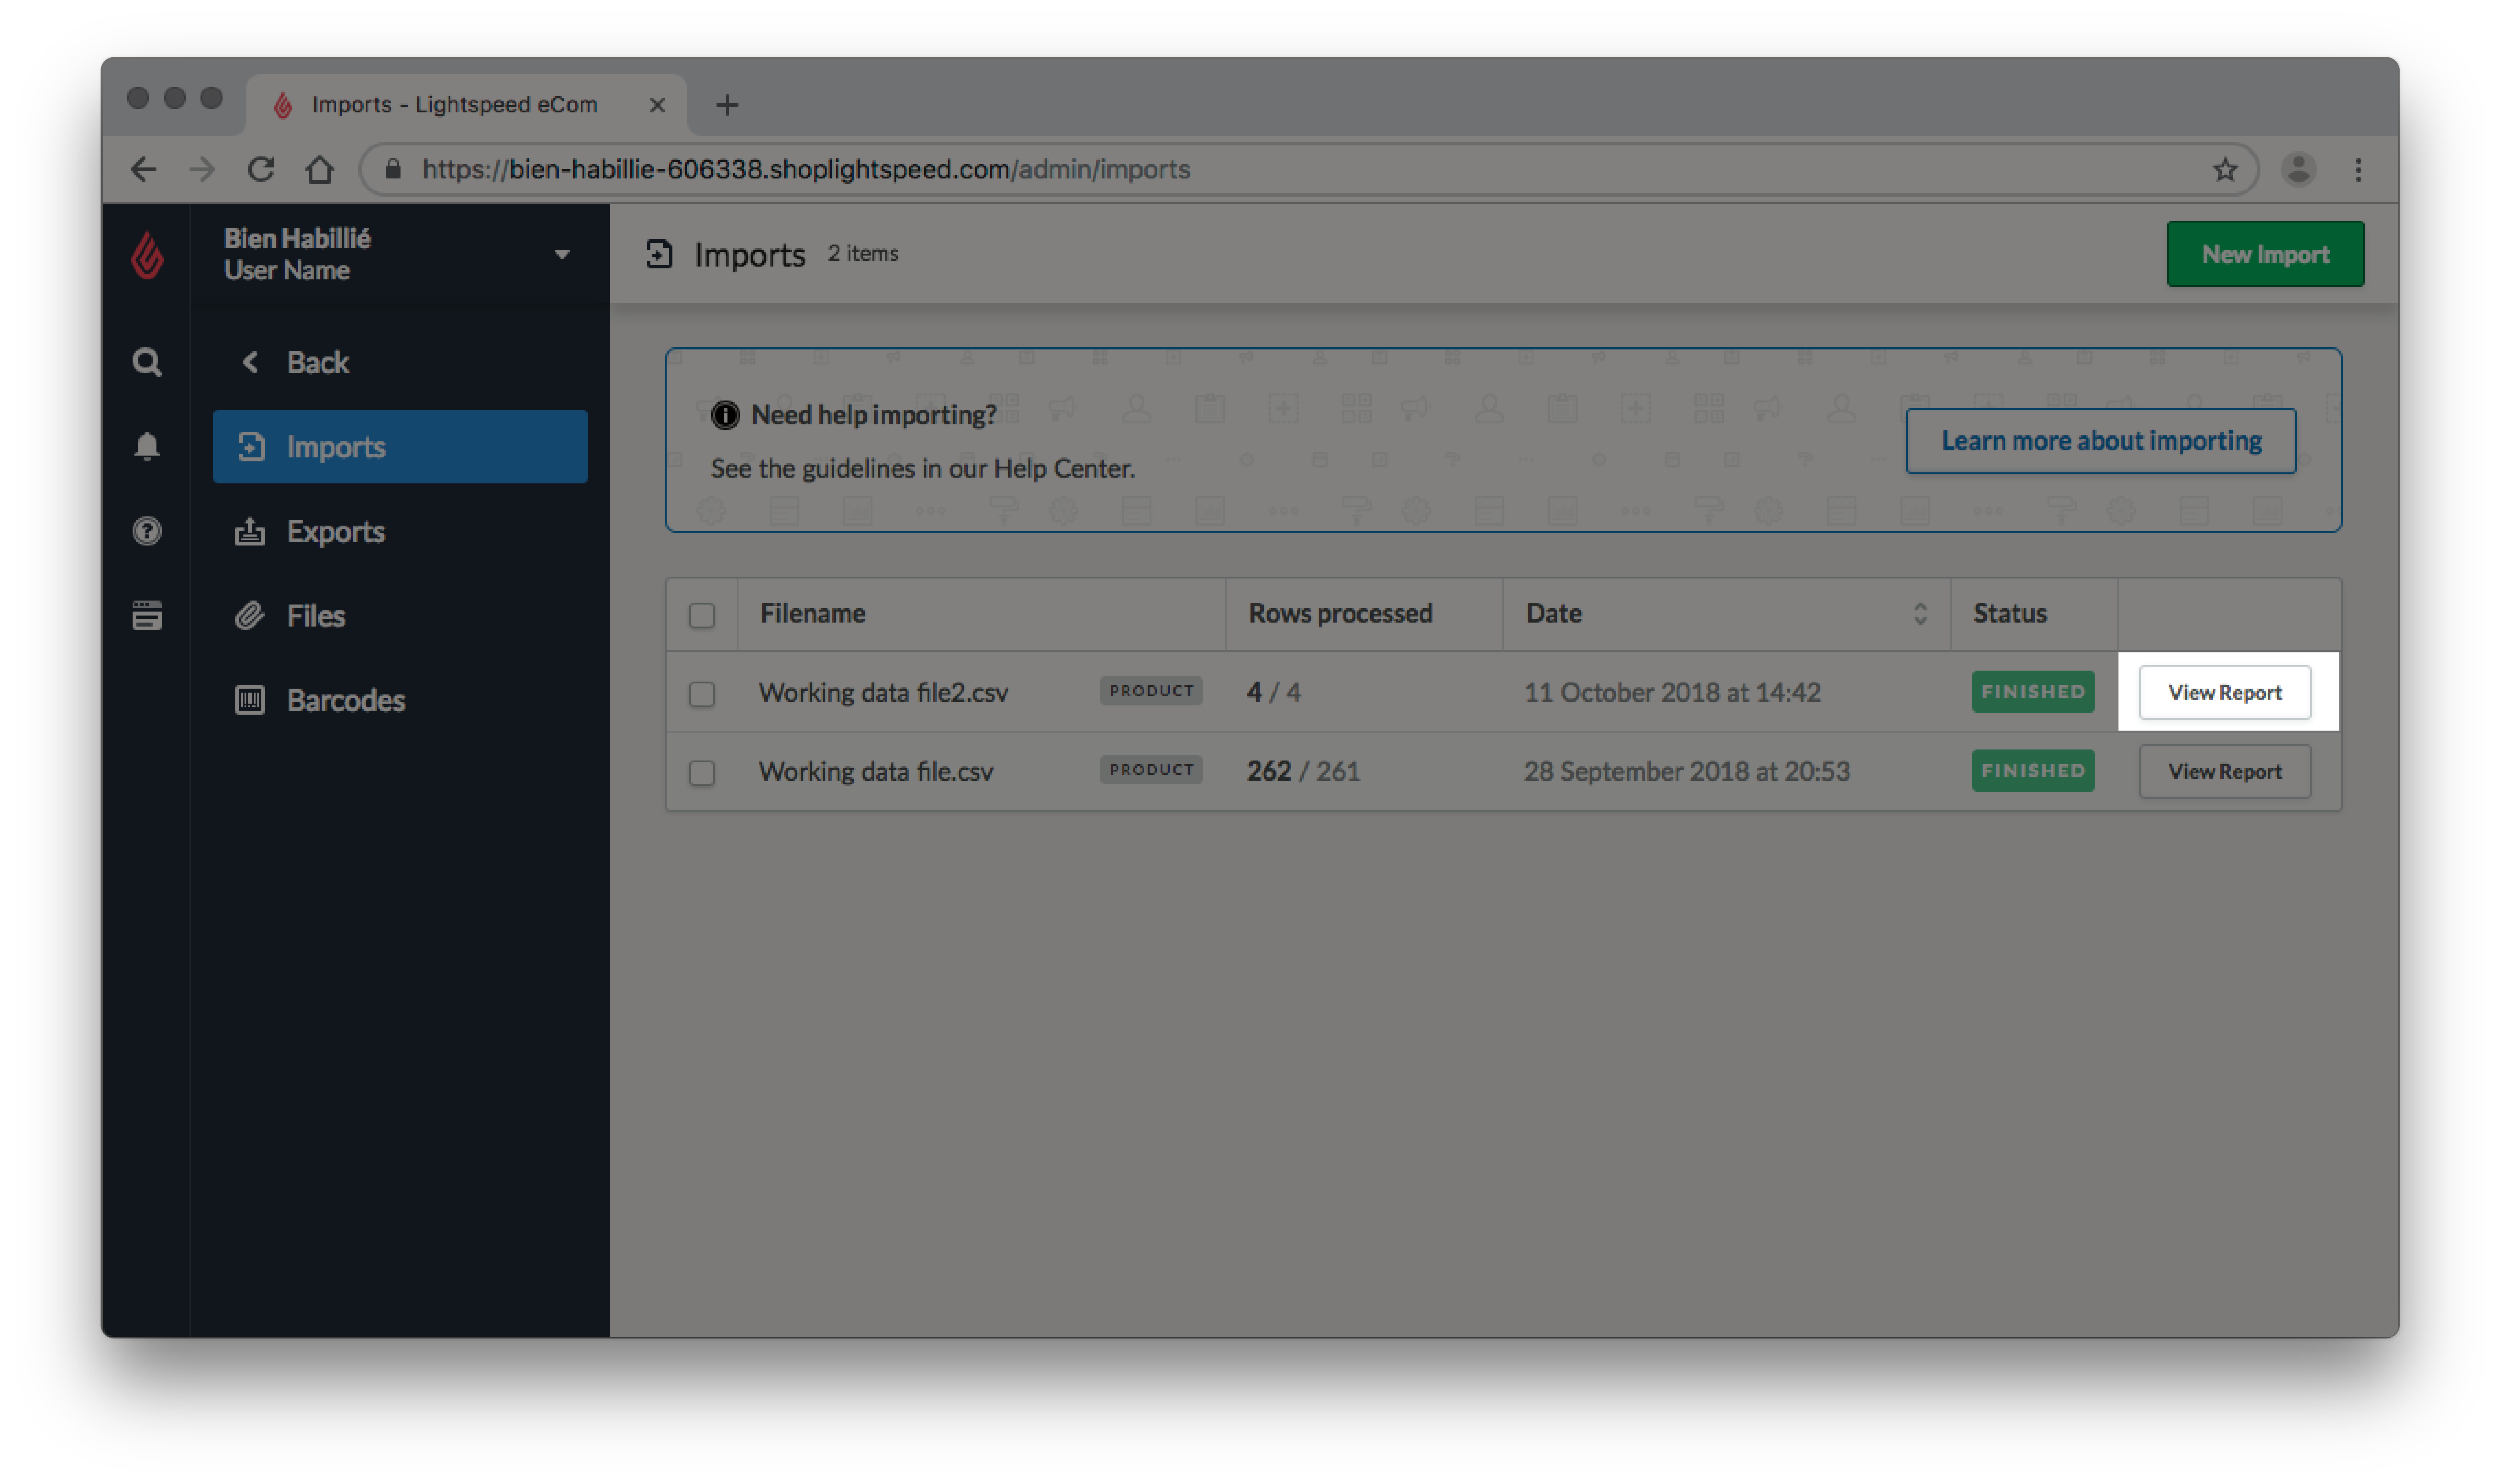
- If any errors are visible, make corrections to your worksheet and import your edits again. To see frequently asked questions and ask your own questions about errors, visit the Lightspeed Community article, here.

3b. Confirm the new products were added correctly
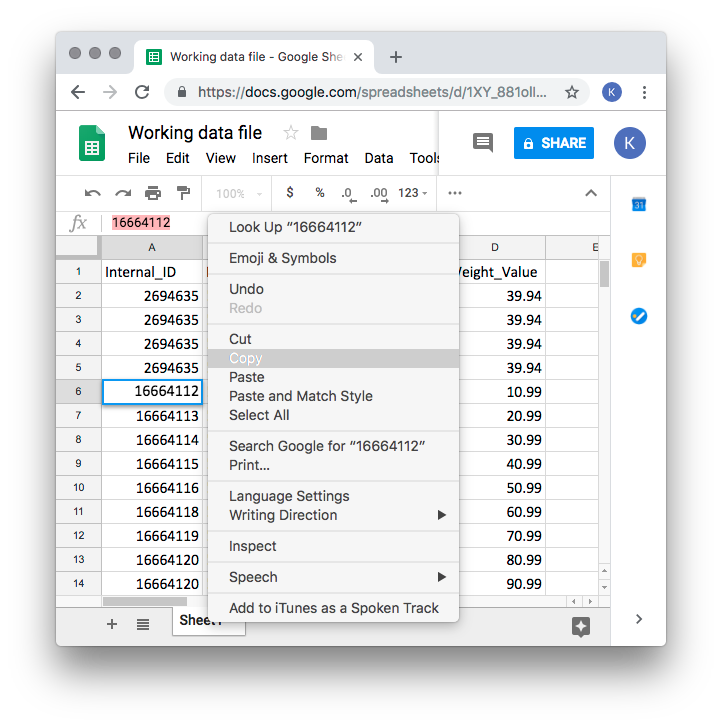
- In Google Sheets, open the worksheet that you uploaded to Lightspeed eCom.
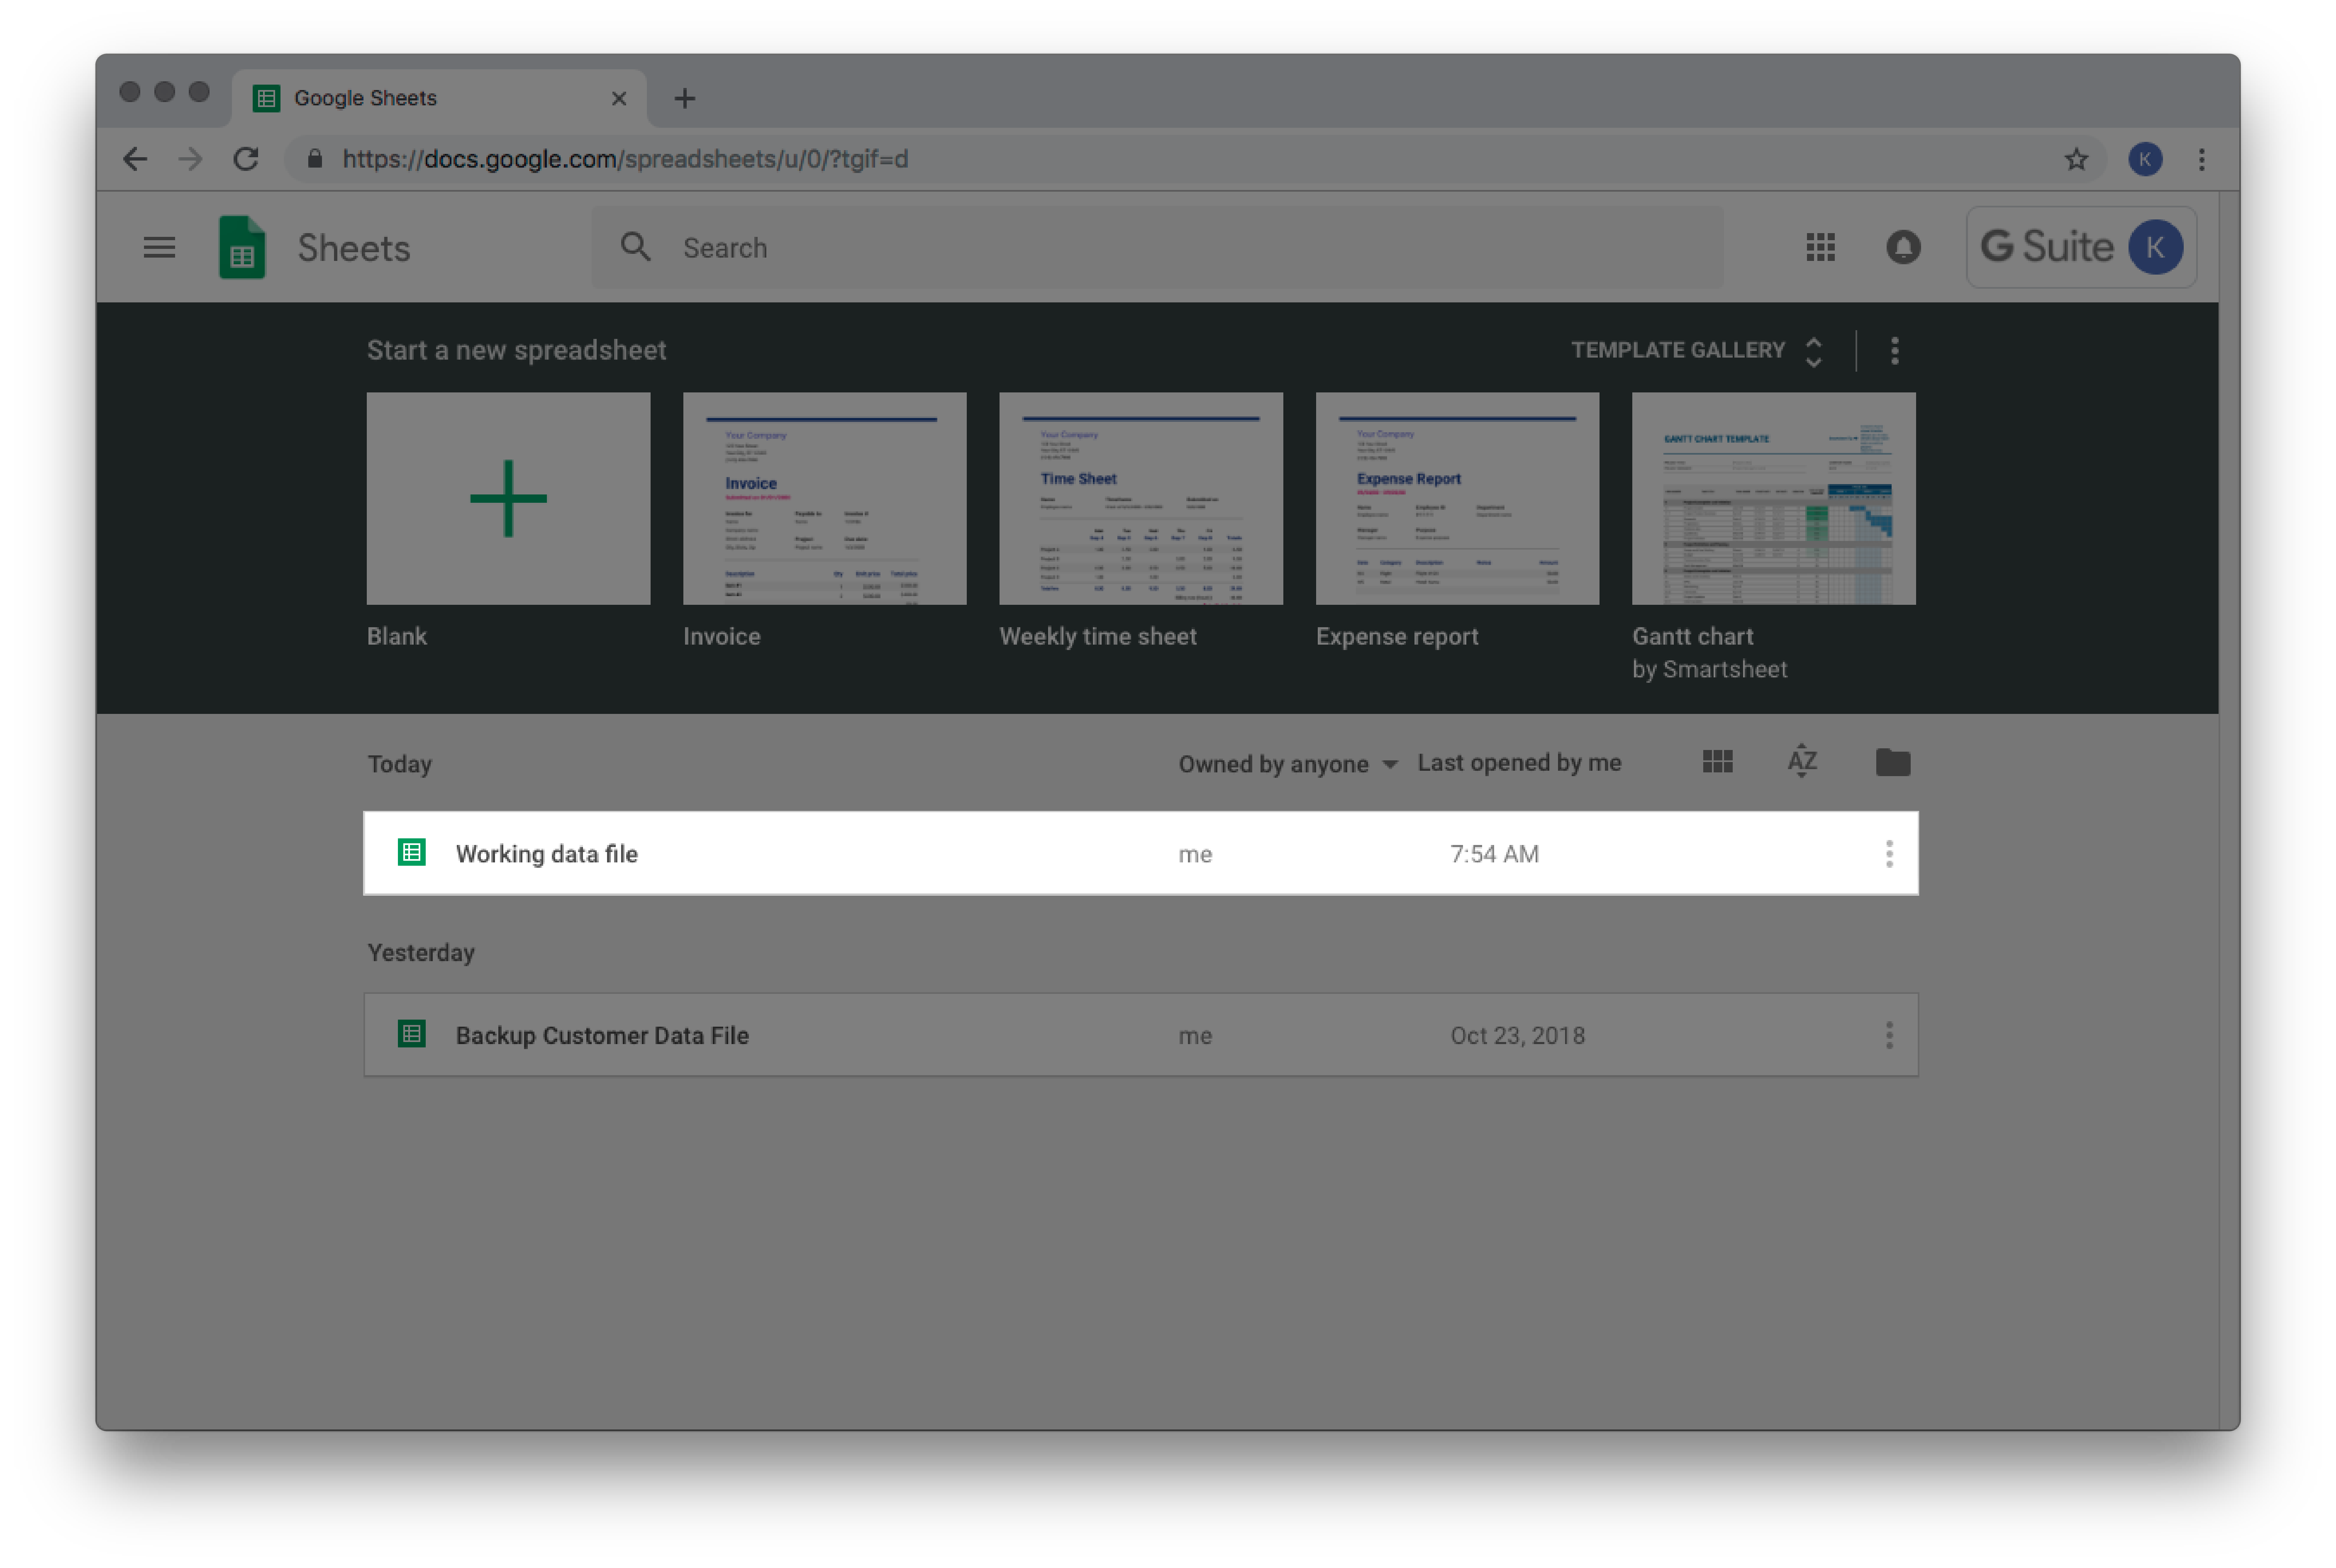
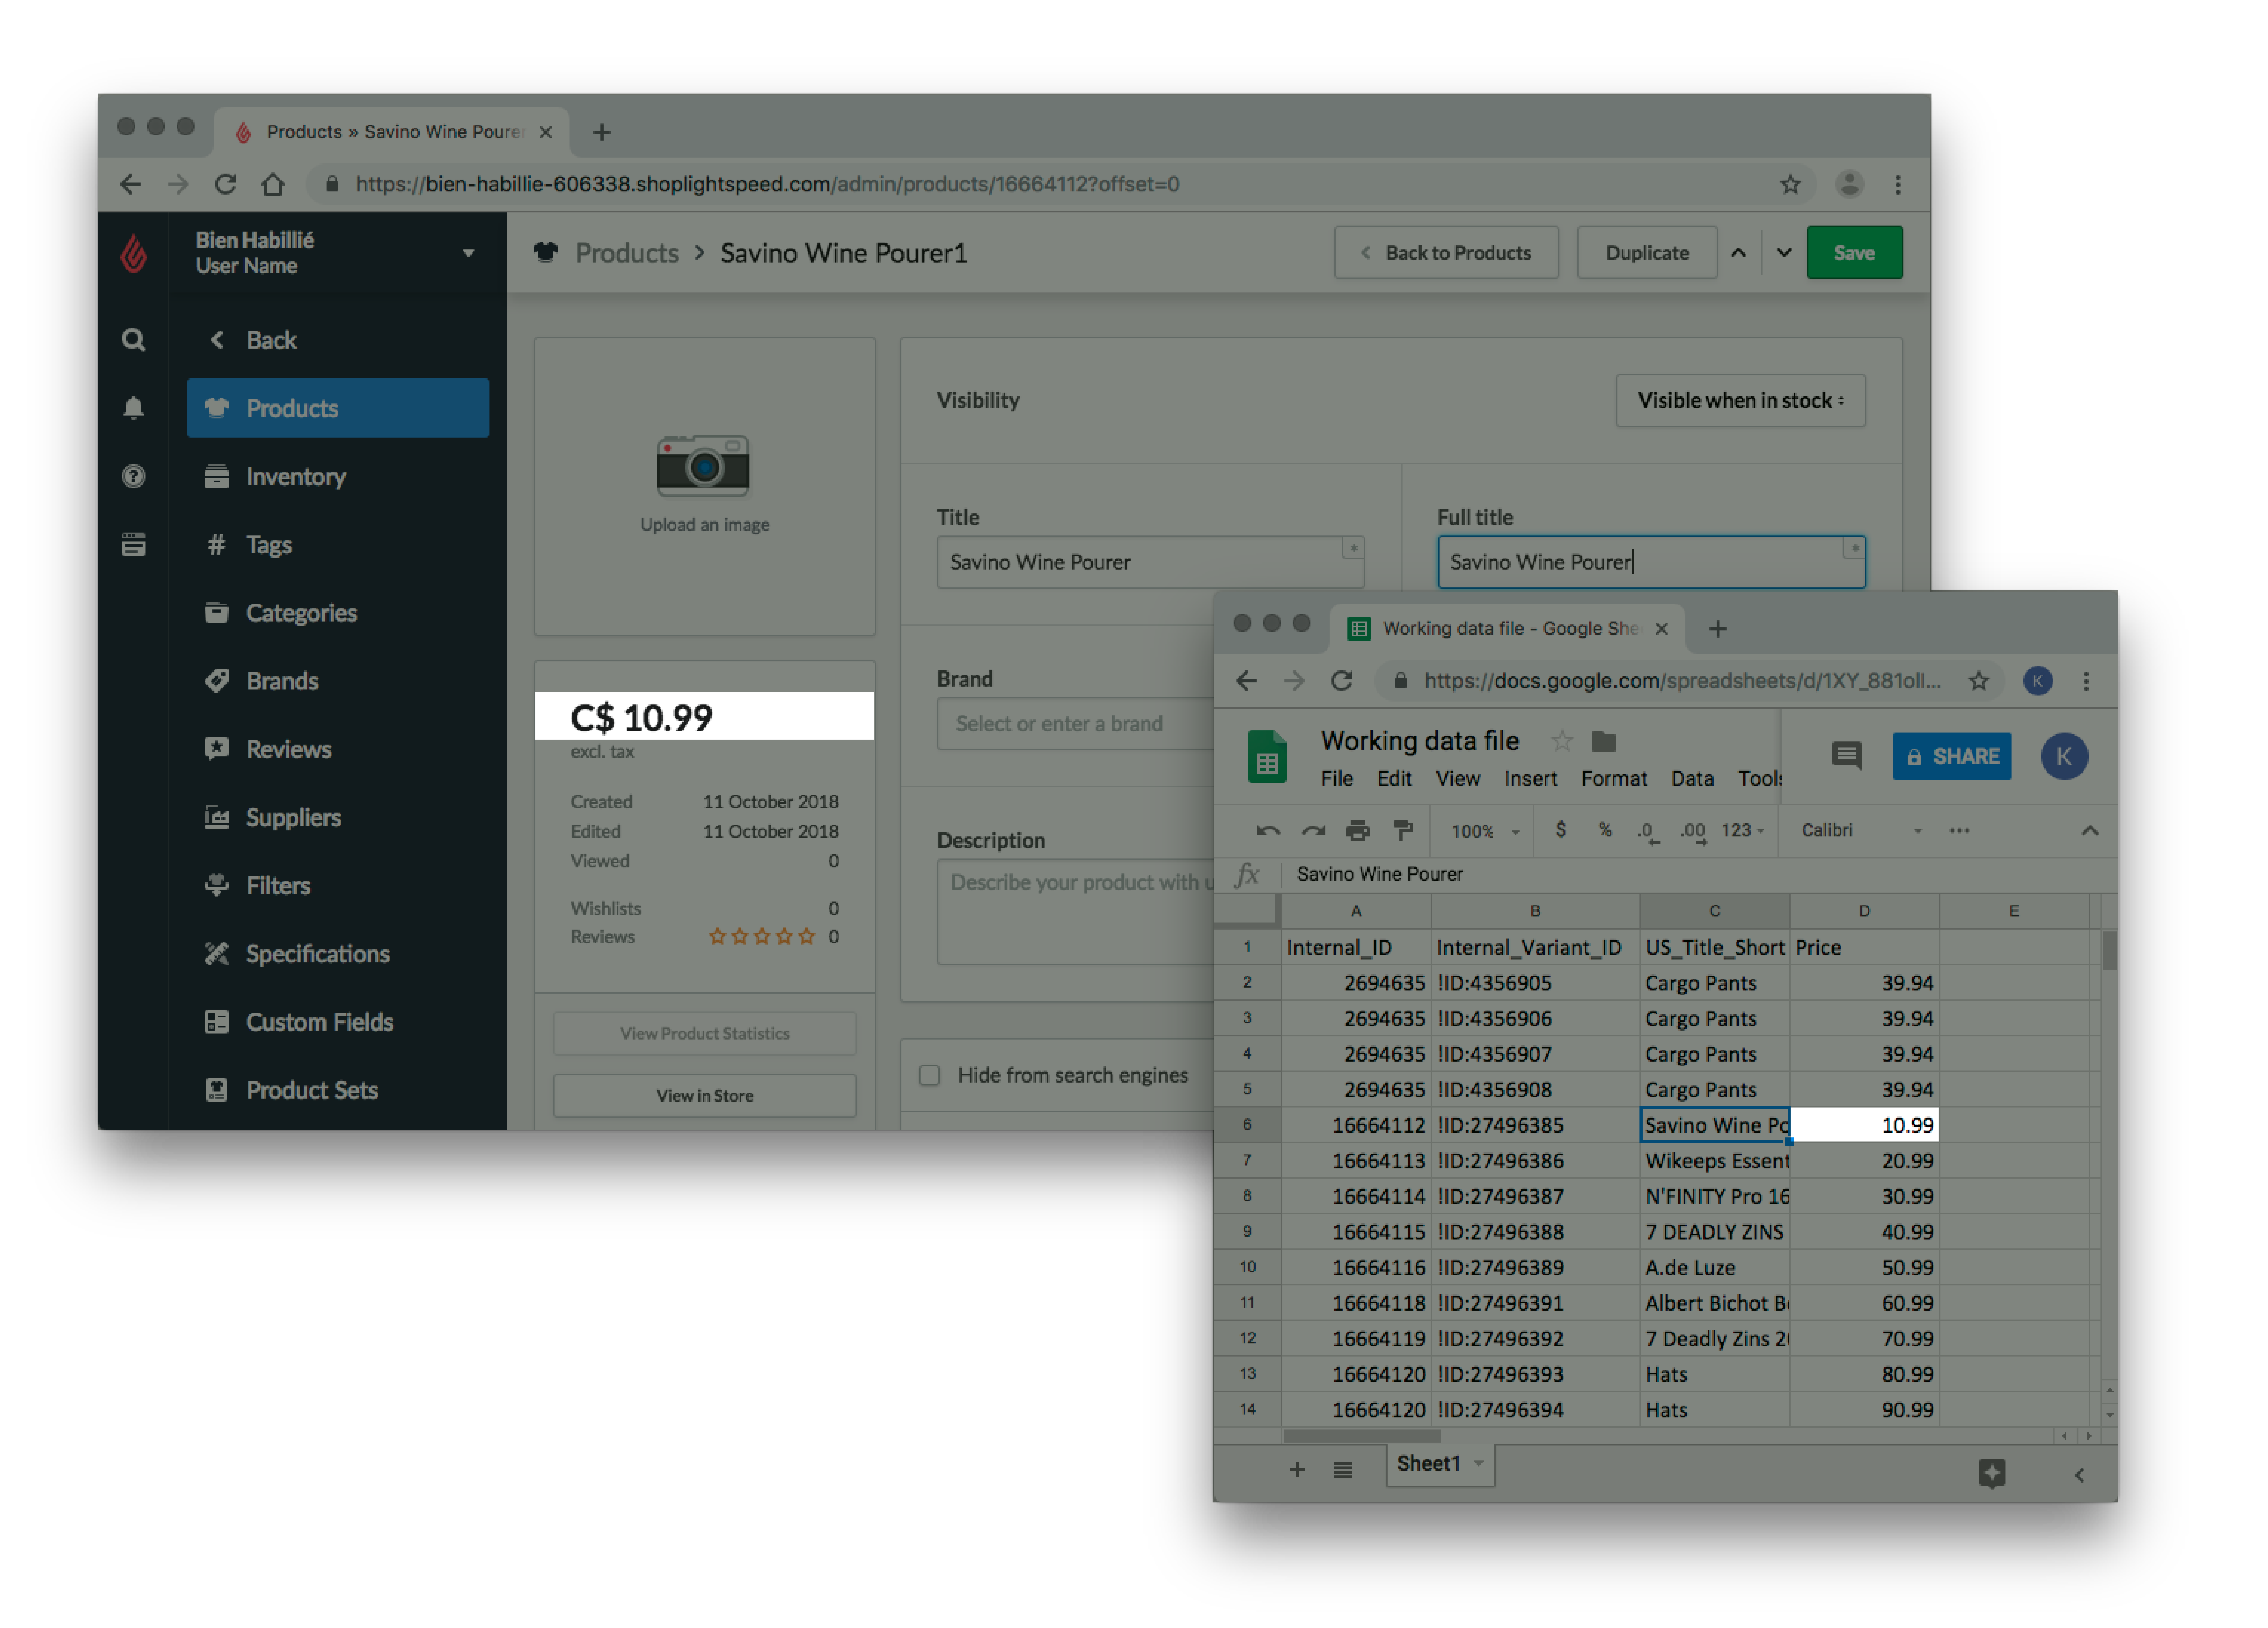
- Select any row at random and copy the product's Internal ID.
- Login to your eCom store's Back Office and select Products.

- Select any product.
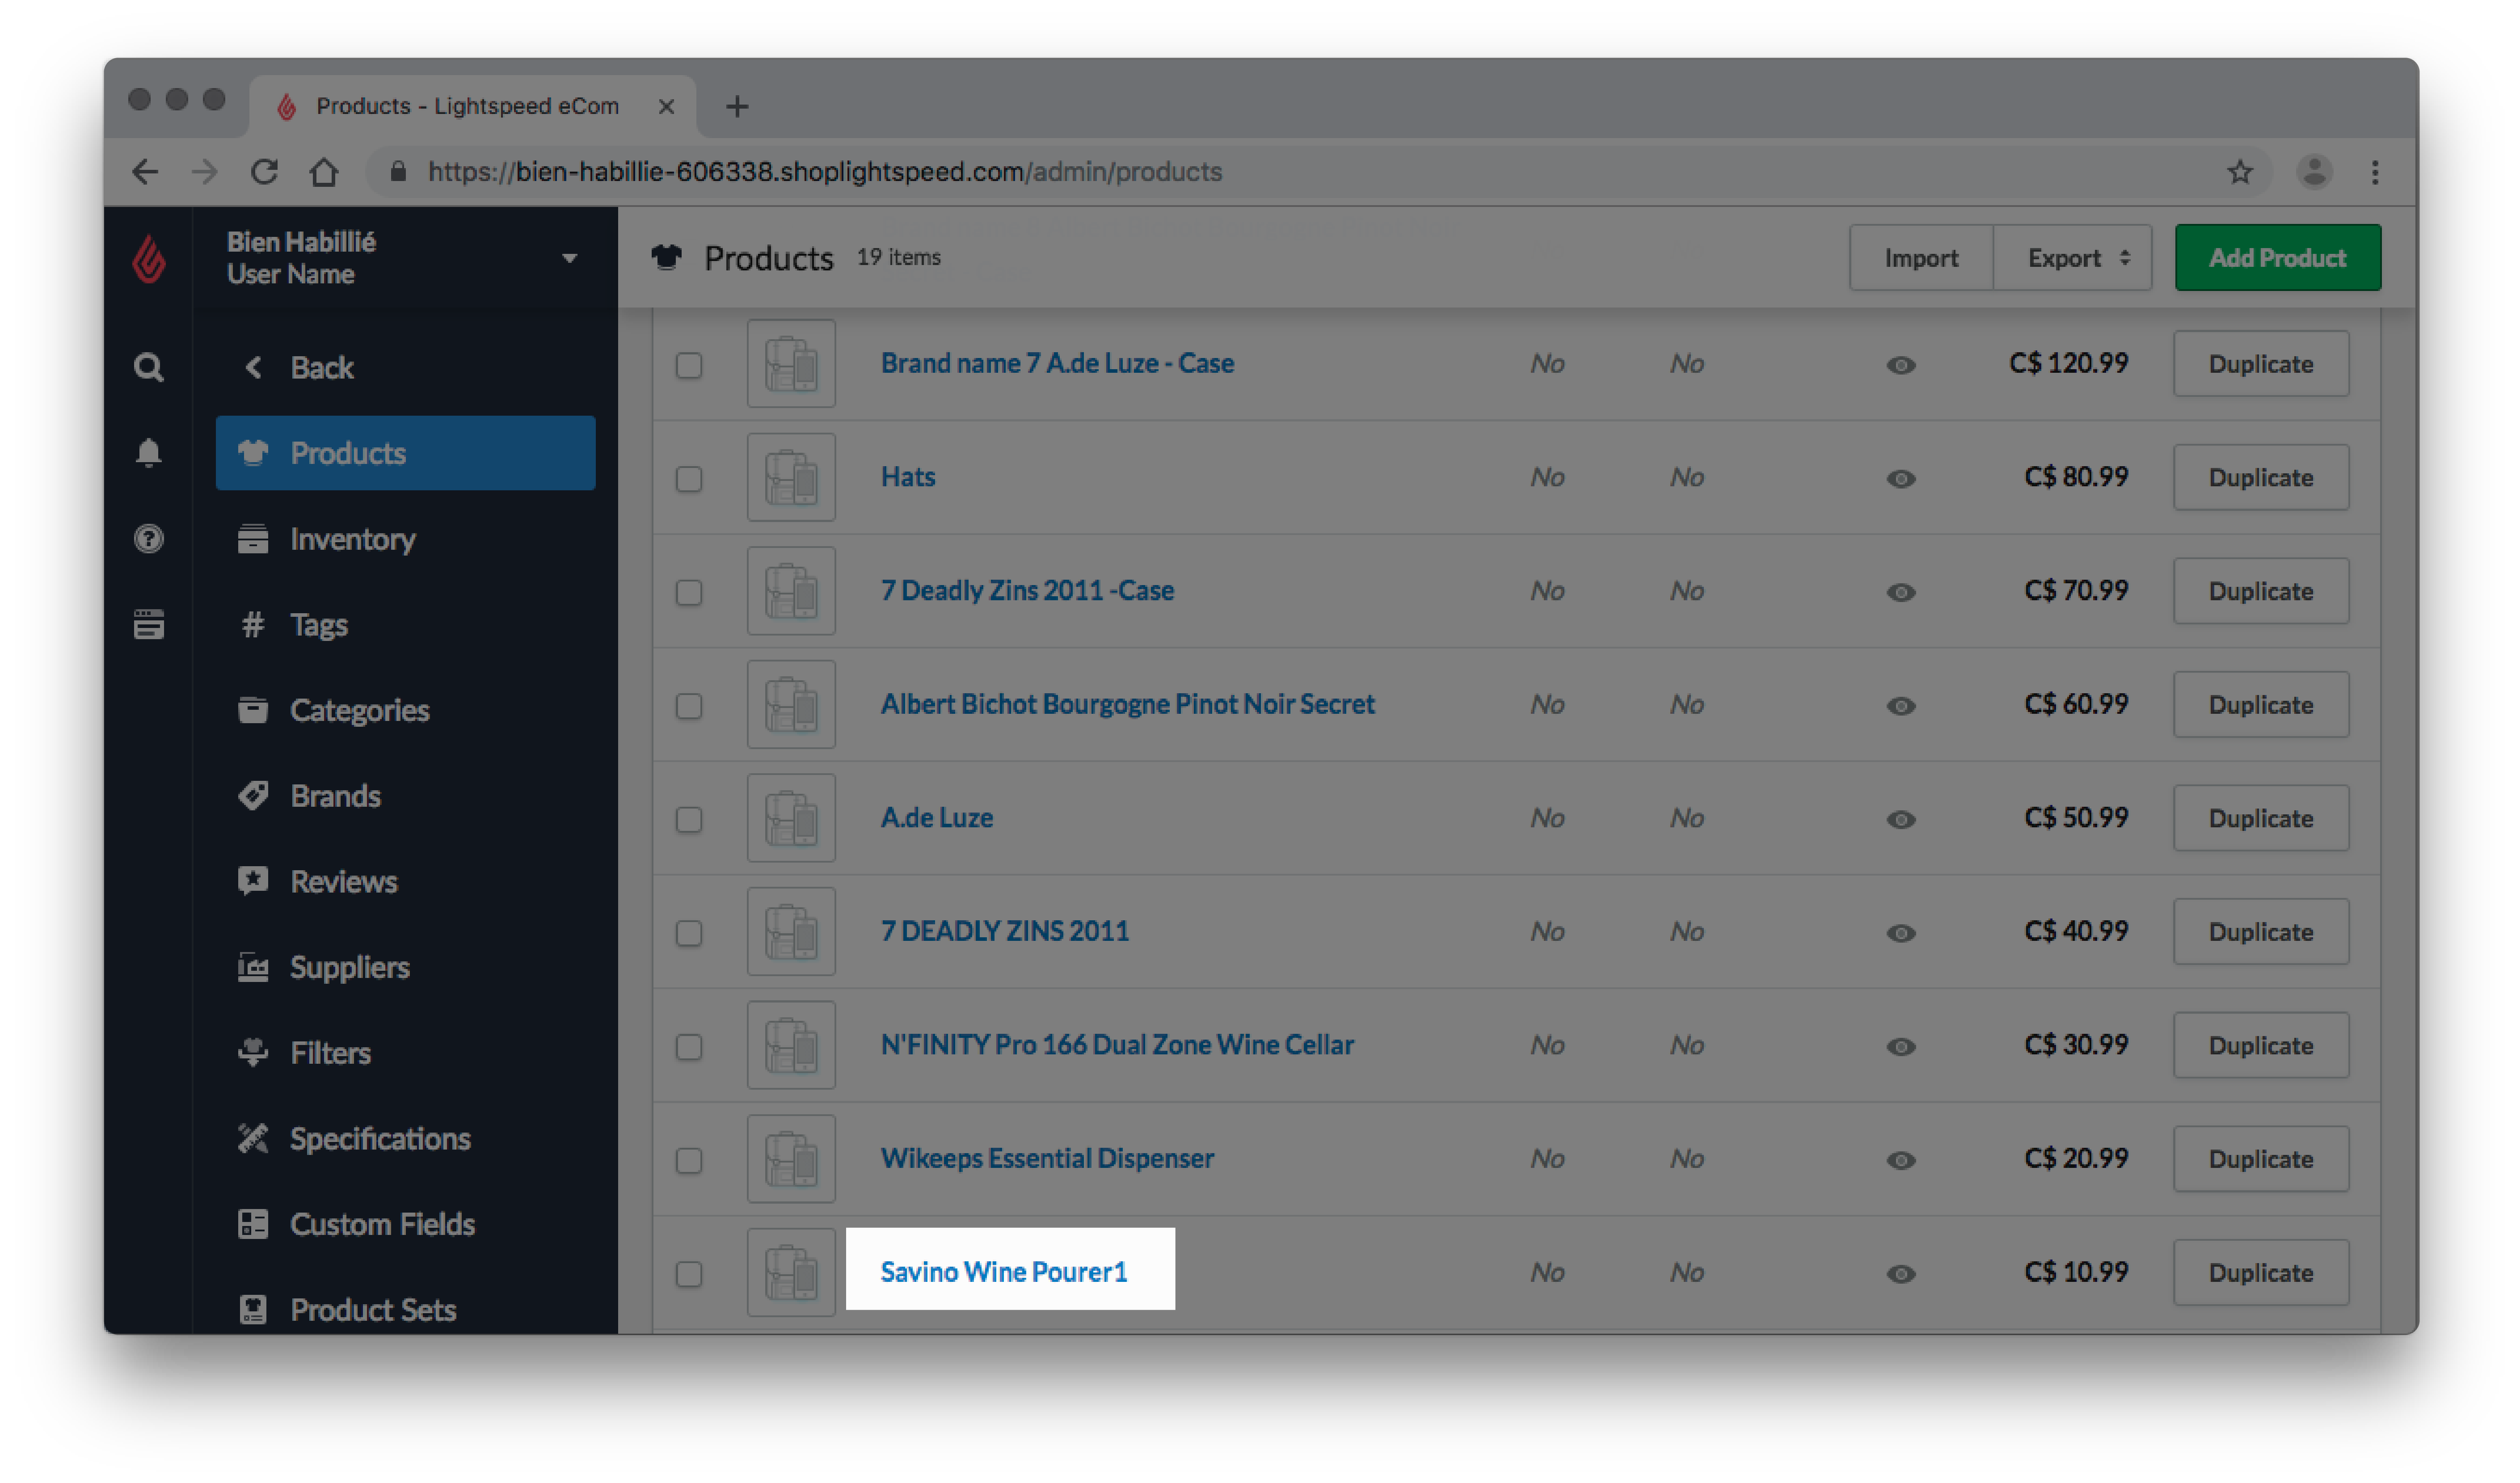
- In the web address bar, replace the number after /admin/products/ with the copied Internal ID and on your keyboard press Enter.
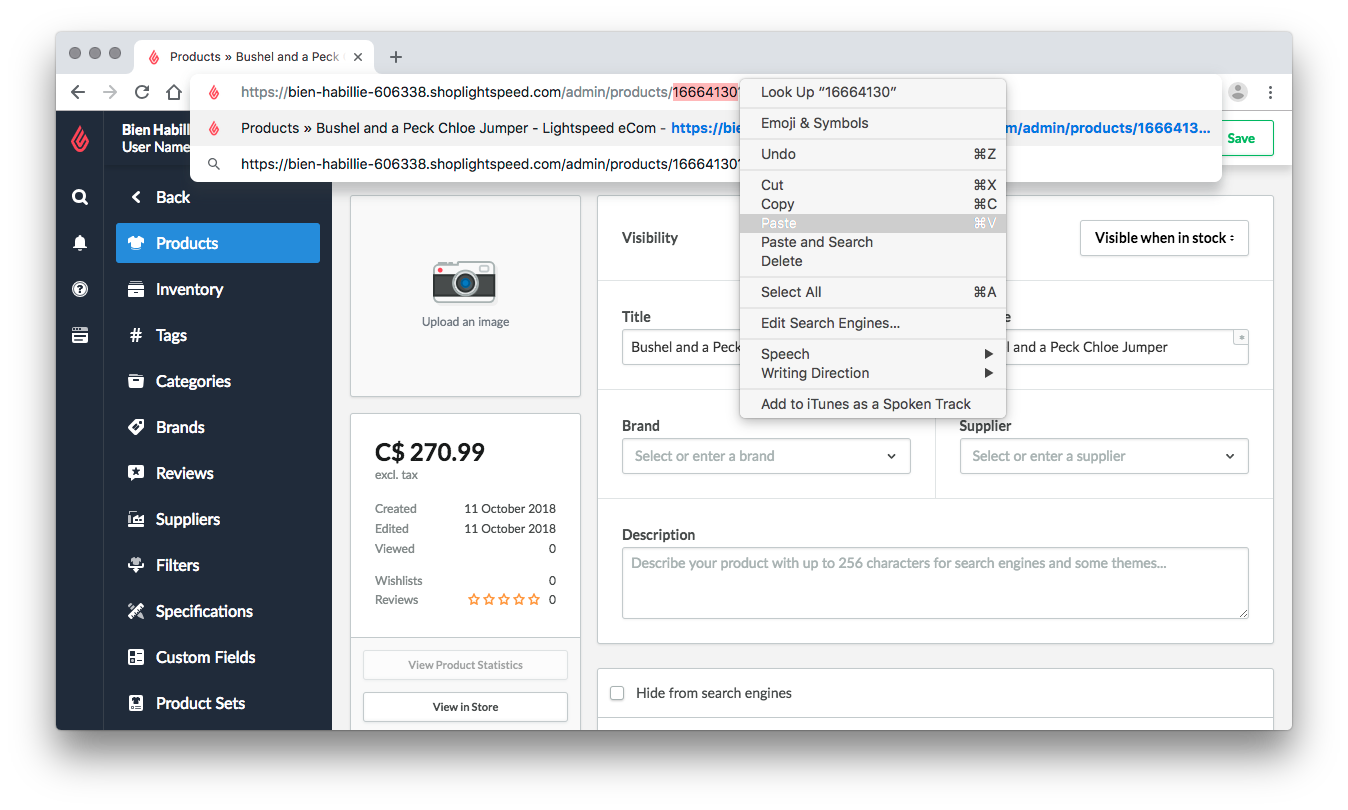
- Compare the product with your worksheet to ensure the changes you made are reflected correctly.
- Repeat steps 1-6 for a couple of products until you're certain all your new products have been correctly imported.
Reference
When preparing your worksheet, there are specifics you should review to ensure your import is successful. To find out the requirements for each column, visit Product column titles. In this reference section, learn about:
Commonly required columns for worksheets
Preparing a worksheet can seem overwhelming. To simplify this process, here are the most important columns you should add to your worksheet file and the reasons why they are important. For more information about each column name, click here. Once you’re comfortable with a basic worksheet, feel free to add other columns to your worksheet using the information in this article.
You can copy the following columns, see below for an explanation on why they are important.
XX_ is used here as a placeholder for language. This will vary according to your shop language(s) For example US_ for English (US) or EN_ for English (UK). Click here for more information.
Internal_ID |
XX_Title_Short |
XX_Title_Long |
XX_Short_Description |
XX_Long_Description |
XX_Variant_Title |
XX_Category_1 |
XX_Category_2 |
XX_Category_3 |
Brand |
Price |
Visible |
Stock_Level |
Weight_Value |
Weight_Unit |
Scroll right --->
When you've prepared your worksheet, learn how to import your file by clicking here.
| Column name | System name | Importance | |
|---|---|---|---|
|
01 |
Product ID |
|
Allows you to add variants. |
| 02 | Title | XX_Title_Short |
Required when importing. |
| 03 | Full title | XX_Title_Long |
|
| 04 | Description | XX_Short_Description |
Used in most themes as a short summary of the product. |
| 05 | Content | XX_Long_Description |
Most themes display the content on the product page. If left blank, the product page can look incomplete. |
| 06 | Variant title | XX_Variant_Title |
When adding variants, allows you to set the title of the variant. |
| 07 | Category 1 Category 2 Category 3 |
XX_Category_1 |
Used for your website's navigation and product organization. Cannot import changes to existing categories. For more information, click here. |
| 08 | Brand | Brand |
Used by most themes for shop navigation, usually a summary page which displays all brands. |
| 09 | Price | Price |
Required when selling products online. |
| 10 | Visibility | Visible |
Controls whether your products are immediately visible on your eCom store. For more information about product visibility, click here. |
| 11 | Inventory level | Stock_Level |
Setting the inventory level can prevent customers from purchasing more products than you have available in stock. |
| 12 | Weight unit | Weight_ValueWeight_Unit |
Setting the weight value and unit is important for shipping methods because shipping is based on weight. If you don't know the exact weight of each product, estimating an approximate weight is preferable to having every product having a weight of 0. |
Tips for columns names in your worksheet
- When creating your worksheet, always include a product title column. This is the only required field when importing new products.
- You should match your worksheet’s column names to the column names in an export. This way, the system will automatically map them to the corresponding fields when you import the worksheet. Otherwise, you will have to manually map your columns. For more information, visit Product column titles.
- You should name your columns according to the title of the column name in an export so that Lightspeed eCom will map each column to a field automatically when you import your worksheet. Otherwise, the import screen will let you manually choose your own column titles when you import your worksheet.
- When using your own column titles, you must make sure to map your columns to the correct fields in eCom. Visit the Suggested mapping when importing column of the product table, here.
- For more information regarding other languages, visit our language table located here.