Authorize.net is available only in the UK, North America, and Australia. For an overview of payment providers available in your country, click here.
Authorize.net is a useful payment provider because it can act as a gateway to other merchant accounts from merchant service providers like Heartland. Authorize.net can also provide both in their all-in-one option.
- A gateway is a service that authorizes payments.
- A merchant account is a bank account that assures you'll get paid when a customer purchases from you.
Setup instructions
- Obtain your Transaction Key and API Login ID from Authorize.net.
- Register for an account with Authorize.net.
- Once you register, Authorize.net will display your Transaction Key and API Login ID. Copy both.
- In eCom on the left menu of the Back Office, click Settings and from Payment Settings click Payment Providers.
- At the top-right corner of the screen, click Add a payment provider and add Authorize.net.
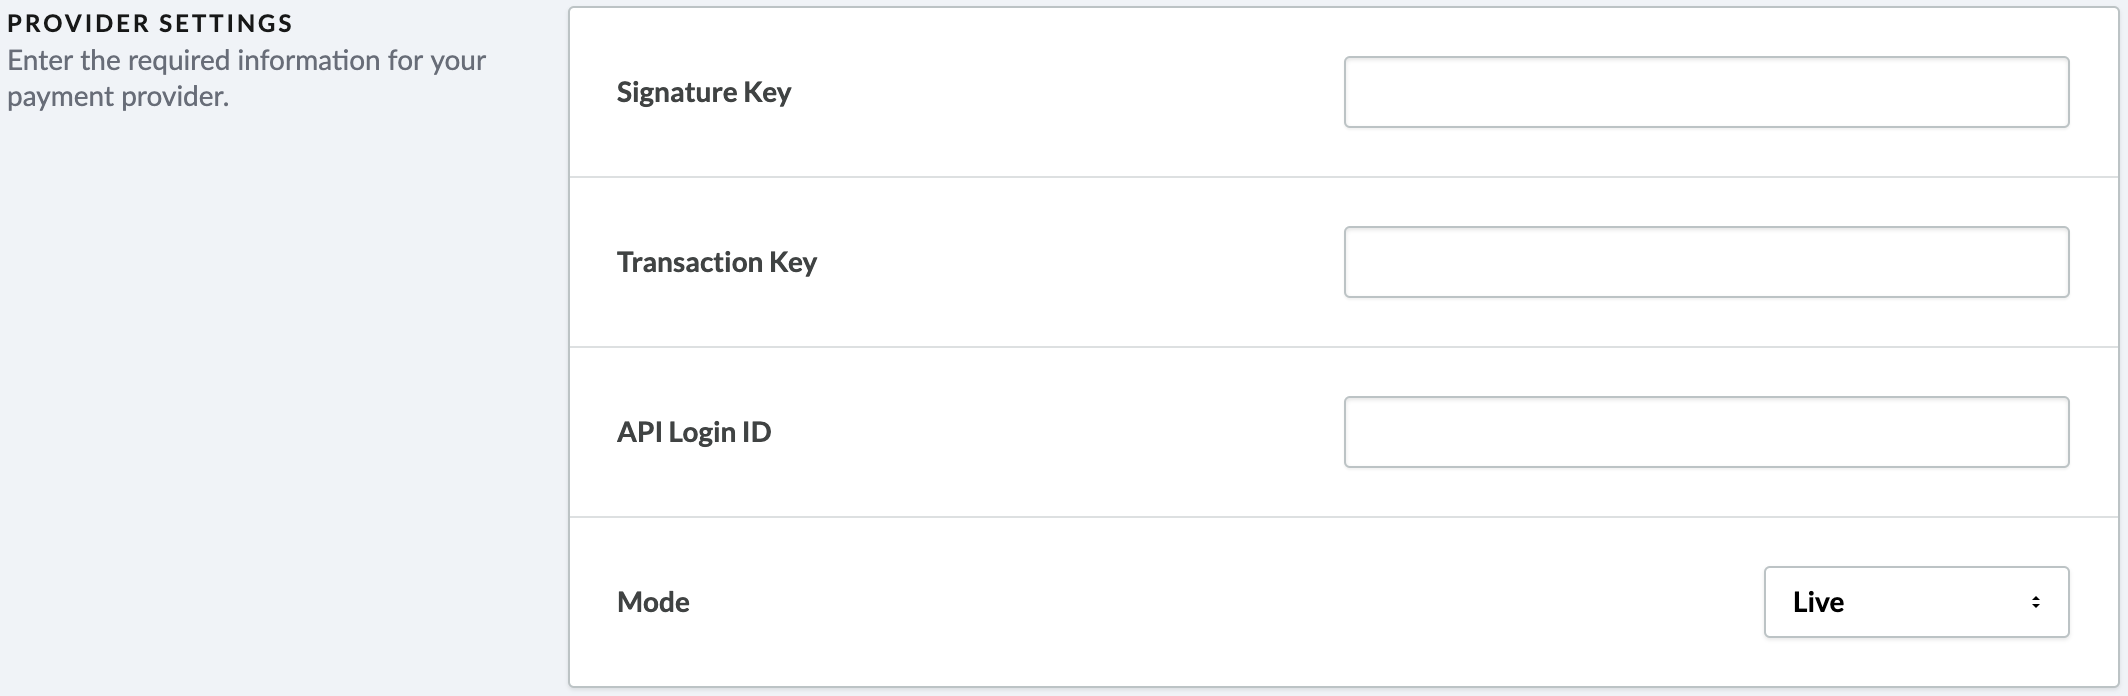
- Paste the Transaction Key and API Login ID into the relevant fields.
- Ensure no extra spaces are pasted along with the credentials by checking for spaces before and after the Transaction Key and API Login ID.
- Click Save.
- Obtain your Signature Key.
- Log into the Merchant Interface at https://account.authorize.net.
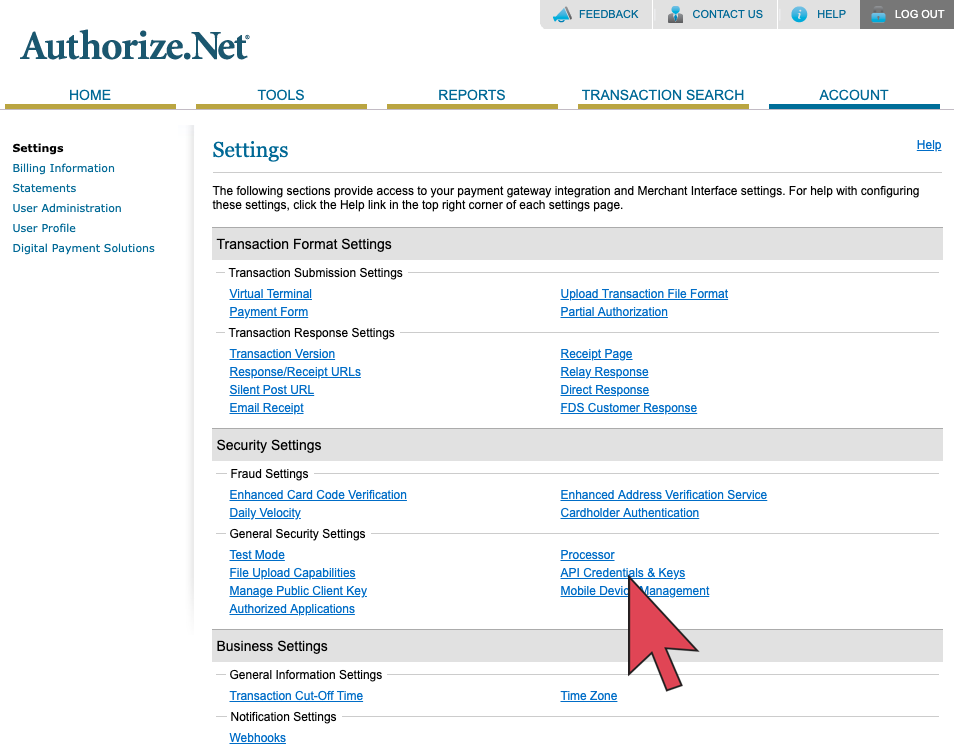
- Click Account from the main toolbar.

- Click API Credentials & Keys.
- Select New Signature Key.
- Enable the checkbox labeled Disable Old Signature Key Immediately.
- Click Submit.
- Request and enter PIN for verification.
- Your new Signature Key is displayed. Click Copy to clipboard.
- Paste this signature inside Lightspeed eCom.
- In your eCom Back Office, click Settings from the main menu on the left-hand side of the screen.
- Click Payment Providers from inside the column titled Payment settings.
- Click Authorize.net.
- Paste the key in the field labeled Signature key.
- Ensure no extra spaces are pasted along with the credentials by checking for spaces before and after the Signature key.
- Delete any content in the field labeled MD5 Hash, if this field is visible.
- Click Save.
- Add a Relay Response URL.
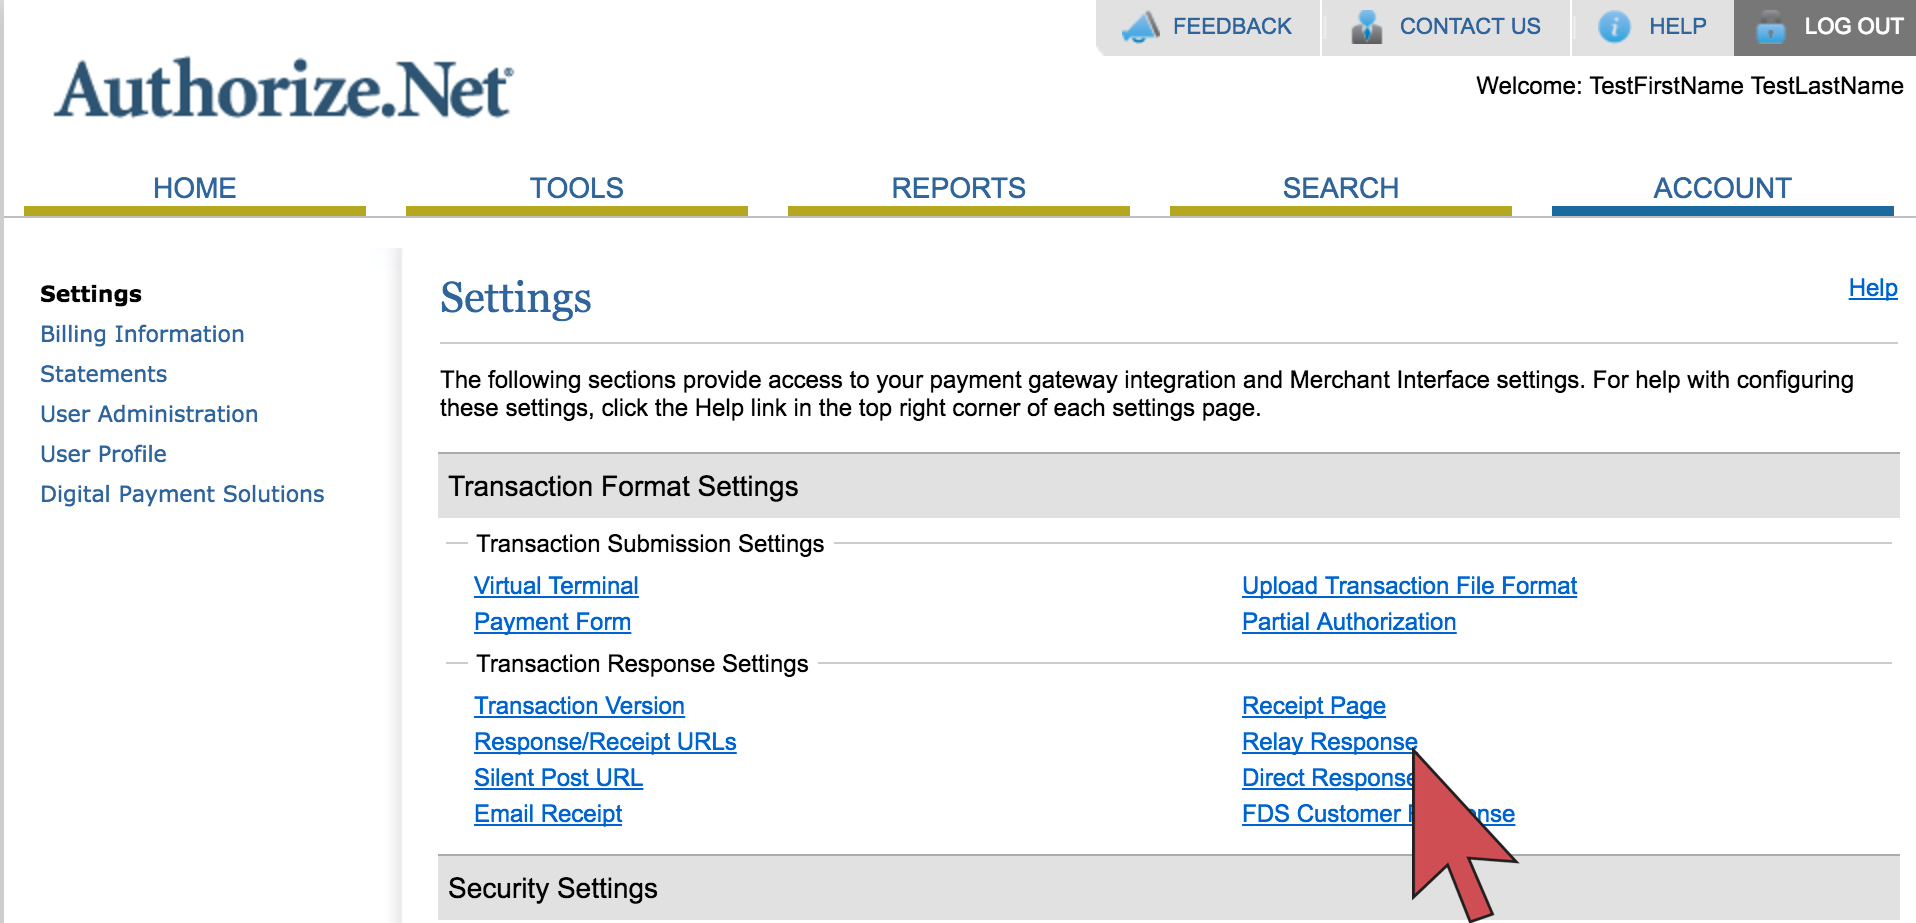
- Log in to your Authorize.net account and click Account.
- Click Relay Response.
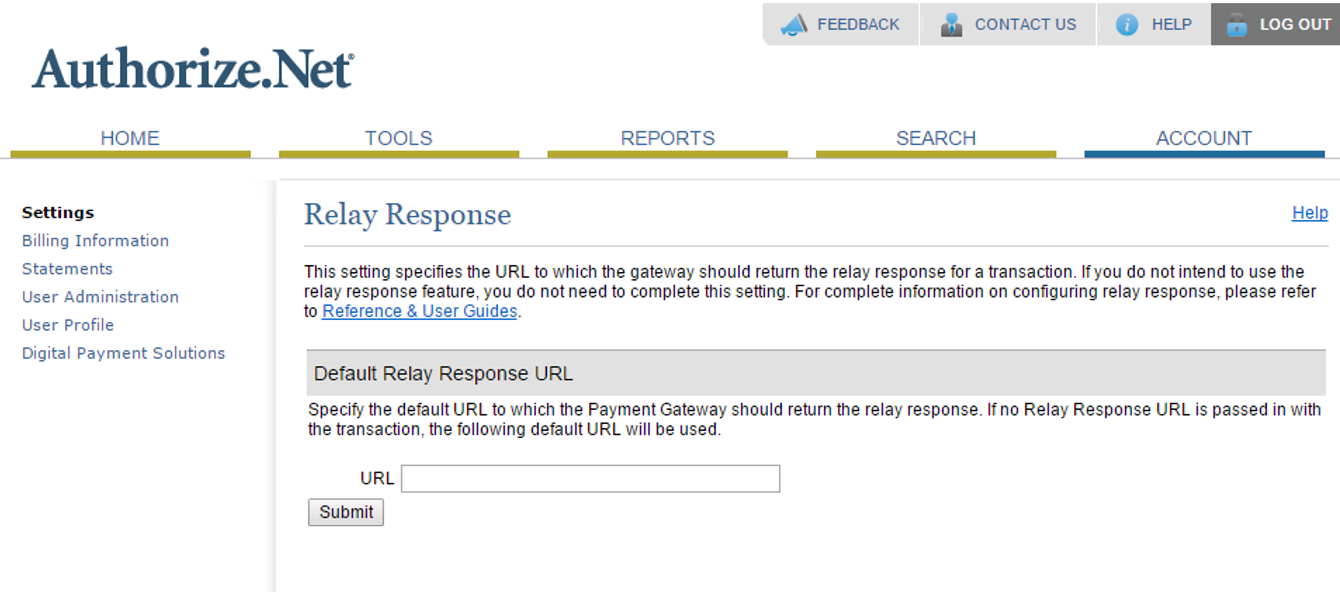
- In the URL field enter your web address starting with https://.
For example, if your web address is www.example.com, enter:https://www.example.com. - Click Submit.
- Manually configure card code verification (CCV).
- Log in to your Authorize.net account and go to Account > Settings > Payment Form > Form Fields.
- Enable both the View and Edit options next to Card Code.
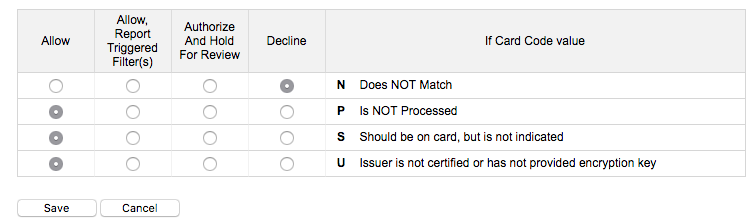
- Then, go to Account > Settings > Card Code Verification.
- This page allows you to specify how invalid responses are handled during card code validation. You can keep the default settings or modify them to your preferences.
-
Test the Authorize.net integration without processing payments.
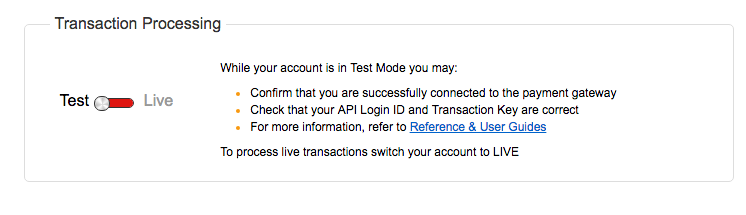
- Log into your Authorize.net account and go to Account > Test Mode.
- Toggle the switch labeled Transaction Processing to Test.
- In the eCom Back Office > Settings > Payment providers > Authorize.net, switch the dropdown box labeled Mode to Test.
- Select which card types you'll accept, and configure the other payment information.
- Toggle Activate this payment provider to on.

-
Click Save.
-
Create a test transaction in your eCom store by buying something from as if you were a customer. Complete the checkout process by entering your address information, selecting any shipping method, choosing Authorize.net as the payment method, confirming your order, and clicking Buy.
-
Your test is successful if you are redirected to an Authorize.net form asking you to enter your credit card details. It means that the Transaction Key, API Login ID, and the Signature key are correct. Your test is unsuccessful if you see an error screen. See the troubleshooting section here for more information.
- Ensure the Authorize.net integration and transaction processing settings are set to live.
- Log into your Authorize.net account and go to Account > Test Mode.
- Toggle the switch labeled Transaction Processing to Live.
- In the eCom Back Office > Settings > Payment providers > Authorize.net, switch the dropdown box labeled Mode to Live.
- Click Save.
- Your setup is complete. Authorize.net is now ready to process live transactions.
Troubleshooting
Orders marked as paid without a captured payment
Using the fraud filter action Do not authorize and hold for review in Authorize.net can cause your orders in eCom to be marked as Paid, even through they are not authorized in your merchant interface. This can be prevented by selecting an alternative filter action or disabling the specific fraud filter.
- Open the Authorize.net merchant interface.
- Under Tools, select Fraud Detection Suite.
- Open the first fraud setting that has Review in the Configuration column.
- Under Filter Actions, select any other action. Or disable the filter at the top of the screen by deselecting Enable Filter.
- Select Save.
- Repeat for any other fraud settings marked with Review in the Configuration column.
Error after completing checkout
Receiving an error after completing checkout is usually caused by an issue with your credentials in the eCom admin or fraud filters in Authorize.net.
Blank spaces in copied credentials
Almost always, the cause of errors is blank spaces before or after the API Login ID, Transaction key, or Signature key.
- In the eCom Back Office, click Settings > Payment providers > Authorize.net.
- Check for blank spaces in the Authorize.net credentials. They are very easy to miss, so it is recommended you deliberately check each field by adding your cursor before and after the API Login ID, Transaction key, and the Signature key.
- If a space is found, delete it and test Authorize.net again using the instructions in Step 4 above.
Incorrect credentials
It is also possible that the API Login ID, Transaction Key, or Signature Key is entered incorrectly. You can verify your API Login ID and request the new Transaction Key and Signature key by following the setup steps above for obtaining a Signature Key.
- To obtain a new Signature Key, follow the steps located here.
- While following the process you can verify your API Login ID on the API Credentials & Keys screen.
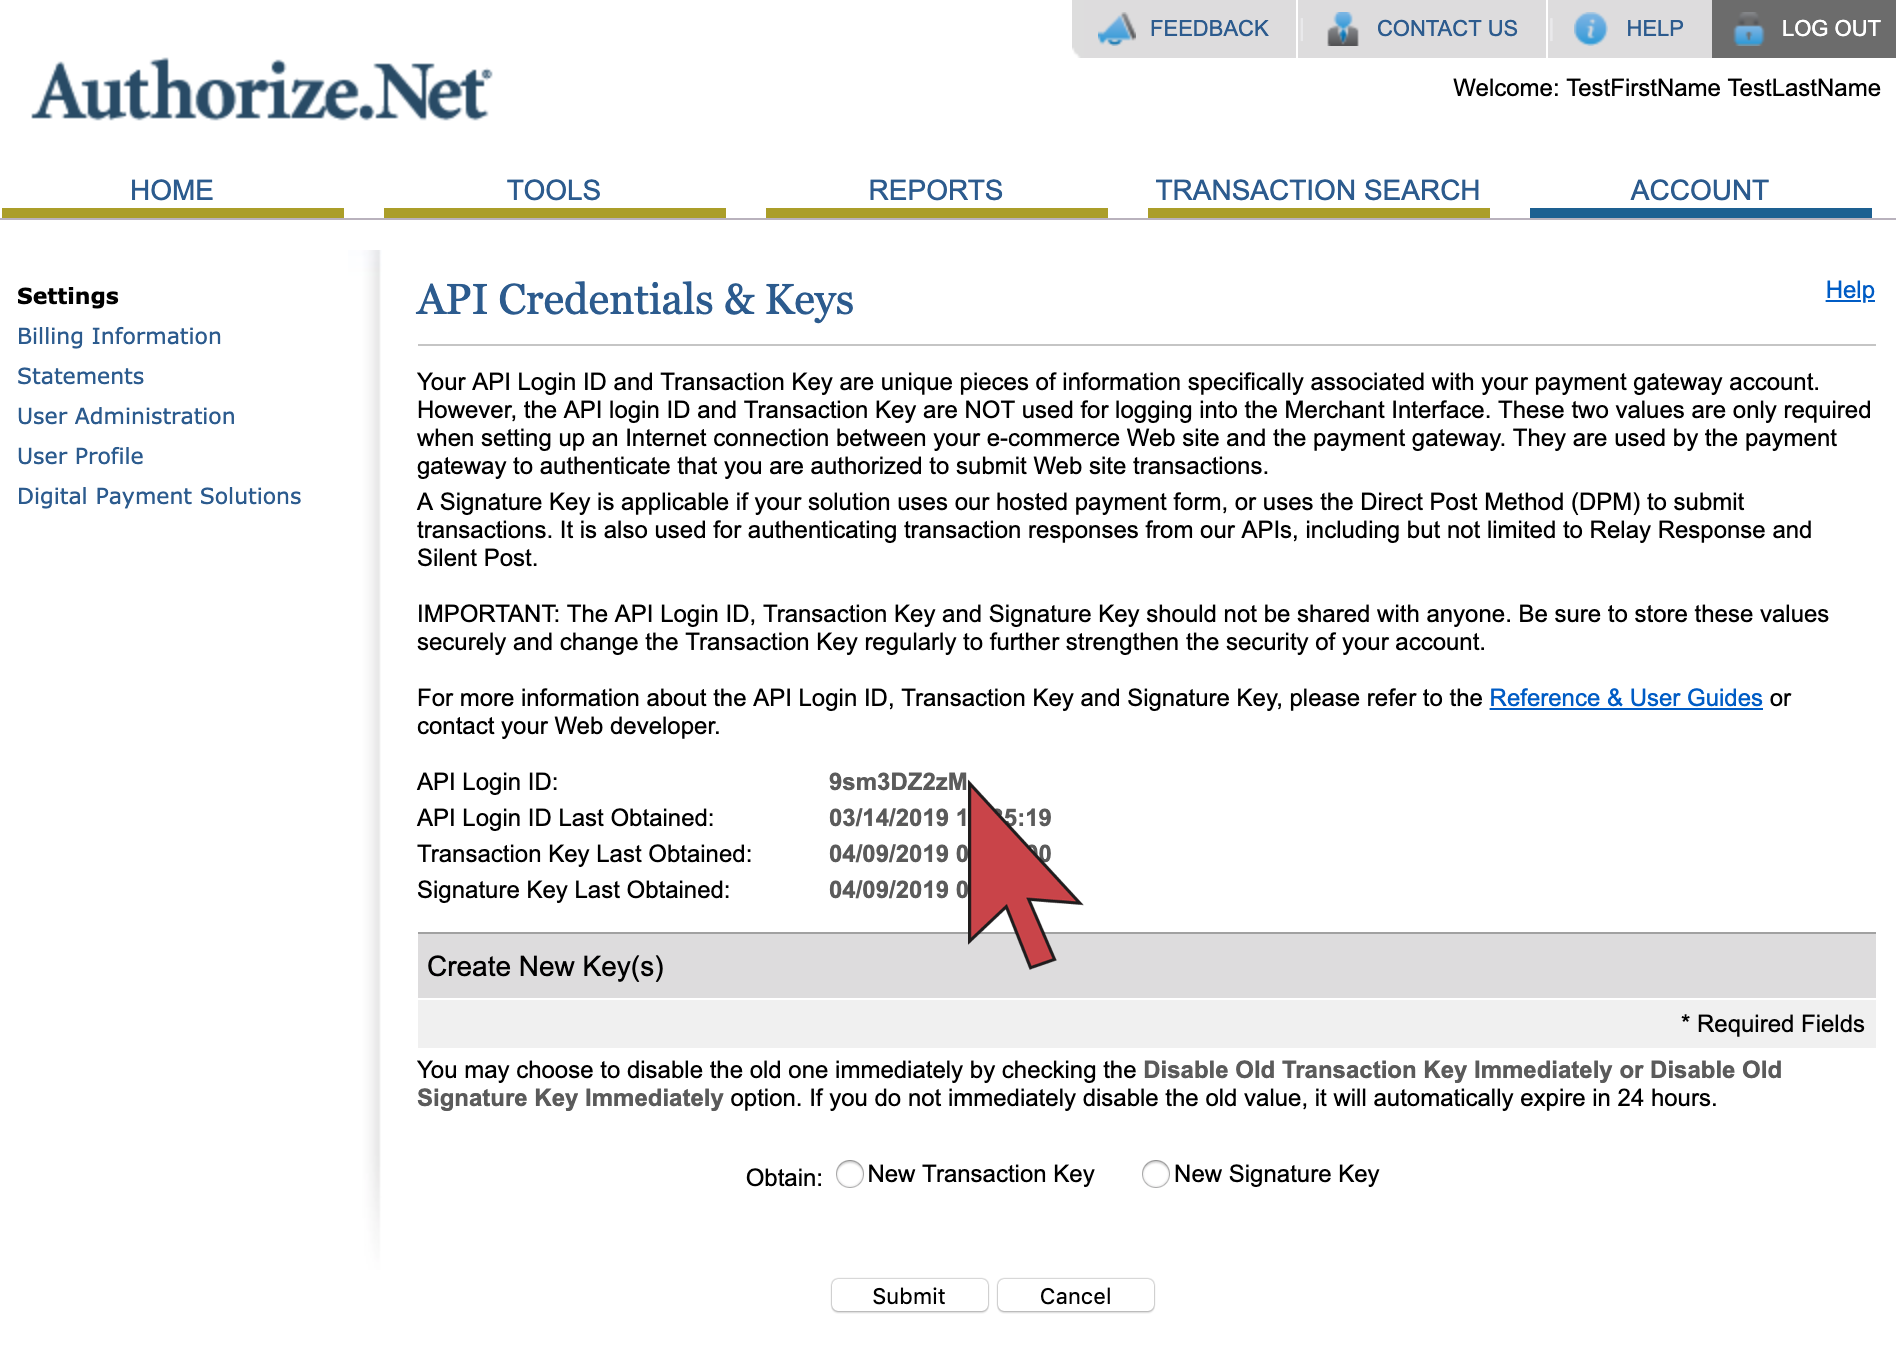
- During the process, in order to obtain the Transaction Key, select New Transaction Key instead. Remember to enable the checkbox to Disable old Transaction key/Signature key immediately.
- Once you've added your new credentials, check for spaces, then test Authorize.net again using step 4 in the above setup instructions.
Incompatible Fraud Filters
The eCommerce fraud settings in Authorize.net related to IP filtering should be disabled to prevent the payment from being declined. Authorize.net does not support the kind of IP addresses used by Lightspeed. Lightspeed is using IPV6 whereas Authorize.net uses IPV4.
- Open the Authorize.net merchant interface.
- Under Tools, select Fraud Detection Suite.
- Under E-Commerce Settings, open IP-Shipping Address Mismatch Filter.
- Disable it by deselecting the Enable filter checkbox. Select Save.
- Repeat for the Regional IP Address Filter.