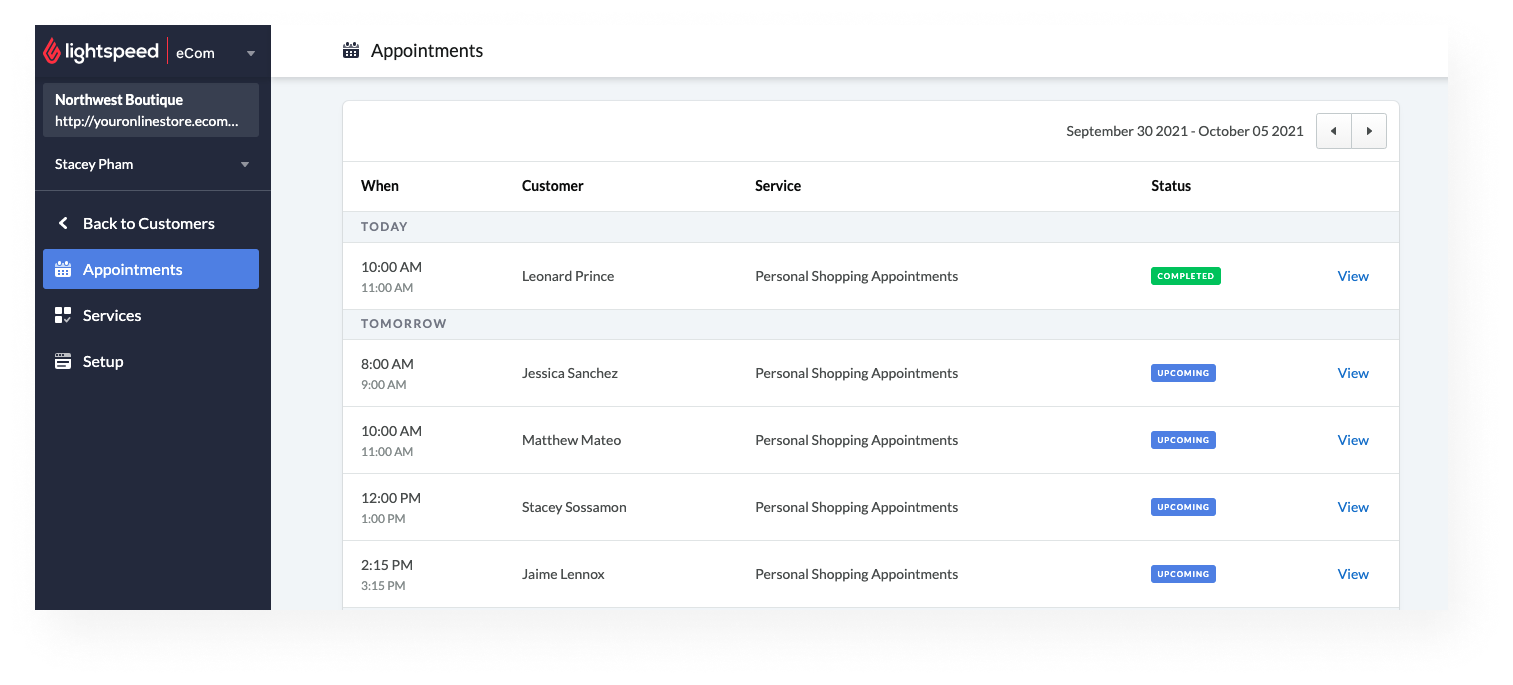
It's important to keep track of your booked appointments to avoid any miscommunication with your customers. Lightspeed eCom makes it easy to manage appointments directly from your back office.
 Viewing Appointment Details
Appointment details include the customer’s phone number, email address, the date and time of the appointment, and optional notes. After a customer books an appointment you can view these appointment details in your eCom back office.
- In your eCom back office, select Customers.
- Select Appointments. eCom lists booked appointments by date. You can view up to 100 appointments per page.
- Use the arrows to switch between date ranges and locate the relevant appointment. Click View.
Only the customer’s name, phone number, and email address are required to book an appointment. If you want customers to submit additional information in the notes section, add directions to your shopping service description.
Messaging Customers
If you need to contact a customer about a booked appointment, you can email them directly from your eCom back office. This is a convenient, efficient way to stay in touch with your customers about their appointments and any changes that may occur.
- In your eCom back office, select Customers.
- Select Appointments. Locate the relevant appointment and click View.
- In the Appointment details panel, select Messages.
- In the CUSTOMER MESSAGING box, type your message. Click Send email.
Your back office message appears as an email in your customer’s inbox. Your sent messages are then saved in your eCom back office and permanently associated with your customer’s email address. If your customer uses the same email to schedule a different appointment, back office will import any previously sent messages. Your customer’s responses appear in your email inbox.