- Create your discount rule.
- Go to the Discount Rules page (Marketing > Discounts > Discount Rules).
- In the grid, click Edit to the right of the discount rule you want to set up. The configuration settings for the rule display.
- Under DISCOUNT RULES, configure the following:
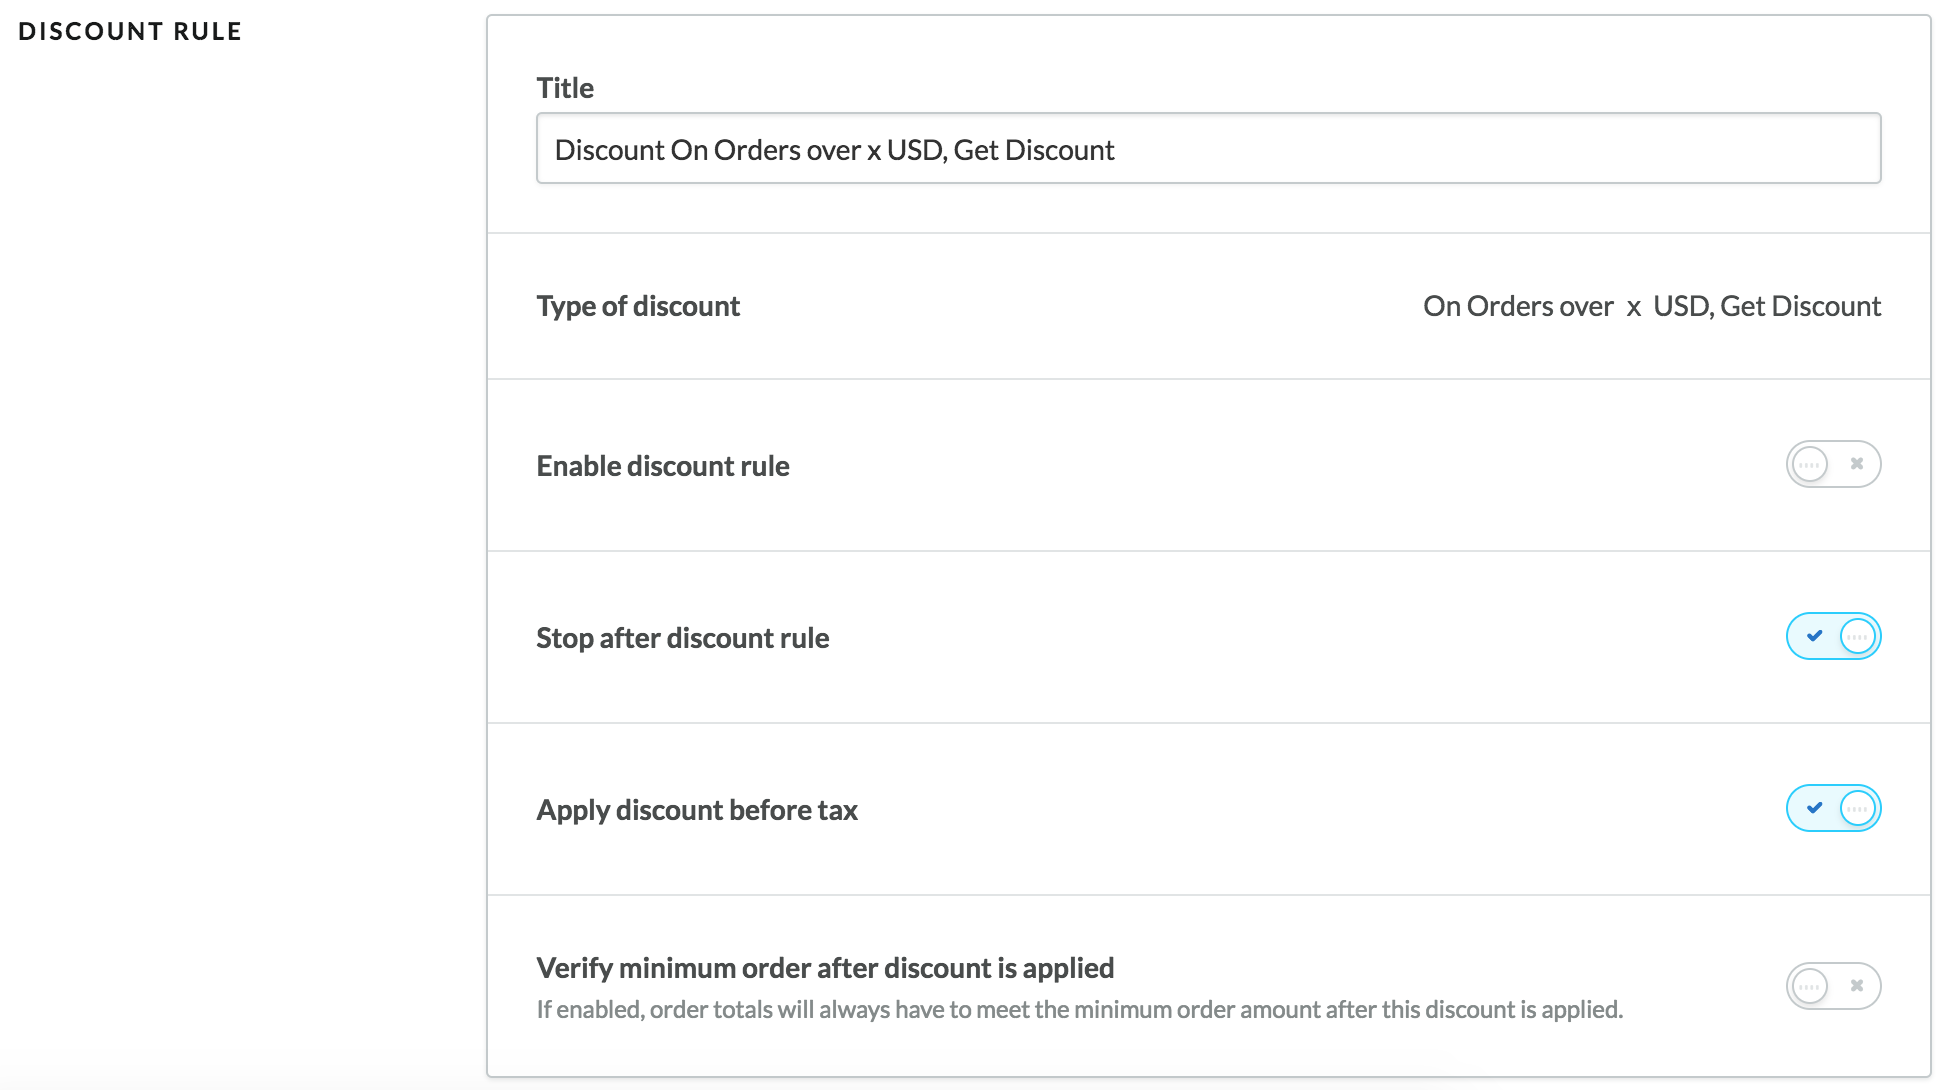
- Title – Edit the discount rule's name, if desired. This is the name you specified when creating the rule.
- Type of discount – The discount type you selected when creating the rule. The type CANNOT be changed.
- Enable discount rule – Activate the discount rule. It becomes active in your online store immediately.
- Stop after this rule (enabled by default) – This setting allows you to control how Lightspeed eCom treats rules that overlap. For more information, see Understanding the Stop after this rule setting.
- Apply discount before tax (enabled by default) - This setting is only available for tax-exclusive stores—for example, merchants from the US and Canada or some business-to-business (B2B) merchants. It allows tax-exclusive merchants to specify whether or not to have the discount (amount or percentage) applied on the original purchase price of products (before taxes are added), or after all applicable taxes have been calculated. By default, this toggle is set to apply the discount before taxes.
- Verify minimum order after discount is applied - If you enable this option, Lightspeed eCom takes the discount into consideration when assessing whether or not a customer's order meets the minimum order amount you set. For example, if you offer a 5$ discount on a minimum spend of 25$, and you enable this option, a customer will be required to place an order of 30$ or more to qualify for the discount, since the minimum order amount is determined after the discount applied.
- Under CONFIGURATION, specify the minimum amount that customers have to spend on an order to qualify for the discount. For example, enter 100 for orders at or over 100$. In the second input field, enter the discount to apply. Use the drop-down menu to specify an amount or percentage; for example, if you enter 10 the discount can be either 10$ or 10%.

- Under the USAGE and DATES areas, configure the following general options for the rule:

- Usage –Specify how many times the discount rule may be applied: either indefinitely, or a set number of times.
- Times Used - This counter shows you how often the discount rule was applied (to date). You can reset the counter by clicking Reset.
- Set period for this discount rule – Set this toggle to on and specify start and end dates if you want this discount rule to be available for a limited time; for example, for seasonal discounts. The time period expires on the selected date at 11:59PM (23:59). For more information about synchronizing discount expiry, click here.

- Click Save.
Set up a discount rule for "On Orders over x $, Get Discount"
Not yet followed by anyone


