You can allow customers to see the in-store availability of products and variants by adding code to your theme. This feature has already been added for Lightspeed owned themes like Ignite.
- Edit your theme's code.
- In the Pages section, select product.rain.
- Paste this snippet below the Availability label or wherever you prefer the element to appear.
{% if theme.inventory_per_location and theme.inventory_per_location != 'disabled' and product.stock.track %}
<table>
<tr class="omni-location-inventory">
    <td>{{ 'Available in store' | t }}:</td>
    <td class="product-inventory-location-label" id="productLocationInventory">{{ 'Check availability' | t }}</td>
  </tr>
</table>
  {% include 'blocks/omni-location-inventory.rain' %}
{% endif %}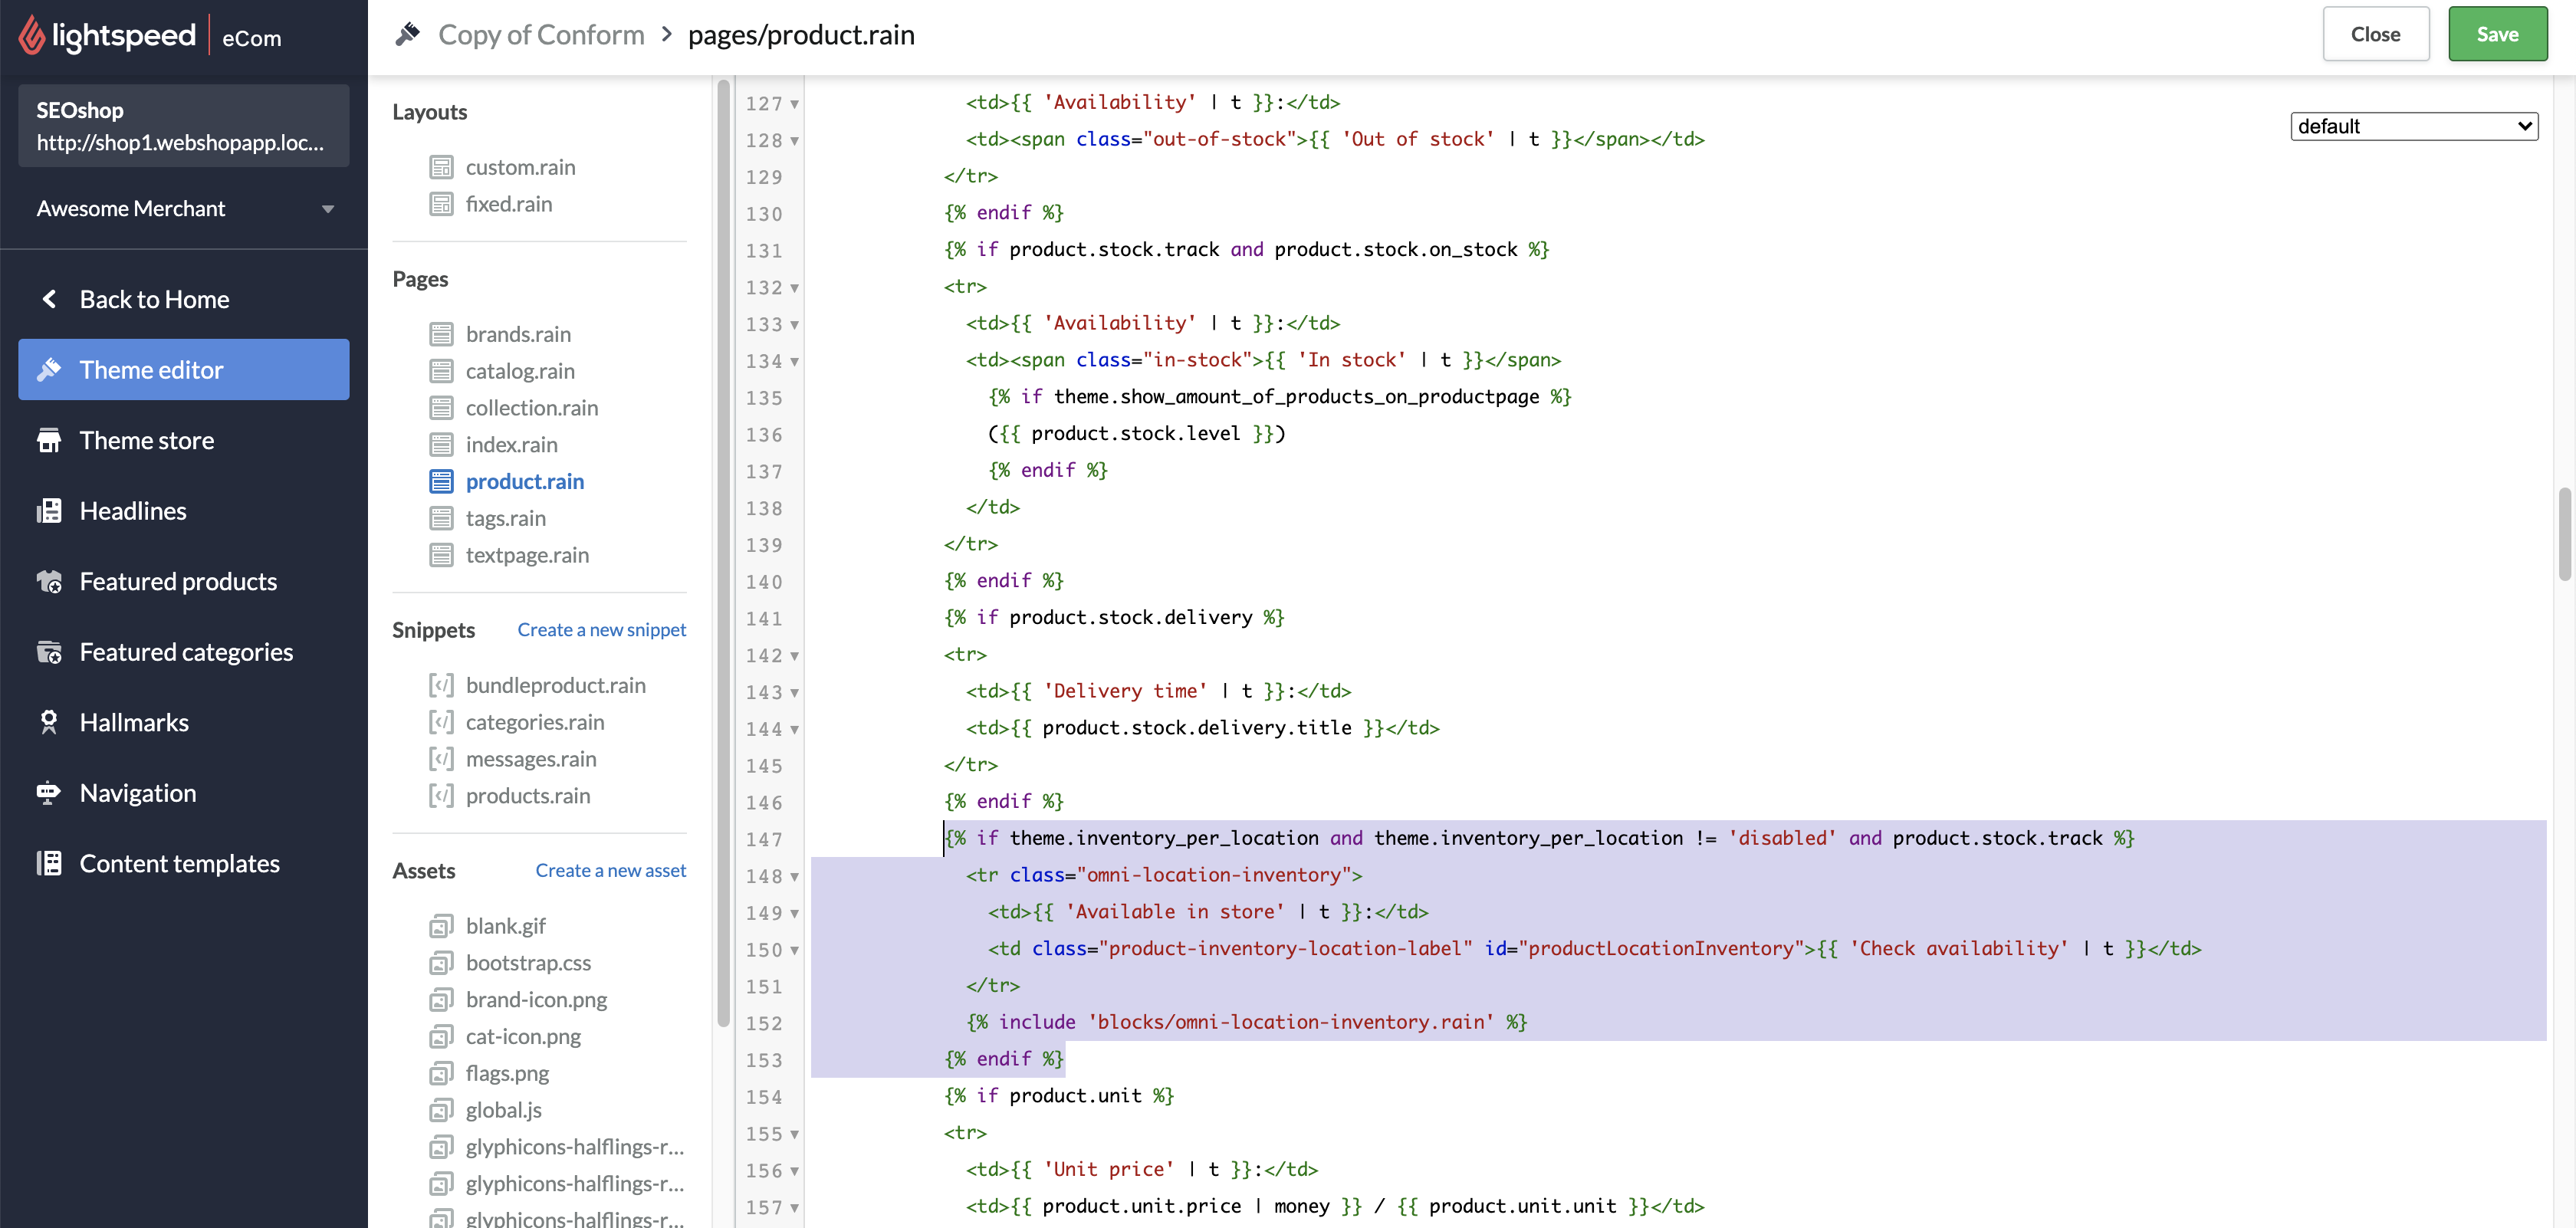
- Save your work.
- Select Close.
- Select More > Manage settings.
- Select Add setting.
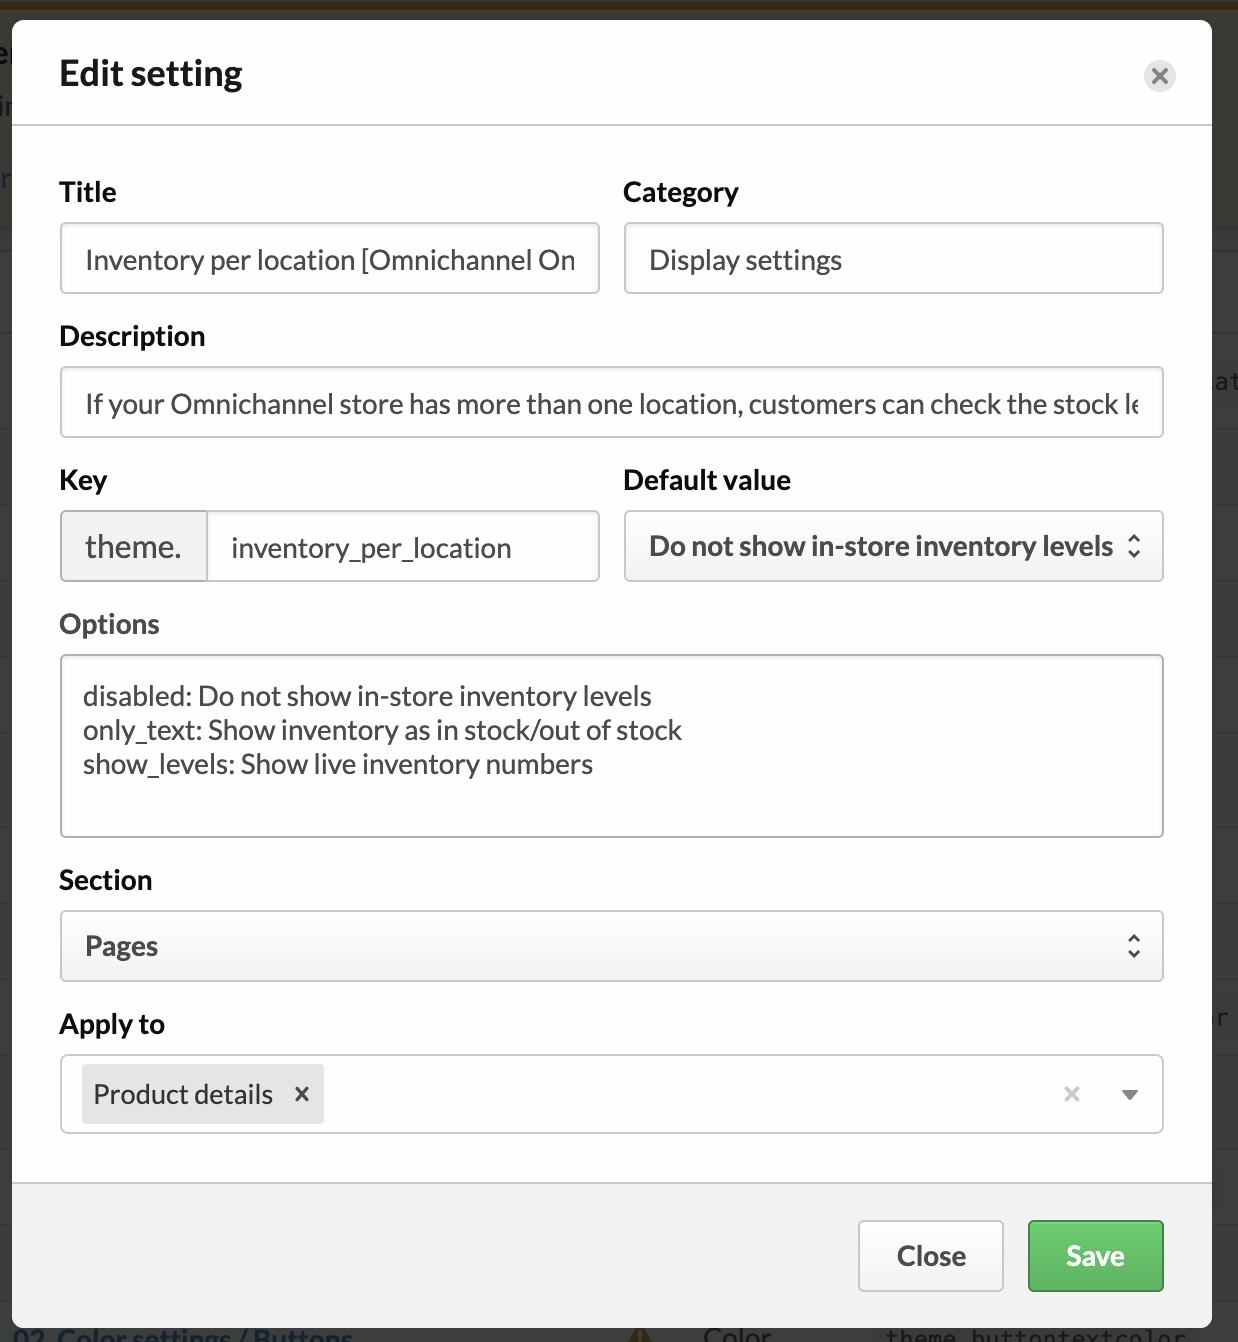
- For Title, type
Inventory per location [Omnichannel Only]. - For Type, choose Select.
- Select Save.
- For Category, type
Display settings. - For description, type
If your Omnichannel store has more than one location, customers can check the stock level at each location. - For Key, type
inventory_per_location. This exact key is required. - For Options, the keys disabled, only_text and show_levels cannot be changed. Type:
disabled: Do not show in-store inventory levelsonly_text: Show inventory as in stock/out of stock
show_levels: Show live inventory numbers - For Default value, select Do not show in-store inventory levels.
- For Section, select Pages.
- For Apply to, select Product details.
- Save your changes.


Testing the customer experience
- Create or log in to a Retail account connected to an eCom store.
- Go to Settings.
- Select Locations.
- Add at least 2 locations.
- Go to Inventory.
- Select Item search and create or confirm an item :
- Has inventory in at least location.
- Is published to eCom.
- Log in to the eCom store admin and go to Design.
- Select Edit theme.
-
Example of in stock / out of stock
In the dropdown, select Product details.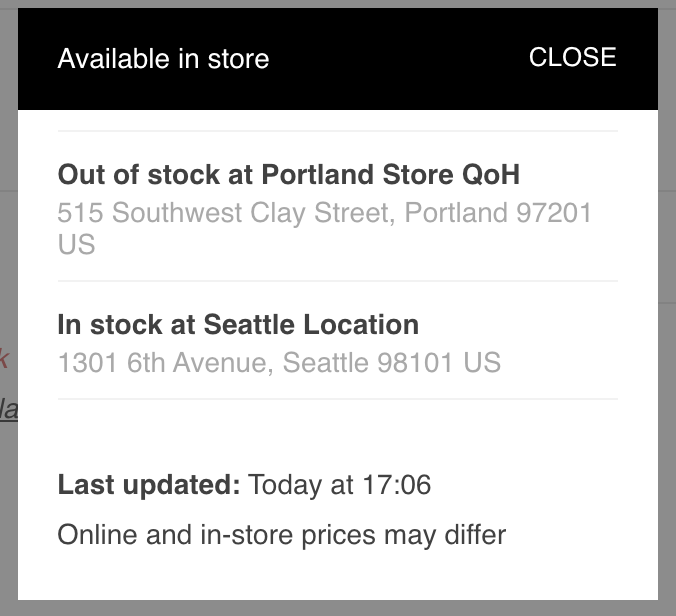
Example of live stock numbers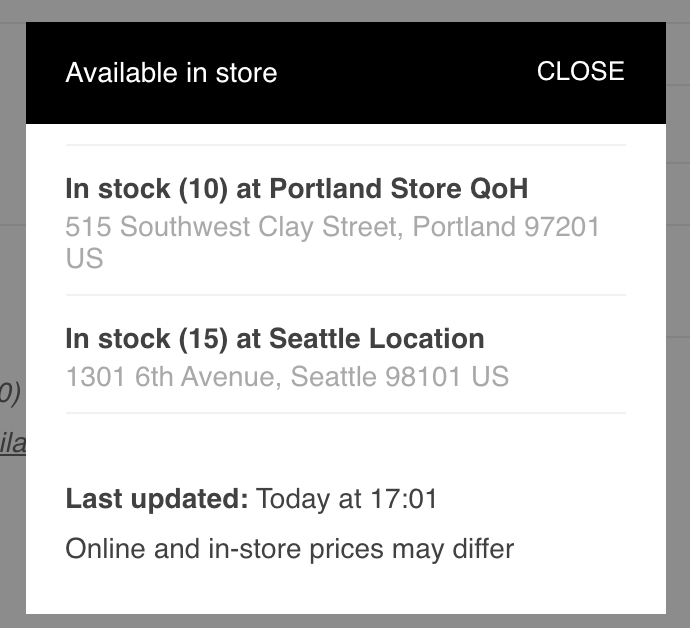
- Select Display settings.
- For Inventory per location, select either:
- Show inventory as in stock/out of stock
- Show live stock numbers.
- Show inventory as in stock/out of stock
- Select Publish.
- Go back by selecting the Theme editor breadcrumb, then Back to Home.
- Go to Products.
- Open the product with inventory by clicking on its title.
- Ensure it's visibility is set to either always visible or visible when in stock.
- Select View in Store.
- Select the Check availability button.
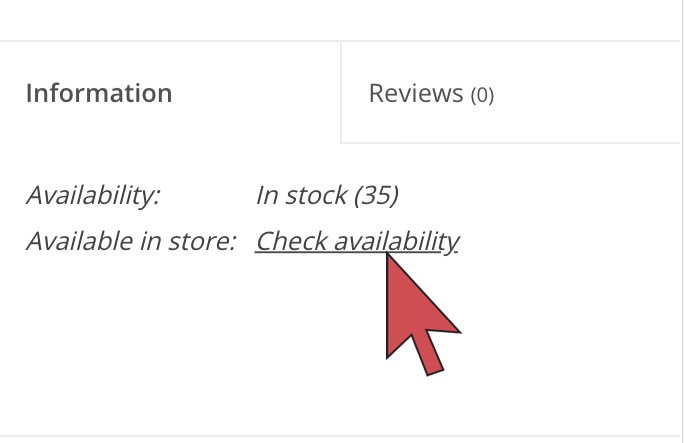
- Ensure the availability for each location appears in the pop-up.
Troubleshooting and advanced implementations
- The html tag related to Check availability (in the example above it is the <td>) should be within the id equal to productLocationInventory as we use this id to call the modal.
- The modal that we have created to show the inventory per location is formed in:
{% include 'blocks/omni-location-inventory.rain' %} - For advanced implementations - The storefront endpoint that is called to determine inventory availability per location is
https://[shopurl].com/product-inventory/?id=[productVariantId]- IMPORTANT: This should only be called after a user action such as clicking a link and should not be used on page load.