You can edit variants' information at any time in your eCom. To manage them from the product page:
- In your back office, go to Products > Products.
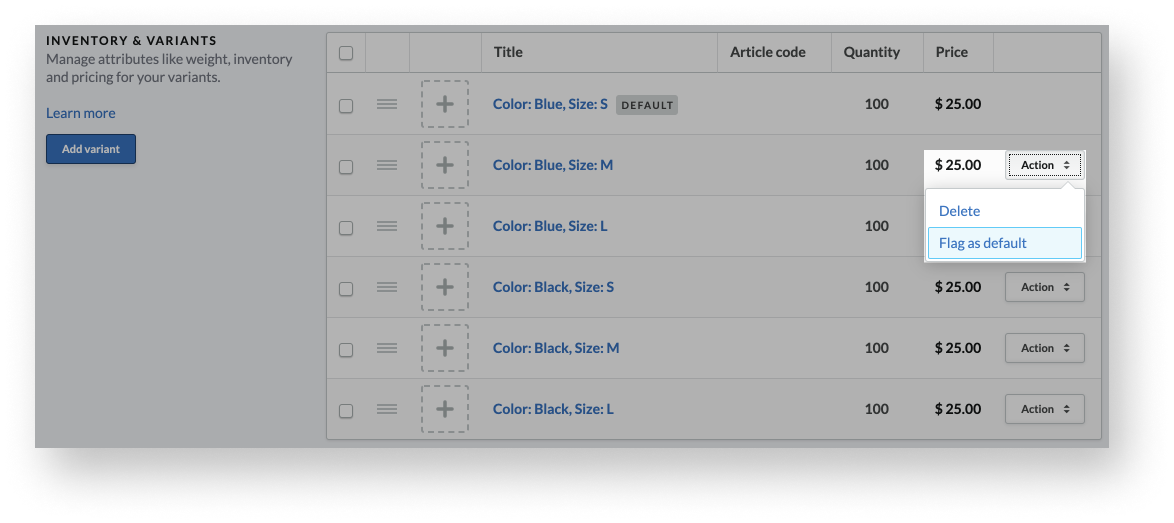
- Scroll down to the INVENTORY & VARIANTS section.
From the INVENTORY & VARIANTS section, you can:
- Add / Delete variants
- Bulk edit variants
- Reorder variants
- Add an image to a variant
- Set a variant as default
Adding or deleting variants
You can add other variants from a product set by selecting the Add variant button on the left.
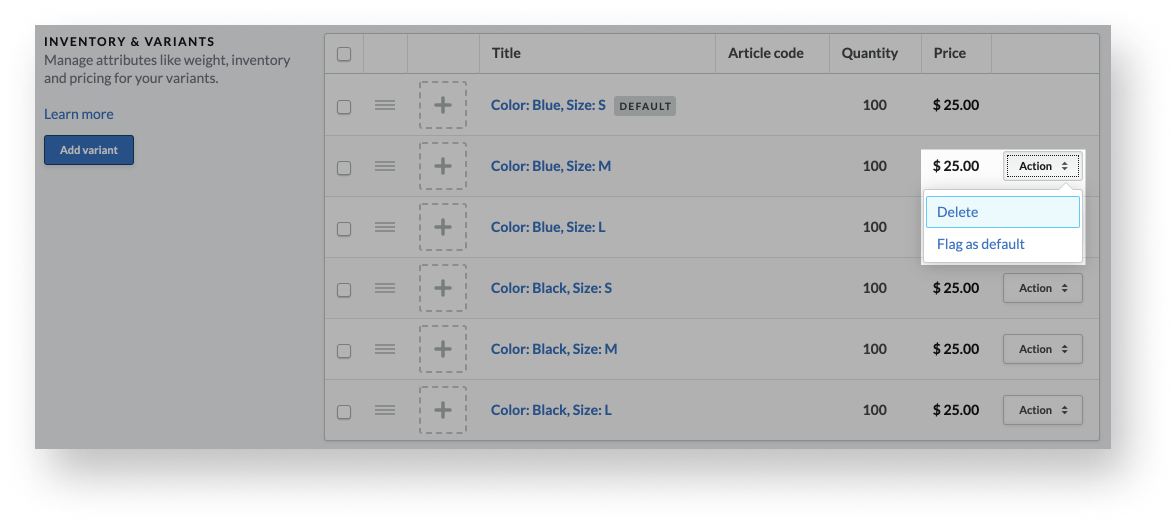
To delete a variant, select the Action drop-down, then select Delete.
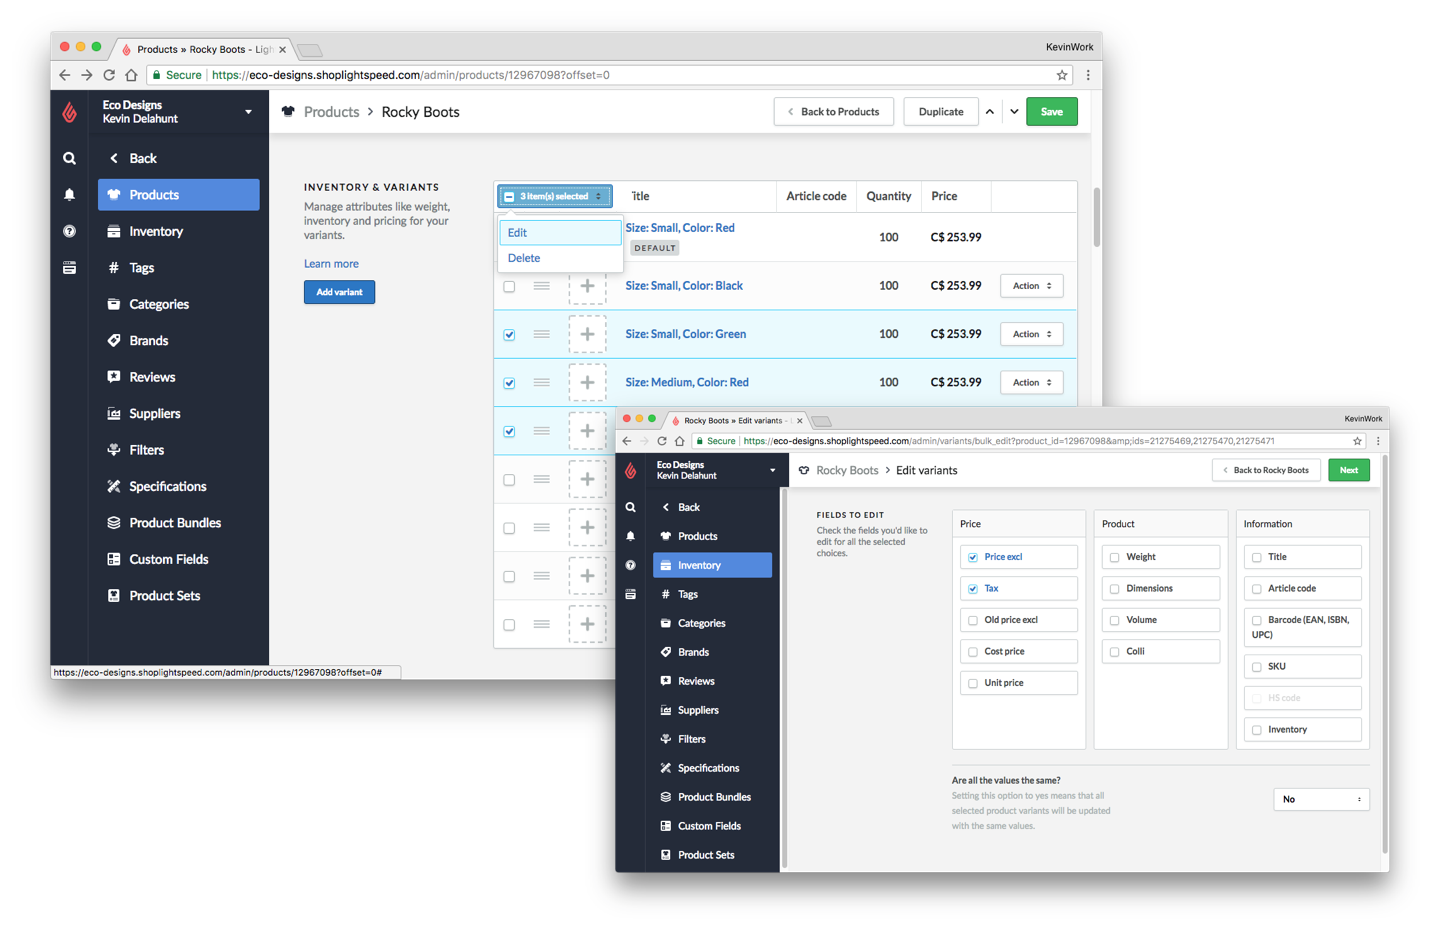
Editing variants in bulk
- Select the checkboxes to the left of the variant title.
- Select X item(s) selected > Edit.
- Select the checkboxes beside the settings you would like to edit.
- To the right of Are all values the same?:
- Select Yes from the dropdown menu if your settings will be the same for every variant.
- Select No if the settings will be unique to each variant. - Select Next.
- Make the adjustments to the displayed variant settings.
- Select Save.
For changes on a much larger scale, you can use the Import feature. For more information, visit Editing products through import.
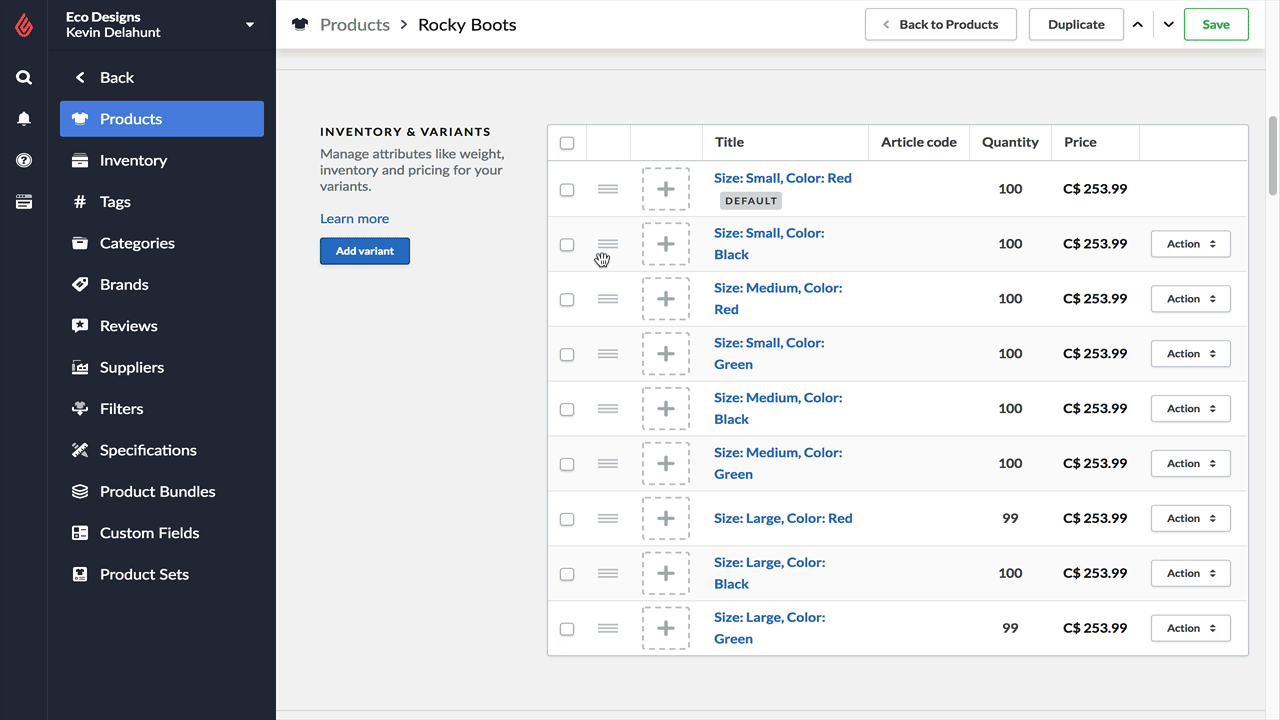
Reordering variants
You can reorder your variants by selecting and dragging the three horizontal line button to the right of the variant checkboxes.
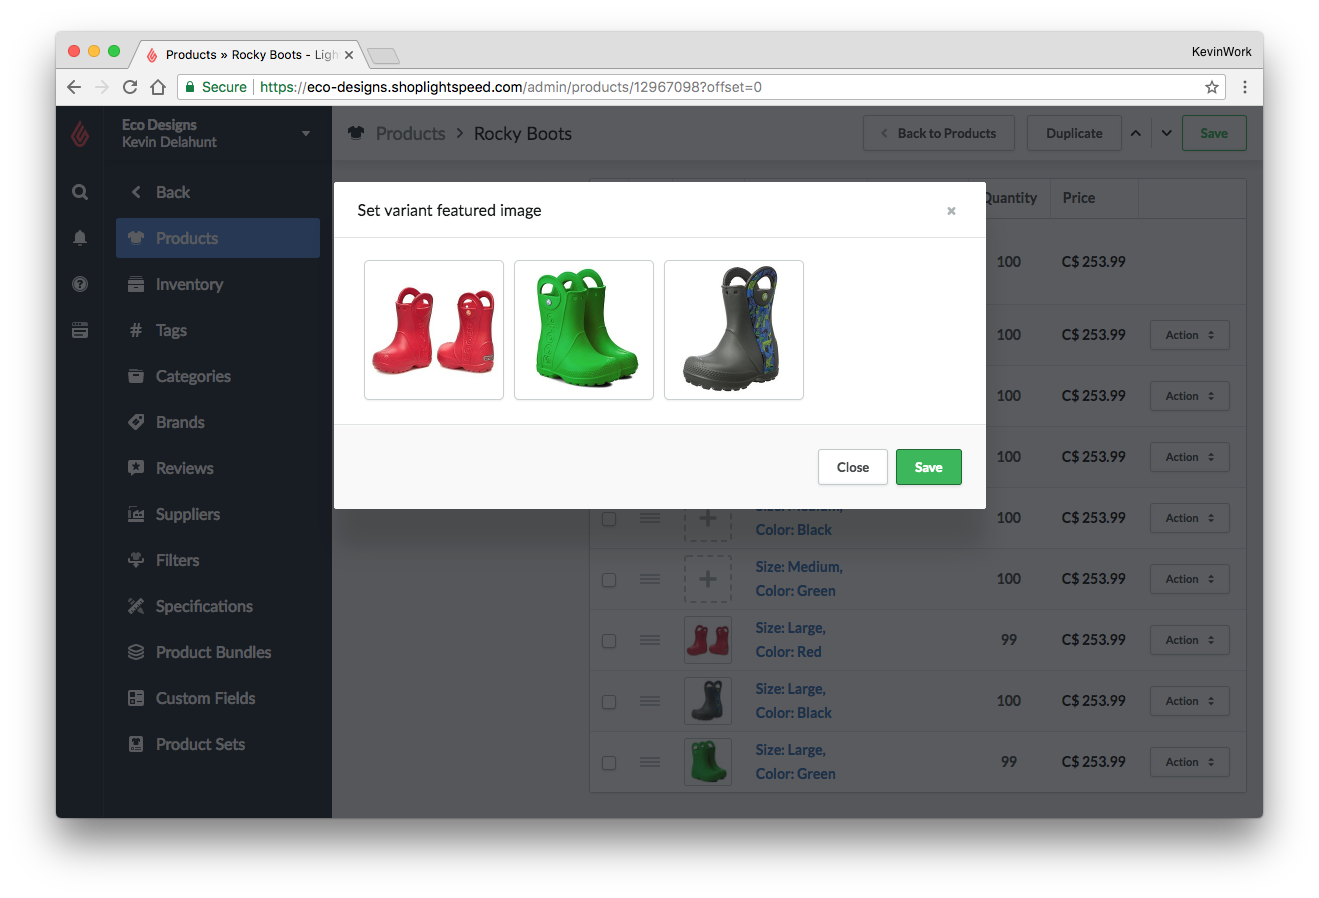
Adding images to variants
- Select the + icon to the left of the variant titles.
- Select the desired image.
- Select Save.
Setting a default variant
eCom will automatically set the first variant uploaded to a product as the default. You can change this manually or automatically.
Manually
- In your back office, go to Products > Products.
- Select the title of the product to open its settings.
- From the INVENTORY & VARIANTS section, select Action > Flag as Default to the right of the variant title.
Automatically
When a default variant goes out of stock, eCom can automatically replace it with the highest-selling, in-stock one. To turn this setting on:
- In your back office, go to Settings.
- Under the Store Settings column, select Workflow.
- Toggle on the switch next to Enable default variant substitution.
To find out more, visit Enable variant substitution - Configuring workflow settings for your online store.
This setting only affects products entered after it was enabled, meaning that previously added products will not have variants replaced automatically. If your eCom is connected to a Retail POS, you can make it affect existing products by enabling the default variant substitution option, un-publishing all products from eCom and then re-publishing them.
Further reading on variants
Learn how to: