Varianten zijn handig voor het organiseren van je voorraad wanneer je producten hebt die in één of meer opzichten verschillen. Een t-shirt dat varieert in maat en kleur kan bijvoorbeeld 5 verschillende maten en 3 verschillende kleuren hebben. Dit betekent dat dit specifieke t-shirt product 15 unieke varianten kent. Klik hier voor een uitgebreide definitie van variant.
Varianten worden meegeteld bij het maximale aantal producten van je abonnement. Als je bijvoorbeeld een abonnement op het Essential pakket met 250 producten hebt en je voert 10 varianten van een product in, dan heb je nog 240 producten over.
Een variant aanmaken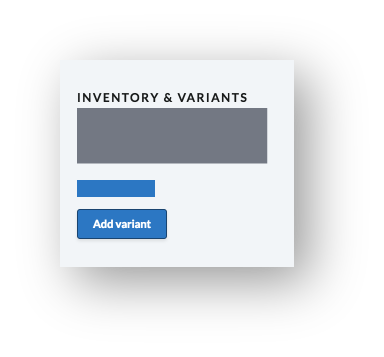
- Open de eCom backoffice en klik op Producten.
- Selecteer een product door op de naam van het product te klikken.
- Scroll naar beneden naar VOORRAAD & VARIANTEN en klik op de knop Variant toevoegen.
- Bij TITEL voer je de naam van de variant in.
- Desgewenst kun je meer details van de variant invoeren en daarna klik je op Opslaan. Voor meer informatie over de gegevens die je kunt wijzigen, ga je naar Een variant configureren.
De knop Variant toevoegen ontbreekt
Als je bij de instructies voor het toevoegen van een variant in stap 3 geen knop Variant toevoegen ziet, is je eCom shop mogelijk verbonden met de voorraad in het magazijn van een fysieke winkel. In dat geval moet je varianten aanmaken in de software die op die locatie wordt gebruikt: Lightspeed Retail of OnSite. In beide worden varianten aangemaakt wanneer je een matrix creëert en naar eCom publiceert. Voor meer informatie:
- Voor Retail ga je naar Matrixen aanmaken en Items in eCom publiceren.
- Voor OnSite ga je naar Een kleuren-matenmatrix aanmaken en Zichtbaarheid van producten beheren in eCom.
Snellere methode om varianten in te voeren
- Ga naar Productsets aanmaken om te leren hoe je een set varianten aan een specifiek product toevoegt.
- Ga naar Nieuwe producten importeren en Producten wijzigen via import om te leren hoe je producten importeert.
Meer informatie
Om te leren hoe je:
Variant definiëren
In Lightspeed eCom zijn varianten gegroepeerde items die in één, twee of meer specifieke opzichten verschillen.
Producten die in één opzicht verschillen
Je kunt één product aanmaken met varianten die slechts in 1 opzicht verschillen:
Bijvoorbeeld: je hebt een product dat John's Tee heet en je hebt de maten: small, medium en large. Zodra je dit aan Lightspeed eCom toevoegt en een klant het product John's Tee bekijkt, dan ziet hij 1 vervolgkeuzelijst met de volgende opties:
- Maat:
- Small
- Medium
- Large
- Je hebt in totaal 3 varianten (1 x 3) van het product.
Producten die in 2 opzichten verschillen
Je kunt één product aanmaken met varianten die in 2 opzichten verschillen:
Bijvoorbeeld: je hebt een product dat Monster Bike heet en je hebt de kleuren: rood, zwart en blauw en je hebt de maten: kind en volwassene. Zodra je het aan Lightspeed eCom toevoegt en een klant het product Monster Bike bekijkt, dan ziet hij 2 vervolgkeuzemenu's met de volgende opties:
- Kleur:
- Rood
- Zwart
- Blauw.
- Maat:
- Kind
- Volwassene
- Je hebt in totaal 6 varianten (3 x 2) van het product.
Producten die in meer opzichten verschillen
- eCom - ALs je Lightspeed eCom gebruikt, dan kan je producten aanmaken die in veel opzichten verschillen, met als limiet maximaal 100 varianten per productset. Bezoek Productvarianten aanmaken (productsets) voor meer informatie.
- Retail met eCom Omnichannel - Als je Lightspeed Retail met eCom gebruikt, dan kan je producten aanmaken die in maximaal 3 opzichten verschillen door in jouw Retail account een productmatrix aan te maken. Ga naar Matrices aanmaken voor meer informatie.
- OnSite met eCom Omnichannel - Als je Lightspeed OnSite met eCom gebruikt, dan kan je producten aanmaken die in maximaal 2 opzichten verschillen door en matrix aan te maken. Bezoek Matrices in OnSite begrijpen voor meer informatie.