You can customize your online store with eCom’s Advanced Settings. To locate the Advanced Settings in your eCom back office, select Settings. In the General Settings column, select Advanced. On the Advanced page, you will find the following sections:
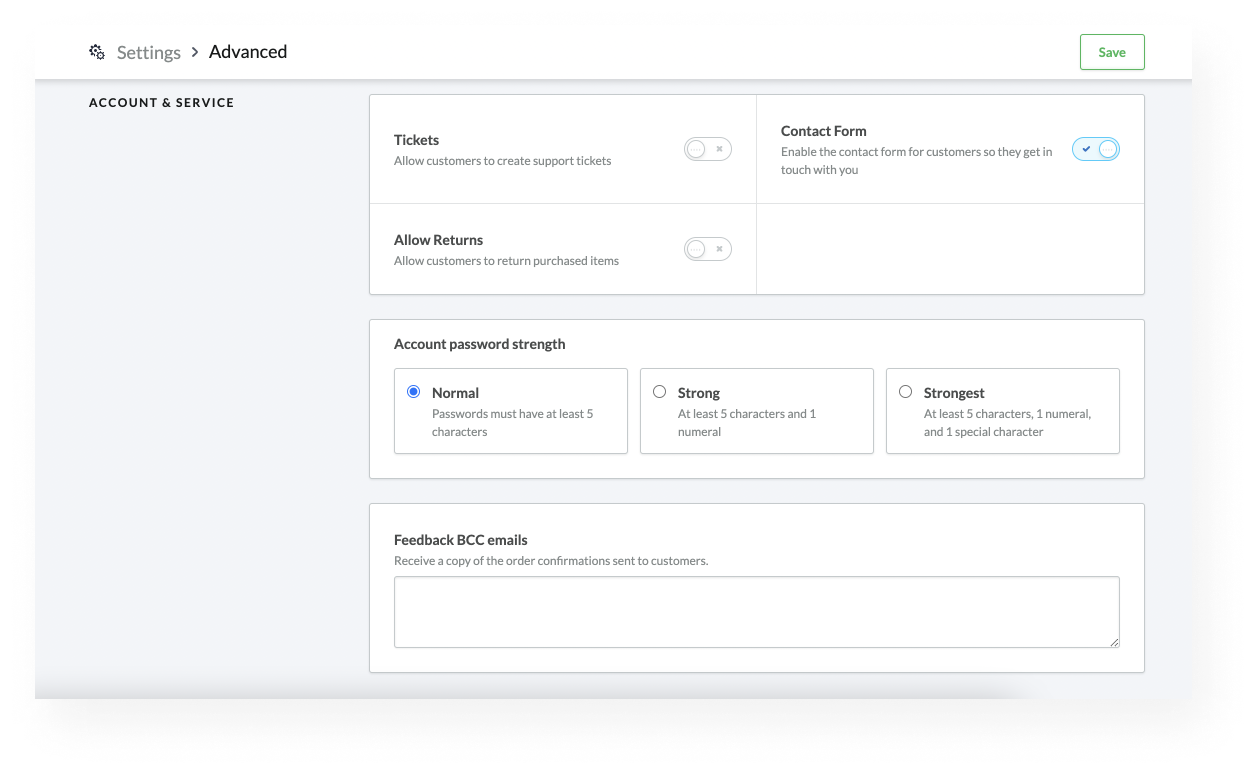
ACCOUNT & SERVICE
| Tickets |
Enable this setting to allow registered customers to create support tickets. You can also enable a contact form method. To learn more about collecting customer feedback, view our Activating customer contact methods article. |
| Contact Form |
Enable this feature to allow registered customers to submit feedback via a contact form. You can also give your customers the ability to submit support tickets. To learn more about collecting customer feedback, view our Activating customer contact methods article. |
| Allow Returns |
Enable this feature to allow customers to return purchased items. To learn more about online returns, view our Managing returns article. |
|
Account password strength |
You can customize password requirements for customer accounts. Choose between the following password strengths:
|
| Feedback BCC emails |
If you want to receive copies of customer order confirmation emails, enter an email address in this field. You can:
To learn more about this feature, view our Configuring new order notifications article. |
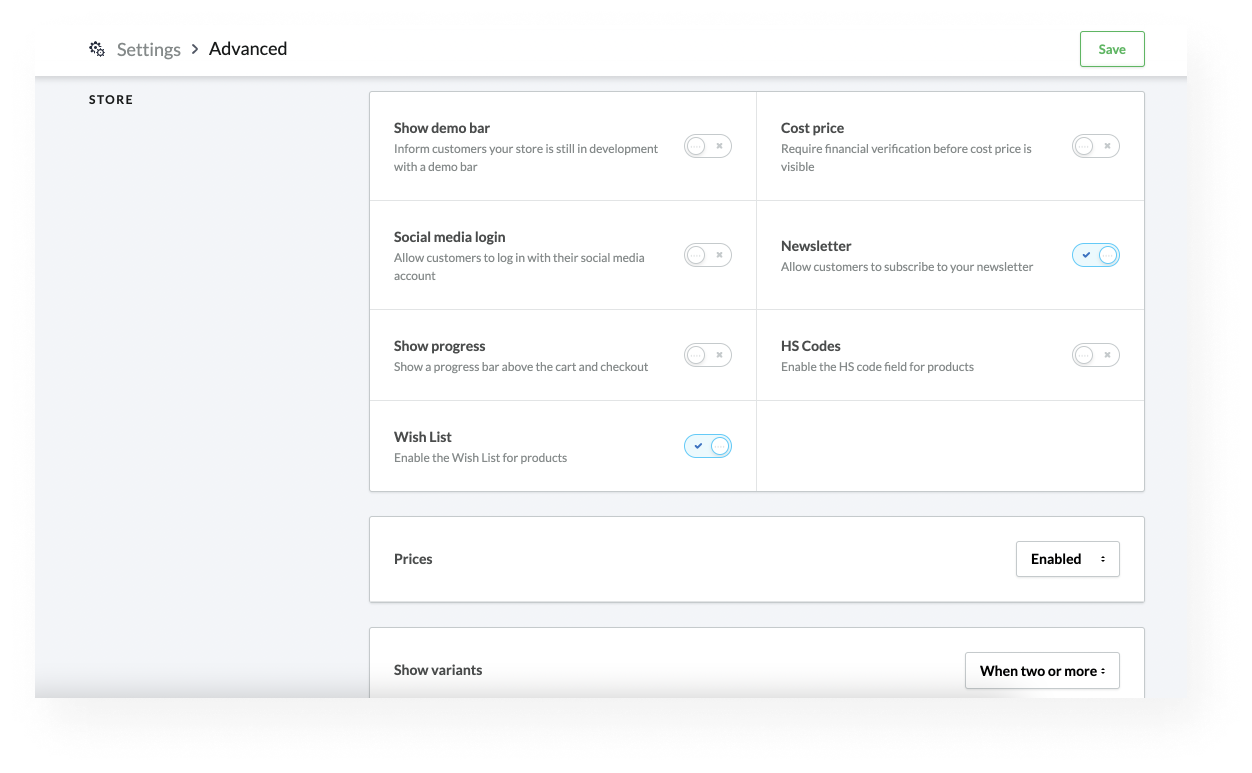
STORE
| Show demo bar |
Enable this setting to notify customers that your store is under construction. This store is under construction. Any placed orders will not be honored or fulfilled. To learn more about disabling your eCom store, view our Disabling your eCom store article. |
| Cost price |
When you enable this setting, only customers with the relevant access rights can view the wholesale cost of a product. |
| Social media login |
Enable this setting to give registered customers the option to sign in with Facebook. |
| Newsletter |
Enable this setting to allow customers to subscribe to your newsletter. |
| Show progress |
When you enable this setting, a progress bar appears during the checkout process. You can also disable this feature when setting up your checkout. |
| HS Codes |
Some international shipments require HS codes. Enable this feature to add an HS field in the Identifiers section of your product variants. After enabling HS codes in your Advanced Settings, we recommend viewing our Adding HS codes article for help setting up the feature. |
| Wish List |
Enable this feature to allow customer wishlists. Note that disabling this switch may not completely remove wishlists from your theme. We recommend viewing our article Removing wishlists for more information. |
| Prices |
Configure this setting to control the visibility of prices in your eCom store. We recommend viewing our Hiding prices article before you adjust this setting. |
| Show Variants |
When two or more is the default setting. When enabled, this setting hides the dropdown menu when a product only has one variant. We recommend reviewing our Displaying only one size or color on the product page article before you adjust this setting. |
LOYALTY
| Enable Loyalty |
When you enable this setting, customers can see Loyalty features in their shopping cart and account. This option only appears for merchants who are subscribed to Lightspeed Loyalty. We recommend viewing our Setting up Loyalty for eCom article before modifying this setting. |
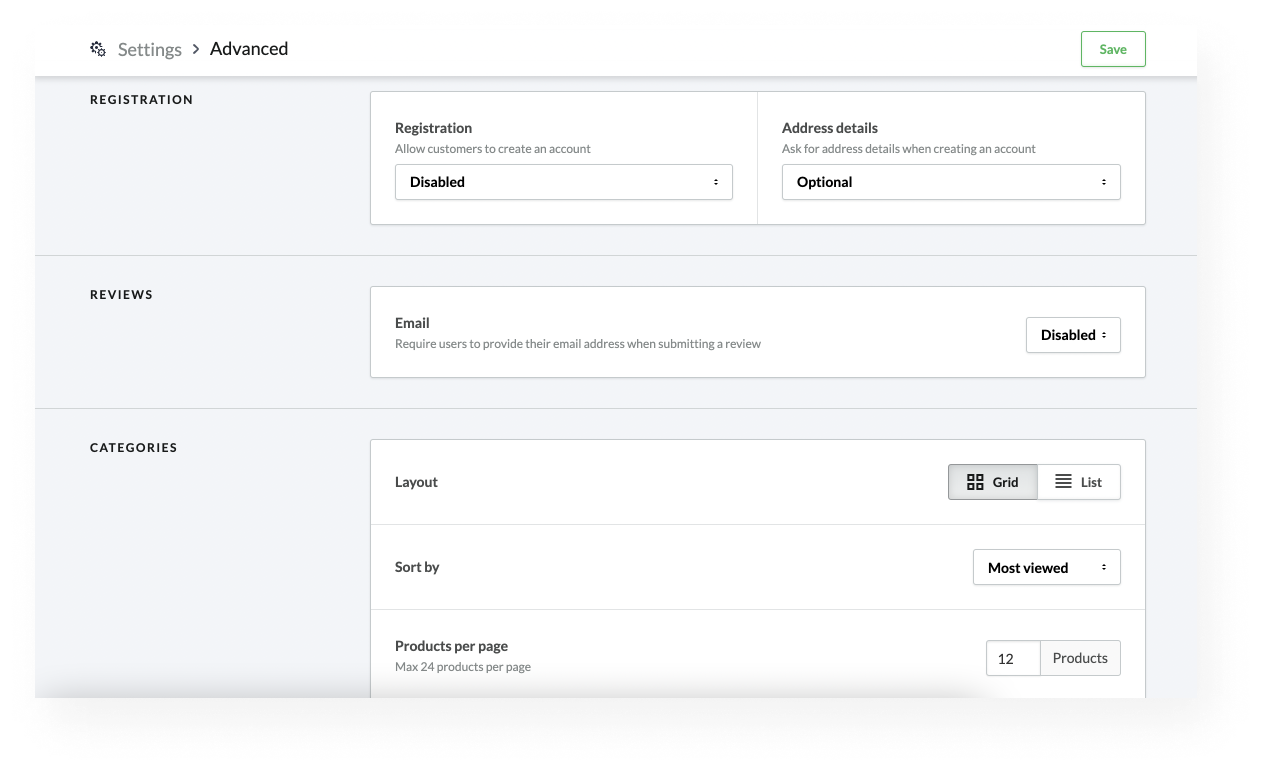
REGISTRATION
| Registration |
Configure this setting to allow customers to create an account before making a purchase.
|
| Address details |
By default, customers registering for accounts have the option to enter their address details. You can also require or disable this setting. This setting does not affect your checkout. |
REVIEWS
|
Enable this setting to require your customers to include their email address when submitting a product review. To learn more about this setting, view our Preventing anonymous reviews article. |
CATEGORIES
| Layout |
You can display your products in a Grid layout or a List layout. We recommend the Grid layout if your item descriptions are long. The List layout is useful when your collections do not fill an entire page. We recommend reviewing our article Changing page layout from grid to list for more information. |
| Sort by |
Select an option to determine how products are sorted on your online store. We recommend viewing our Reordering products in a category article before adjusting this setting. |
| Products per page |
This setting determines the number of products to display per page. You can display a maximum of 24 products. We recommend viewing our Changing the number of products per page article before adjusting this setting. |
STOCK RESERVATION
|
Temporarily reserve stock for Awaiting Payment orders |
By default, when a customer adds an item to their shopping cart and doesn’t complete the order, eCom reserves the item and puts the order in an “Awaiting Payment” status. If you enable this setting, eCom will no longer reserve the item if it’s sold in eCom or Retail. This helps prevent discrepancies between your Retail and eCom inventory totals. We recommend keeping this setting toggled on to avoid overselling your stock unless you are specifically reserving items for awaiting payment orders |


