The checkout process is a series of steps customers must follow to make a purchase at your online store. The checkout process begins when a customer adds a product to the shopping cart and it ends when they submit payment for their order. A functioning checkout is essential to your online store's success, and there are mandatory and optional steps to complete before your checkout is ready for your customers.
Mandatory steps
To enable your checkout, you must:
- Enable a shipping method.
- Enable a payment provider.
- Enable taxes:
- Are you selling in Germany? Set your legal mode to strict.
- Test your checkout.
Optional steps
After you follow the mandatory steps listed above, you will have a functioning checkout. However, you can customize your checkout to suit your business needs:
- Customize customer requirements
- Customize checkout permissions
- Simplify checkout by hiding the register/login option
- Customize your Thank You page
- Enable/disable newsletter subscriptions
- Customize the tax settings for your checkout
- Disable the terms and conditions checkbox
Customize customer requirements
You can control the information your customers are required to provide before they can check out.
Limit checkout permissions
By default, the checkout is Enabled. This allows all guests and registered customers to check out, but it is possible to limit checkout permissions.
- In your eCom main menu, select Checkout and then Configuration.
- Scroll down the Configuration page until you find CART & CHECKOUT PERMISSIONS. Click the drop-down and select one of the following options:
- Disabled - Prevents all guests from adding products to the shopping cart. Displays the message "Checkout has been disabled" on the home page and product pages. This option is useful when you want to disable your eCom store.
- Forced - This option allows guests and registered customers to add products to the shopping cart, but guests cannot check out until they log in. When a guest selects the checkout button, they are taken to the account login screen with the message Guest checkout has been disabled. Please log in first. Adjust this setting when controlling guest purchases.
- Registered customers only - Prevents guests from adding products to the shopping cart. Displays Guest checkout has been disabled. Please log in first on the home page and product pages. This feature is most useful for business to business (or B2B) sales, and is limited to subscriptions with the B2B feature setting.

Simplify checkout by hiding the register/login option
You can remove the requirement to register or create a guest account. This simplifies the checkout process, which may increase your conversion rate.
- In your eCom back office, select Settings.
- At the bottom of the General Settings column, select Advanced.
- Scroll down to the REGISTRATION section. Under Registration, click the drop-down menu and select Guest only.
- Click Save.

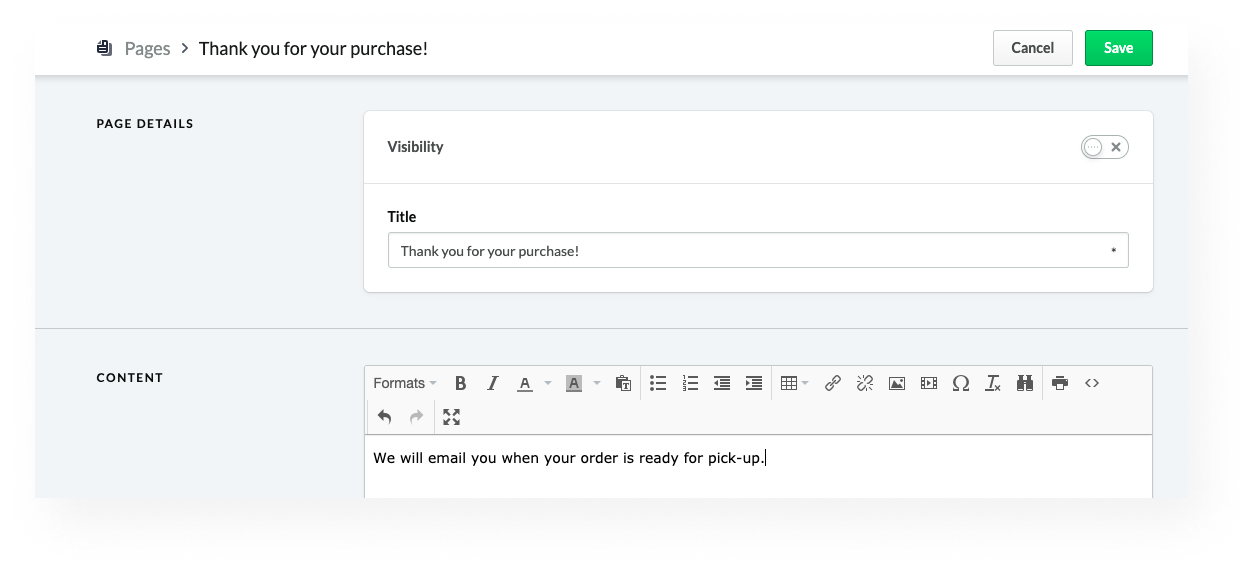
Customize the title and add content to your Thank you page
After your customers make a purchase, they are redirected to a Thank You page. By default, your eCom store will display the message Thank you for your purchase!. You can customize this message or add content to this page:
- In your eCom back office, select Content.
- Click on the title Thank you for your purchase.
- Edit the page title or add content.
- Select Save.
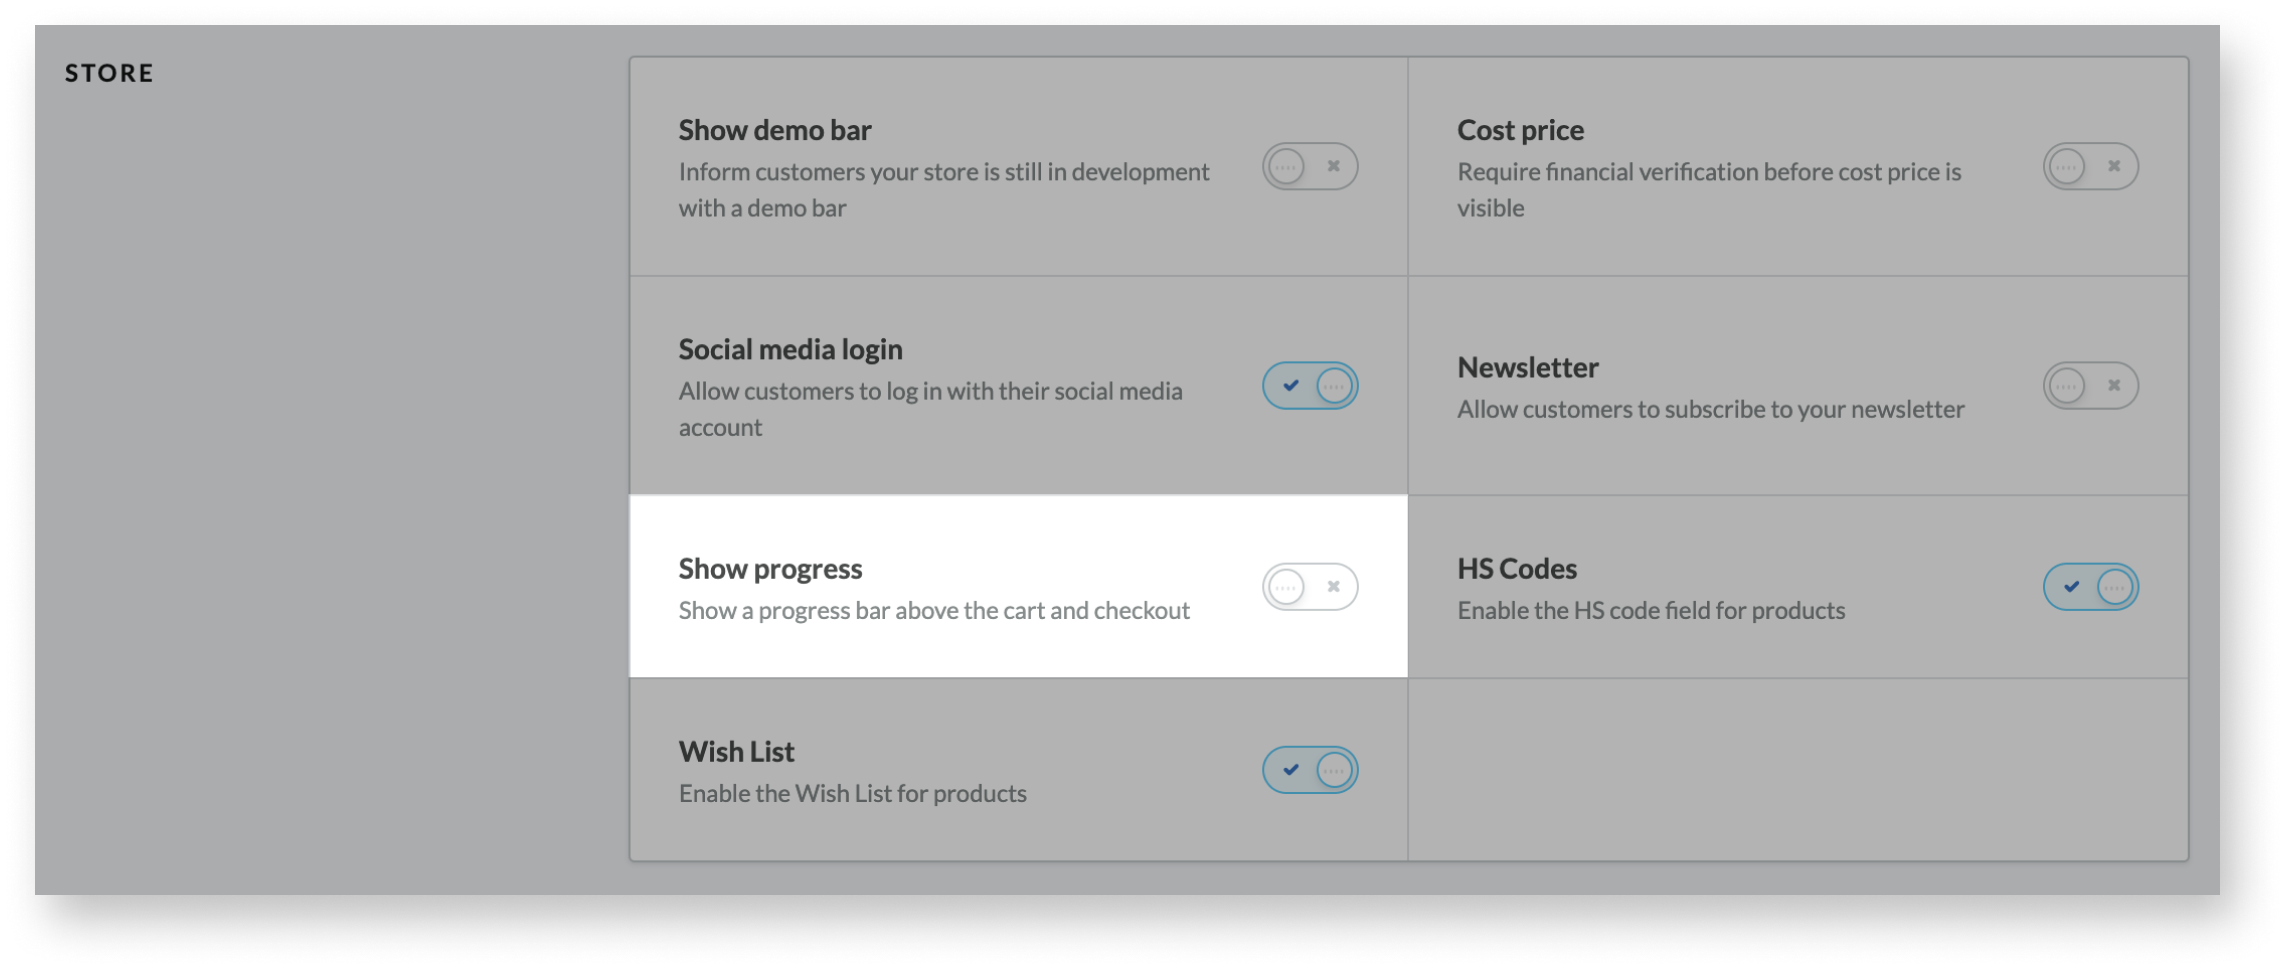
Disable the progress bar
Disabling the progress bar affects all progress bars, even if they are enabled in Checkout > Dashboard > Configure. Progress bars are enabled by default under Settings > Advanced:
- In your eCom admin, select Settings.
- At the bottom of the General Settings column, select Advanced.
- Scroll to the STORE section and disable the toggle labeled Show progress.
- Click Save.
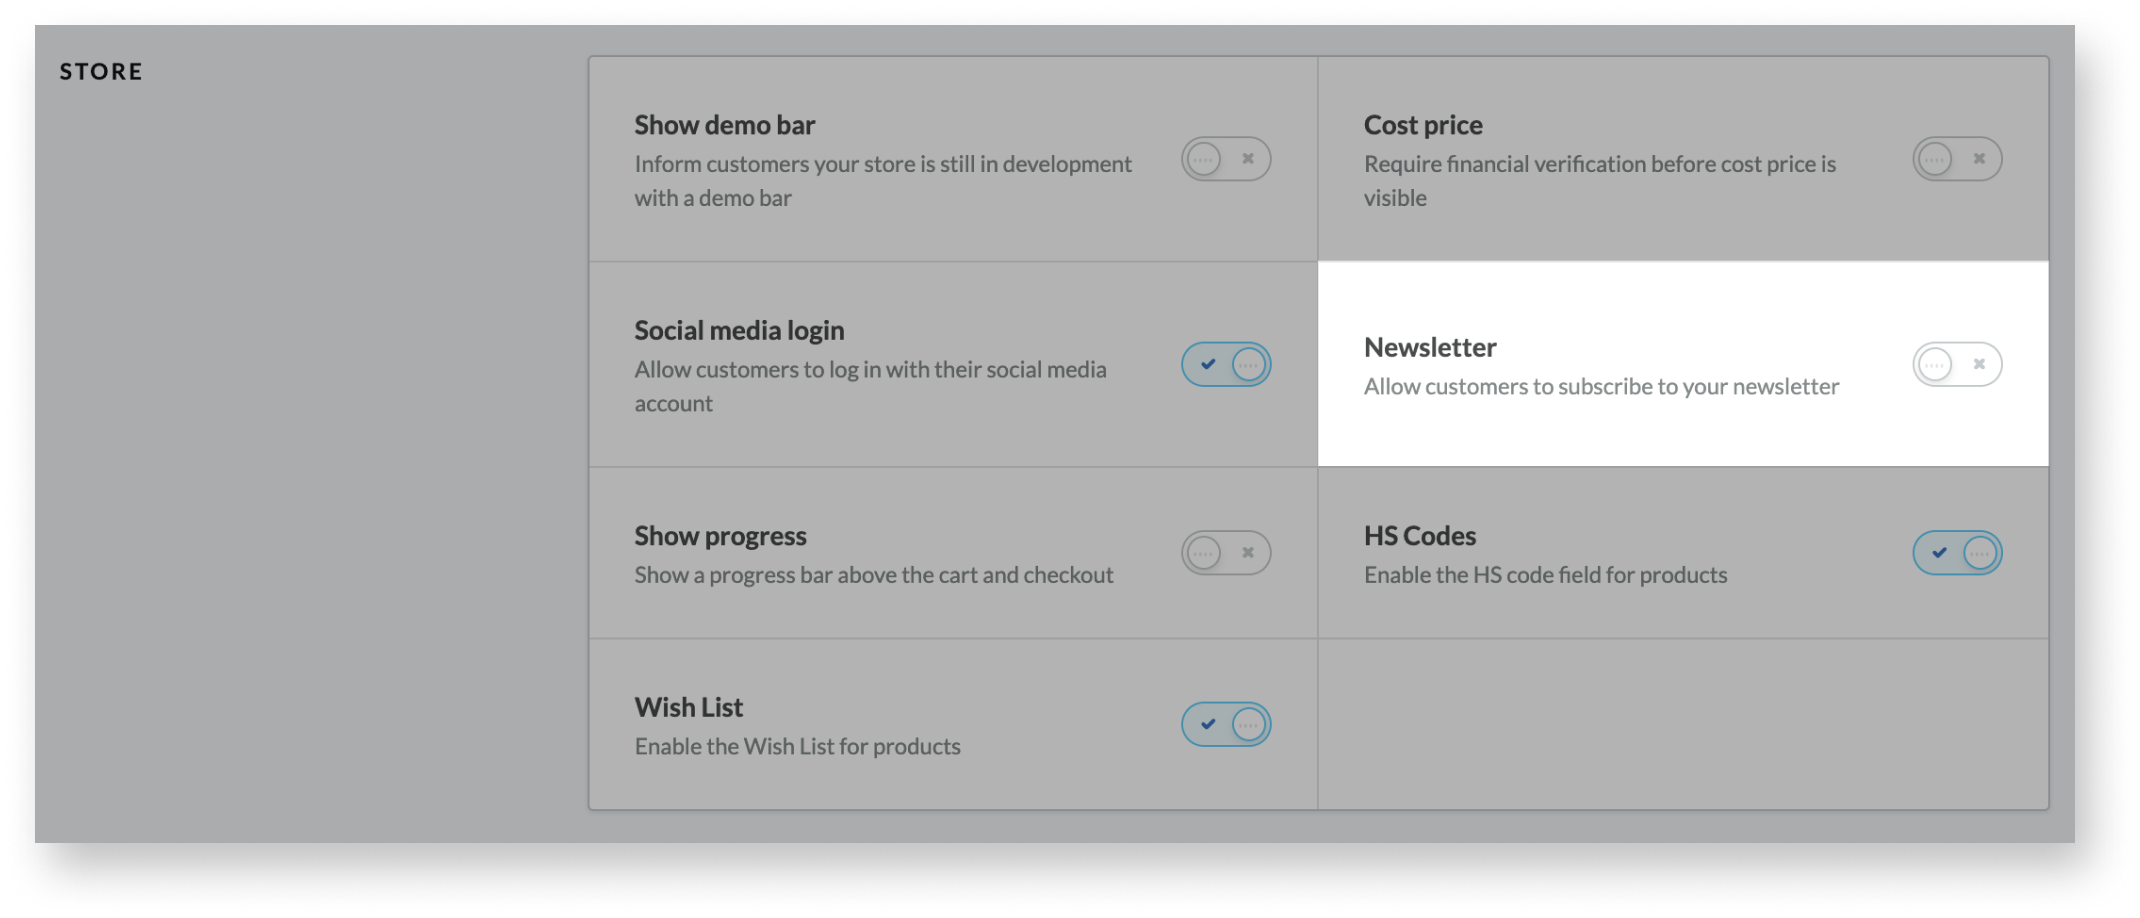
Enable/disable newsletter subscriptions
You can invite customers to subscribe to your newsletter from your eCom checkout. This information is then stored in your eCom back office under Customers. To enable or disable newsletter subscriptions, follow these steps:
- In your eCom back office, select Settings.
- At the bottom of the General Settings column, select Advanced.
- Scroll to the STORE section and toggle the Newsletter switch on or off according to your preferences.
- Click Save.
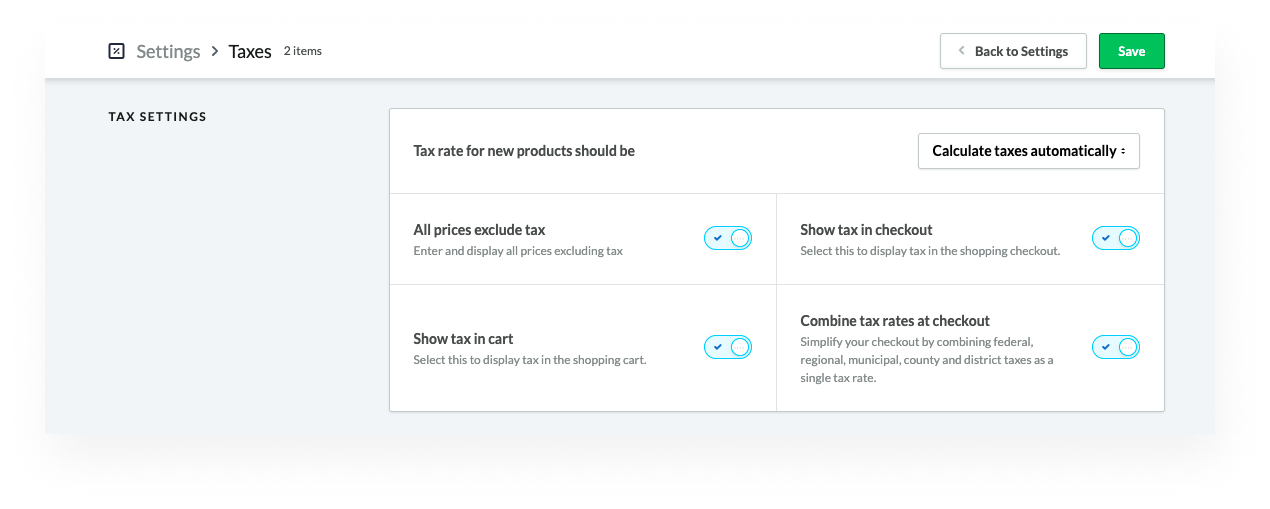
Customize the tax settings for your checkout
- In your eCom back office, select Settings.
- Under the column Payment Settings select Taxes.
- Enable or disable any of the following four tax settings:
- All prices exclude tax - Enable this to exclude tax from prices.
- Show tax in cart - Enable this to display tax in the shopping cart.
- Show tax in checkout - Enable this to display tax in the checkout.
- Combine tax rates in checkout - Enable this to combine multiple tax rates into a single tax rate in the checkout. We recommend enabling this option to simplify your checkout.
- Click Save.
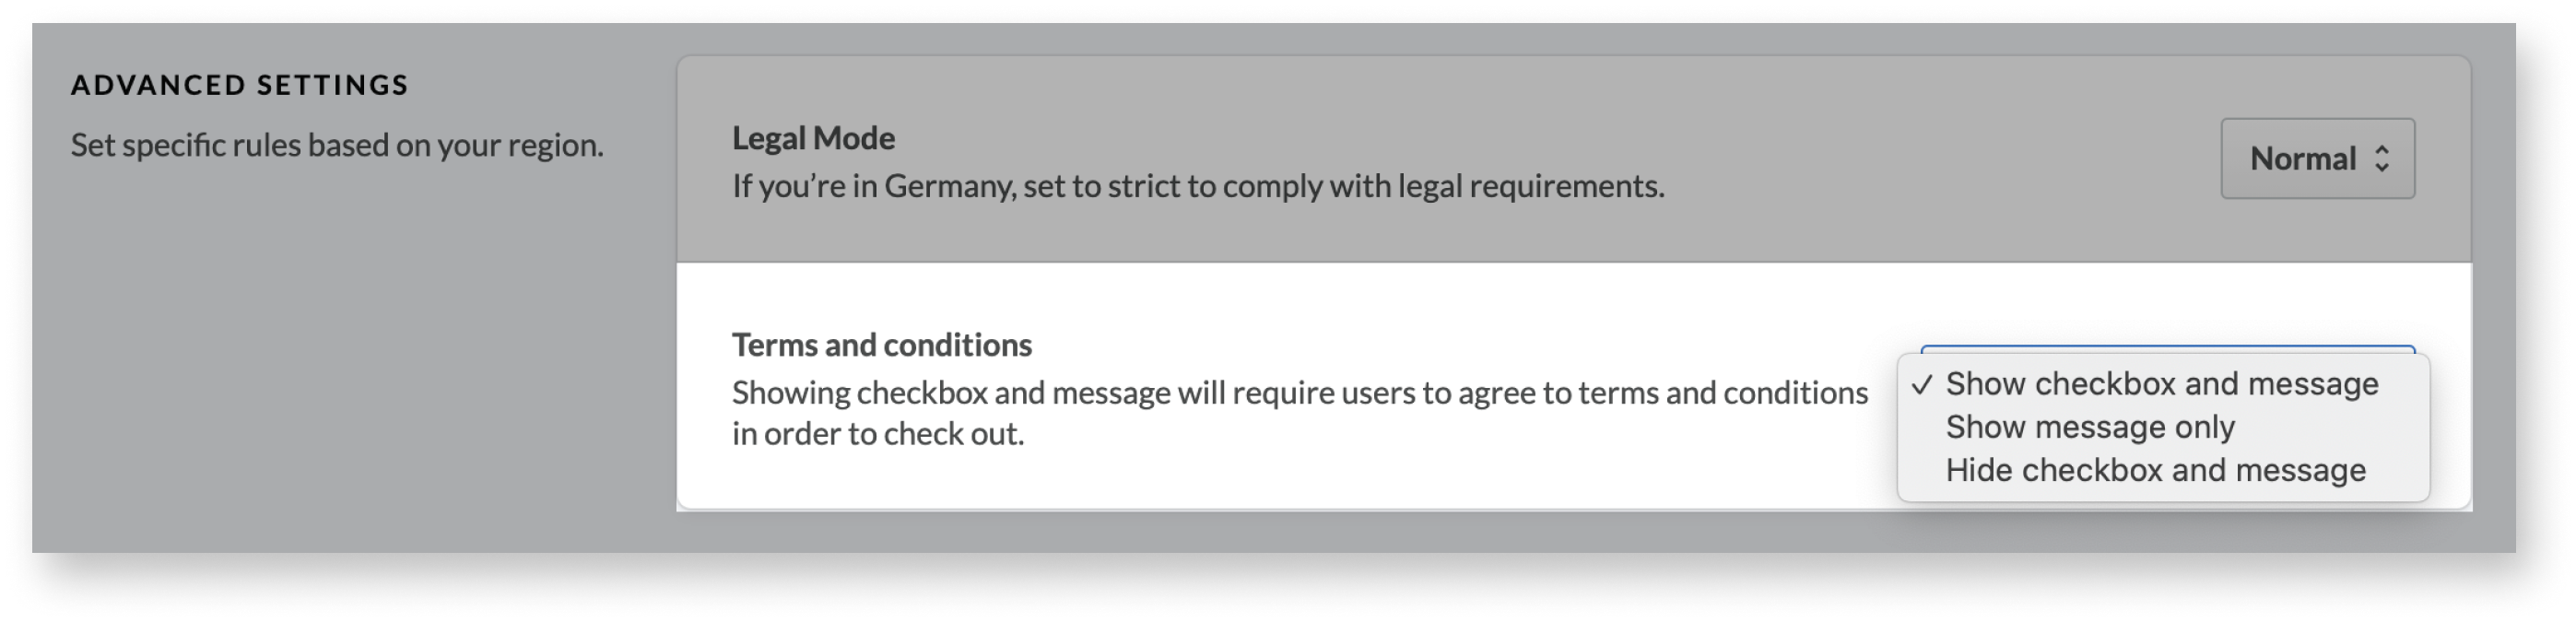
Disable the terms and conditions checkbox
Disabling this setting can improve conversion by decreasing the number of clicks to complete the checkout process. Review your government and payment provider's checkout requirements before making adjustments. If unsure, use the default setting: Show checkbox and message.
- In your eCom admin, select Checkout.
- Select Configuration in the menu on the left.
- Scroll down to the ADVANCED SETTINGS section.
- For Terms and conditions, select either:
- Show message only
- Hide checkbox and message
- Click Save.